
Line
Introduction
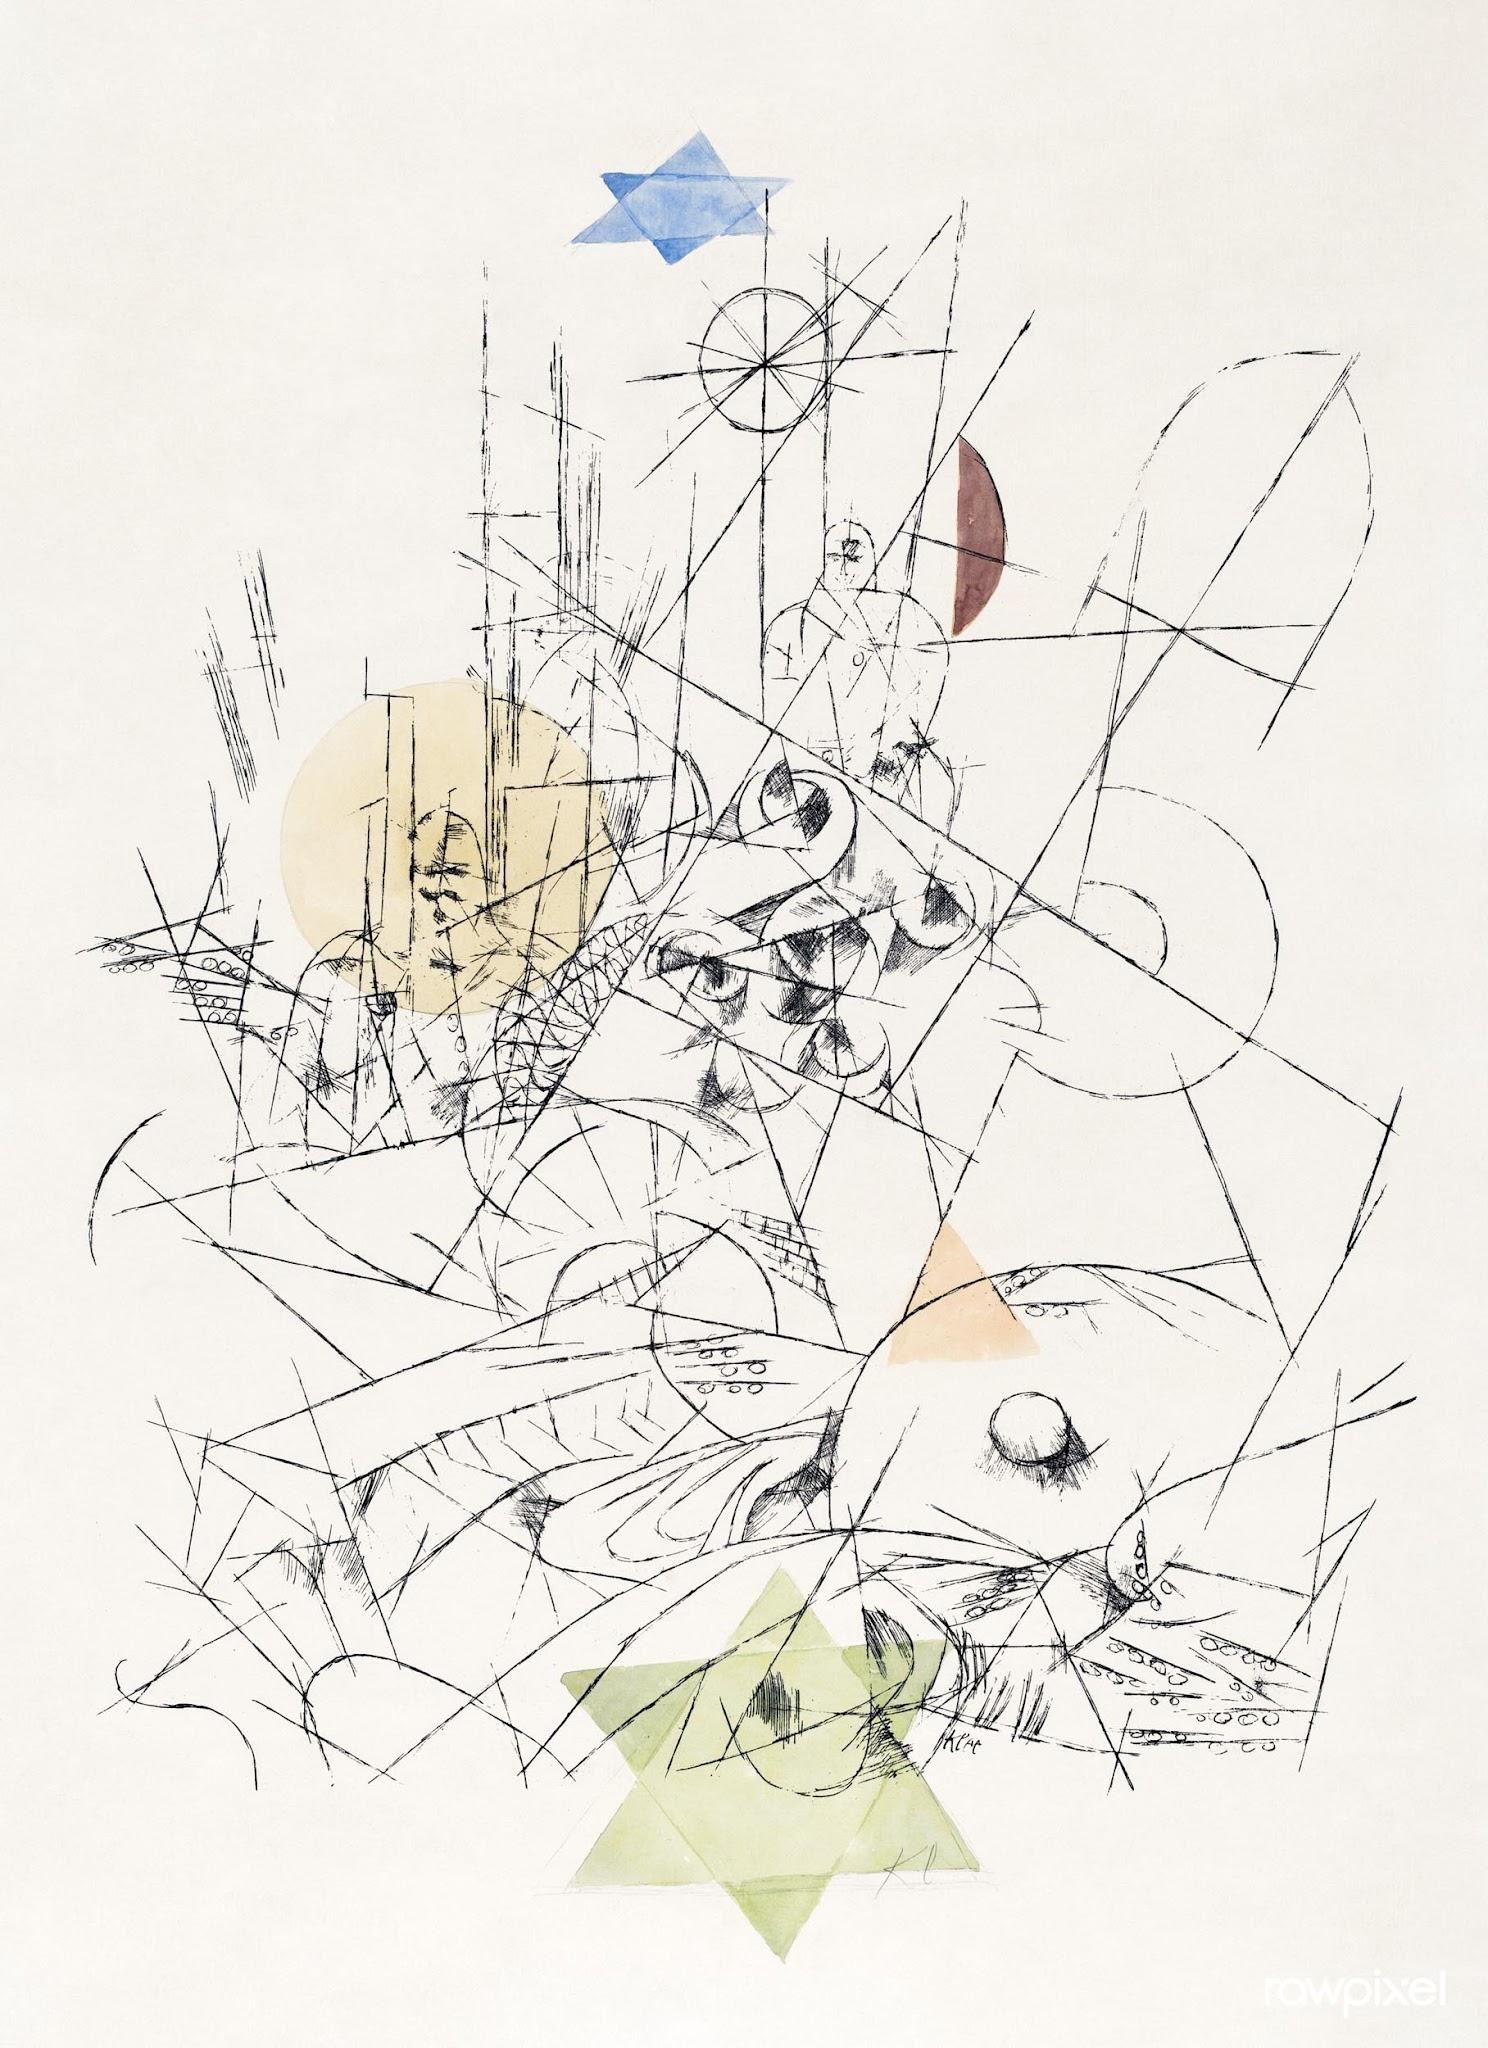
“A line is a dot that went for a walk” – Paul Klee[1]
Line is an element of art and a cornerstone of drawing. As Paul Klee famously stated, a line is a point set in motion. It is also described as a moving or continuous dot or mark.
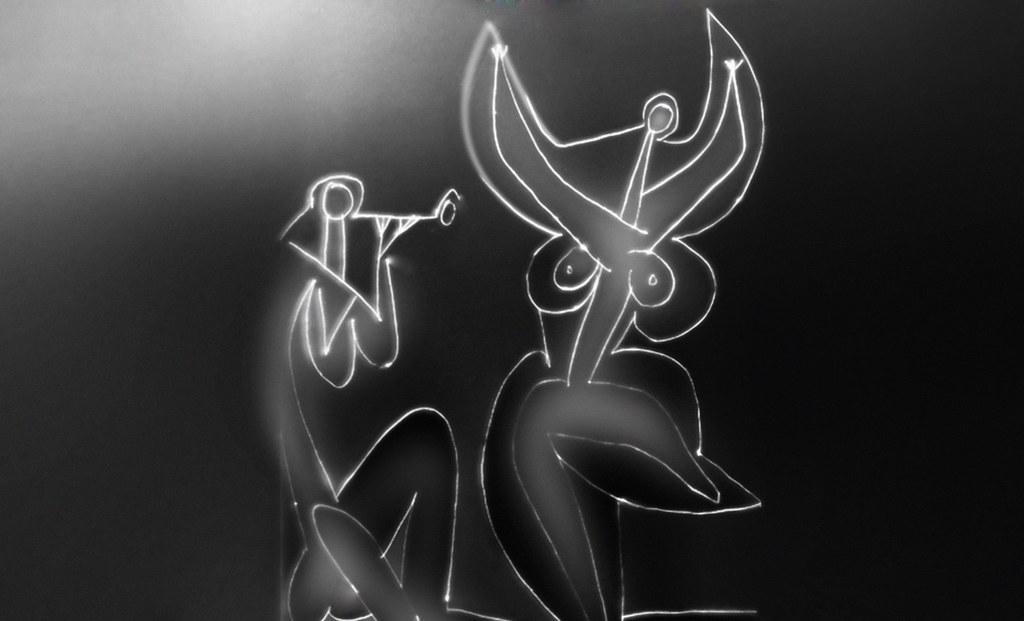
A line is typically created with art materials, such as pencils and pens. In this chapter, we will focus on the techniques and materials used in foundational drawing practices. However, if we follow Klee’s concept, a line is not only created with traditional art materials but can also be formed with unconventional tools such as ink, Conte crayons, and even light. Consider the example of Pablo Picasso creating lines of light with a flashlight, which was captured with a camera that used a slow shutter speed.
Master Artist: Raphael and Contour Line
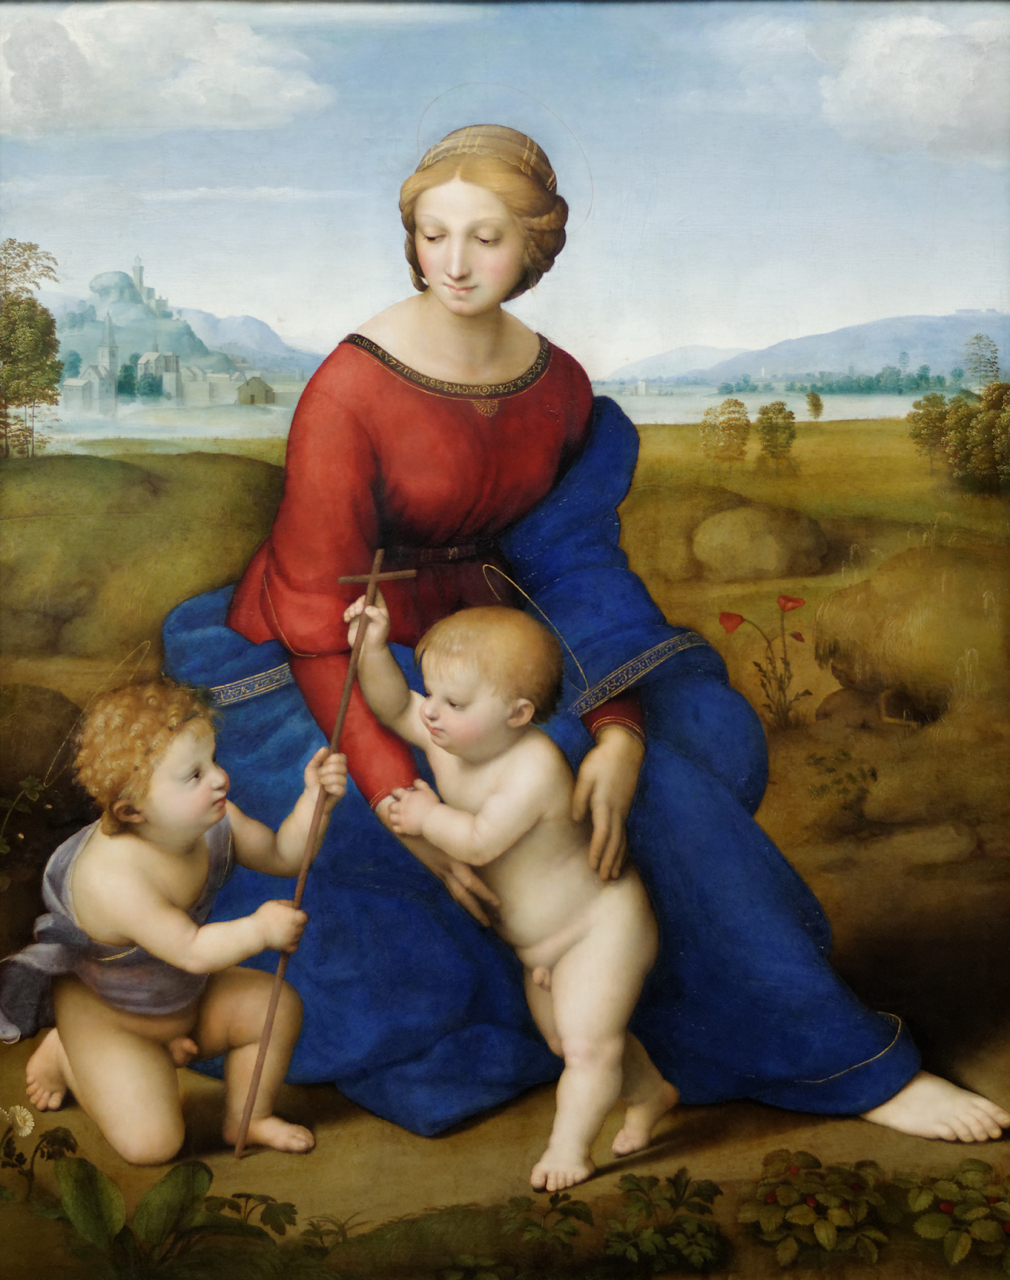
During the Italian Renaissance, a popular school of thought emerged championing a style of art-making known as disegno, an Italian term meaning “drawing” or “design”. Artists following this philosophy believed that the most valuable part of the creative process was the careful layout and crisp drawing of a scene before secondary aspects, such as color, were added. The artworks produced within this style had very intentional composition and a crisp formal style. For example, see the image below by Raphael. Although it is a painting, it illustrates the crisp style of disegno and therefore has visible contour lines throughout. A clear sense of structure is created by the separation between Mary and the background, and even between Mary’s skin and her gown. There is such a clear divide that it seems we could easily break Mary apart from her surroundings.
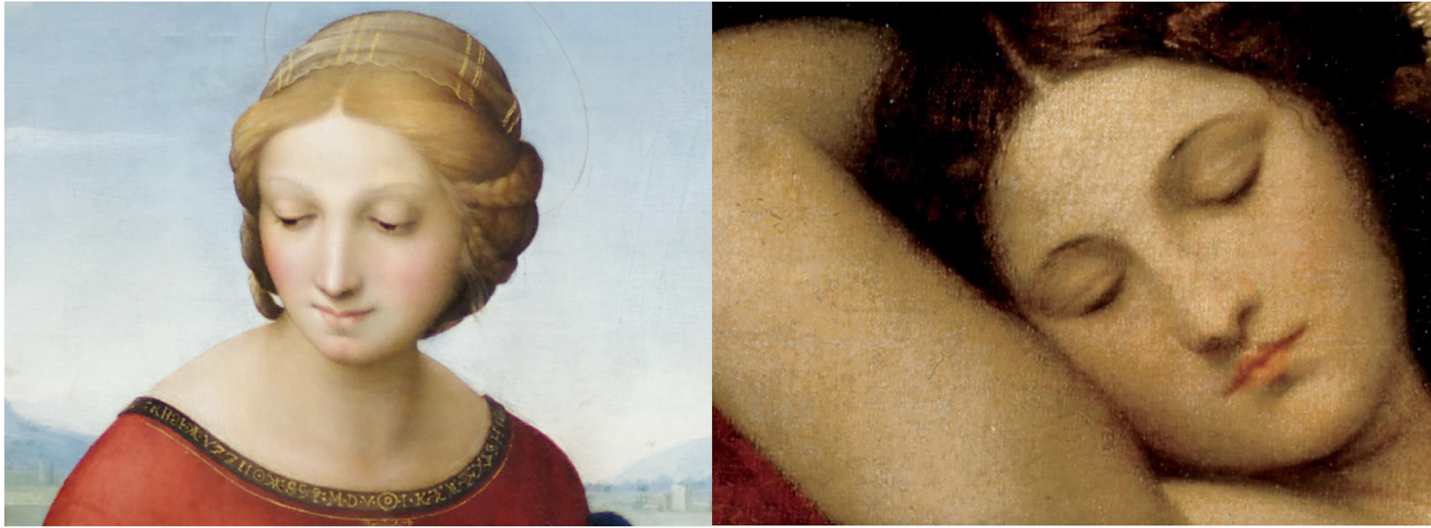
The competing philosophical school of colorito (more popular among Venetian Renaissance artists) would avoid contour lines altogether. They would rather have objects bleeding into each other at their borders, a technique visible in Giorgione’s works, such as the detail used below in comparison to Raphael’s work. Colorito avoids sharp contour lines in favor of a more hazy, sensual look that blends a subject into its surroundings.
“Master Artist: Raphael and Contour Line.” Written by Elaine Wilson. License: CC BY
Types of Line
Contour Line
Contour lines define the outline of a form, as well as the interior structure, without the use of shading. These lines are highly descriptive and record the edges, ridges, and boundaries between a form’s shape, planes, volumes, masses, textures, and surface indentations, undulations, and modulations.
In essence, contour lines are the basis of drawing. A simple contour line can create a form with minimal embellishment while allowing for a range of line quality.
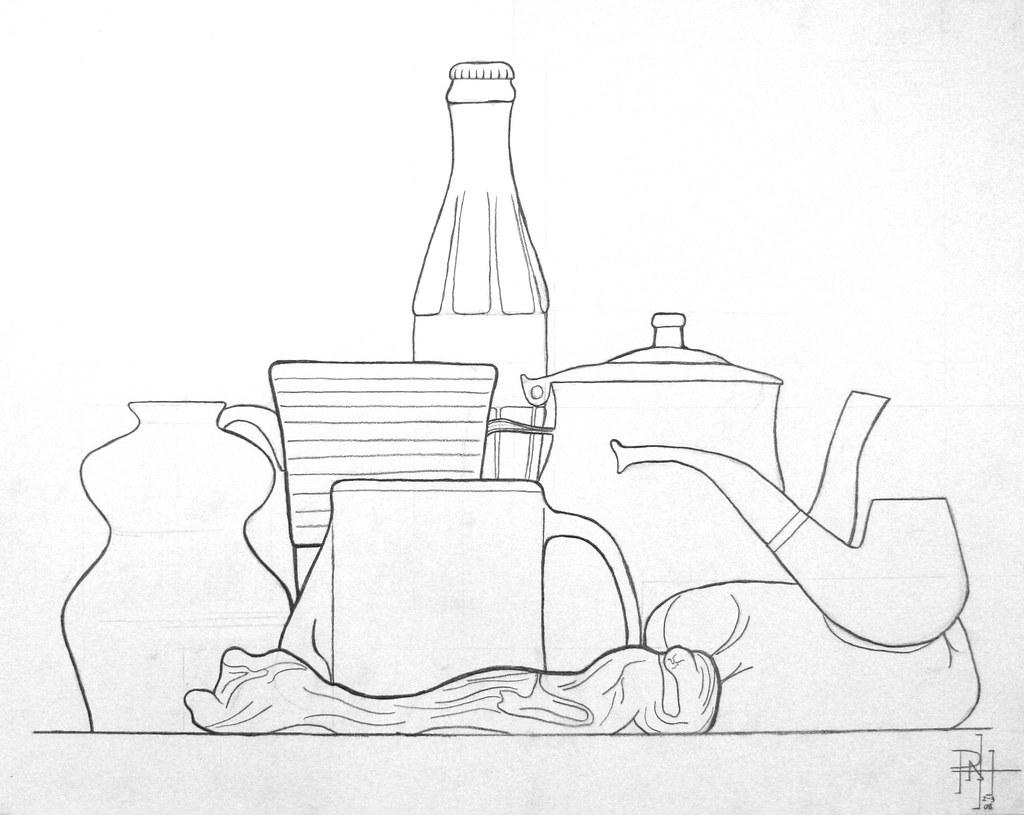
Contour lines define the edges of a shape or form. An artwork consisting solely of contour lines allows for frequent views of the reference and drawing paper. There is not a set percentage of time spent with the subject or drawing media, but a more natural flow of looking back and forth between the two. Contour lines are typically used in direct observation drawings, but can also be used to create drawings from imagination, photos, and other sources.
Many drawing techniques focus on contour lines. For example, blind contour line, modified contour line, and cross-contour line.
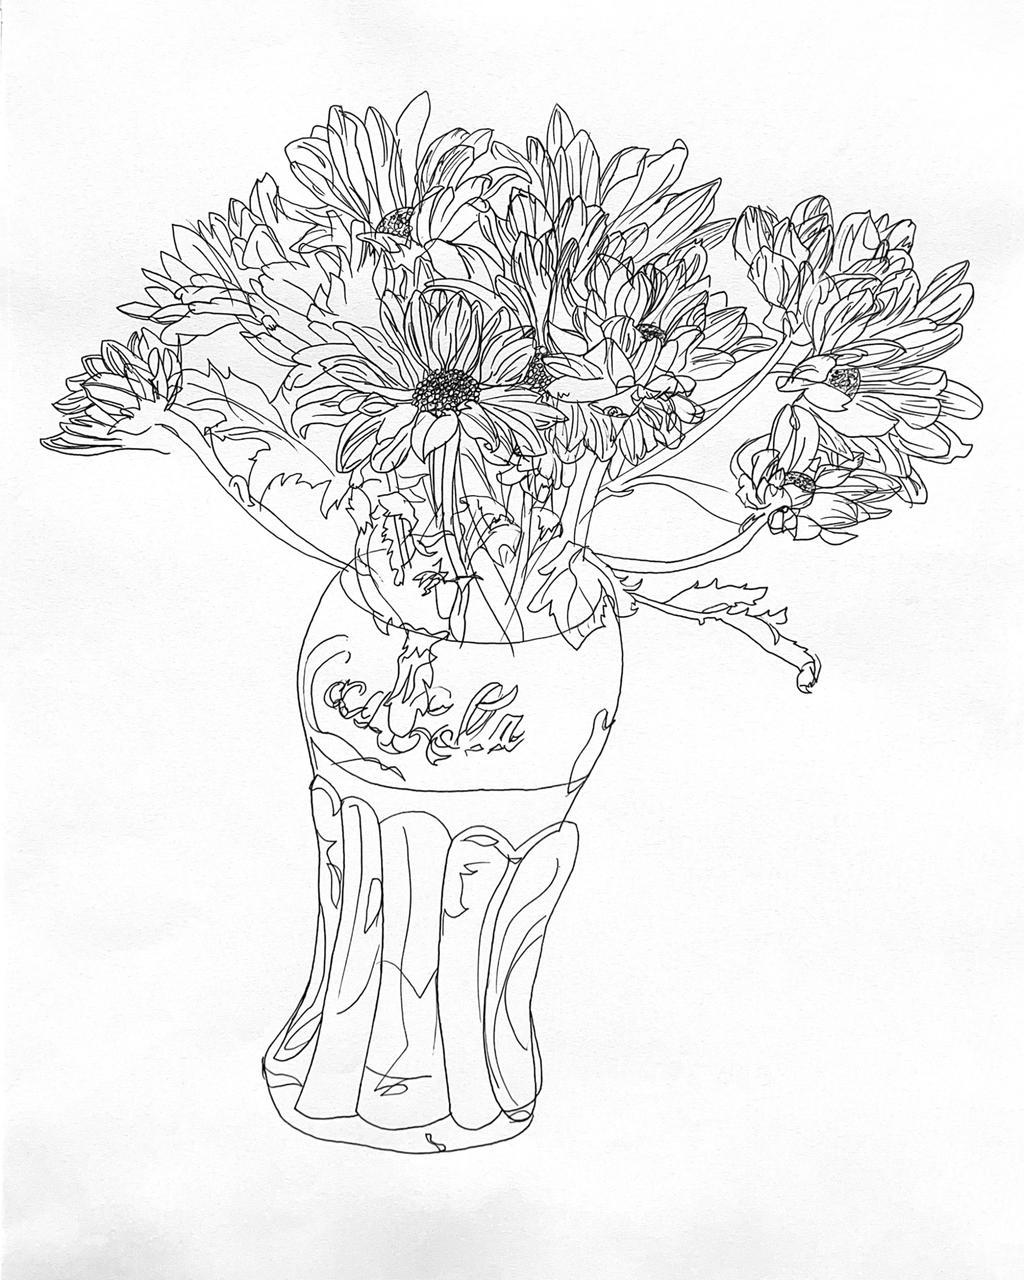
Blind Contour Line
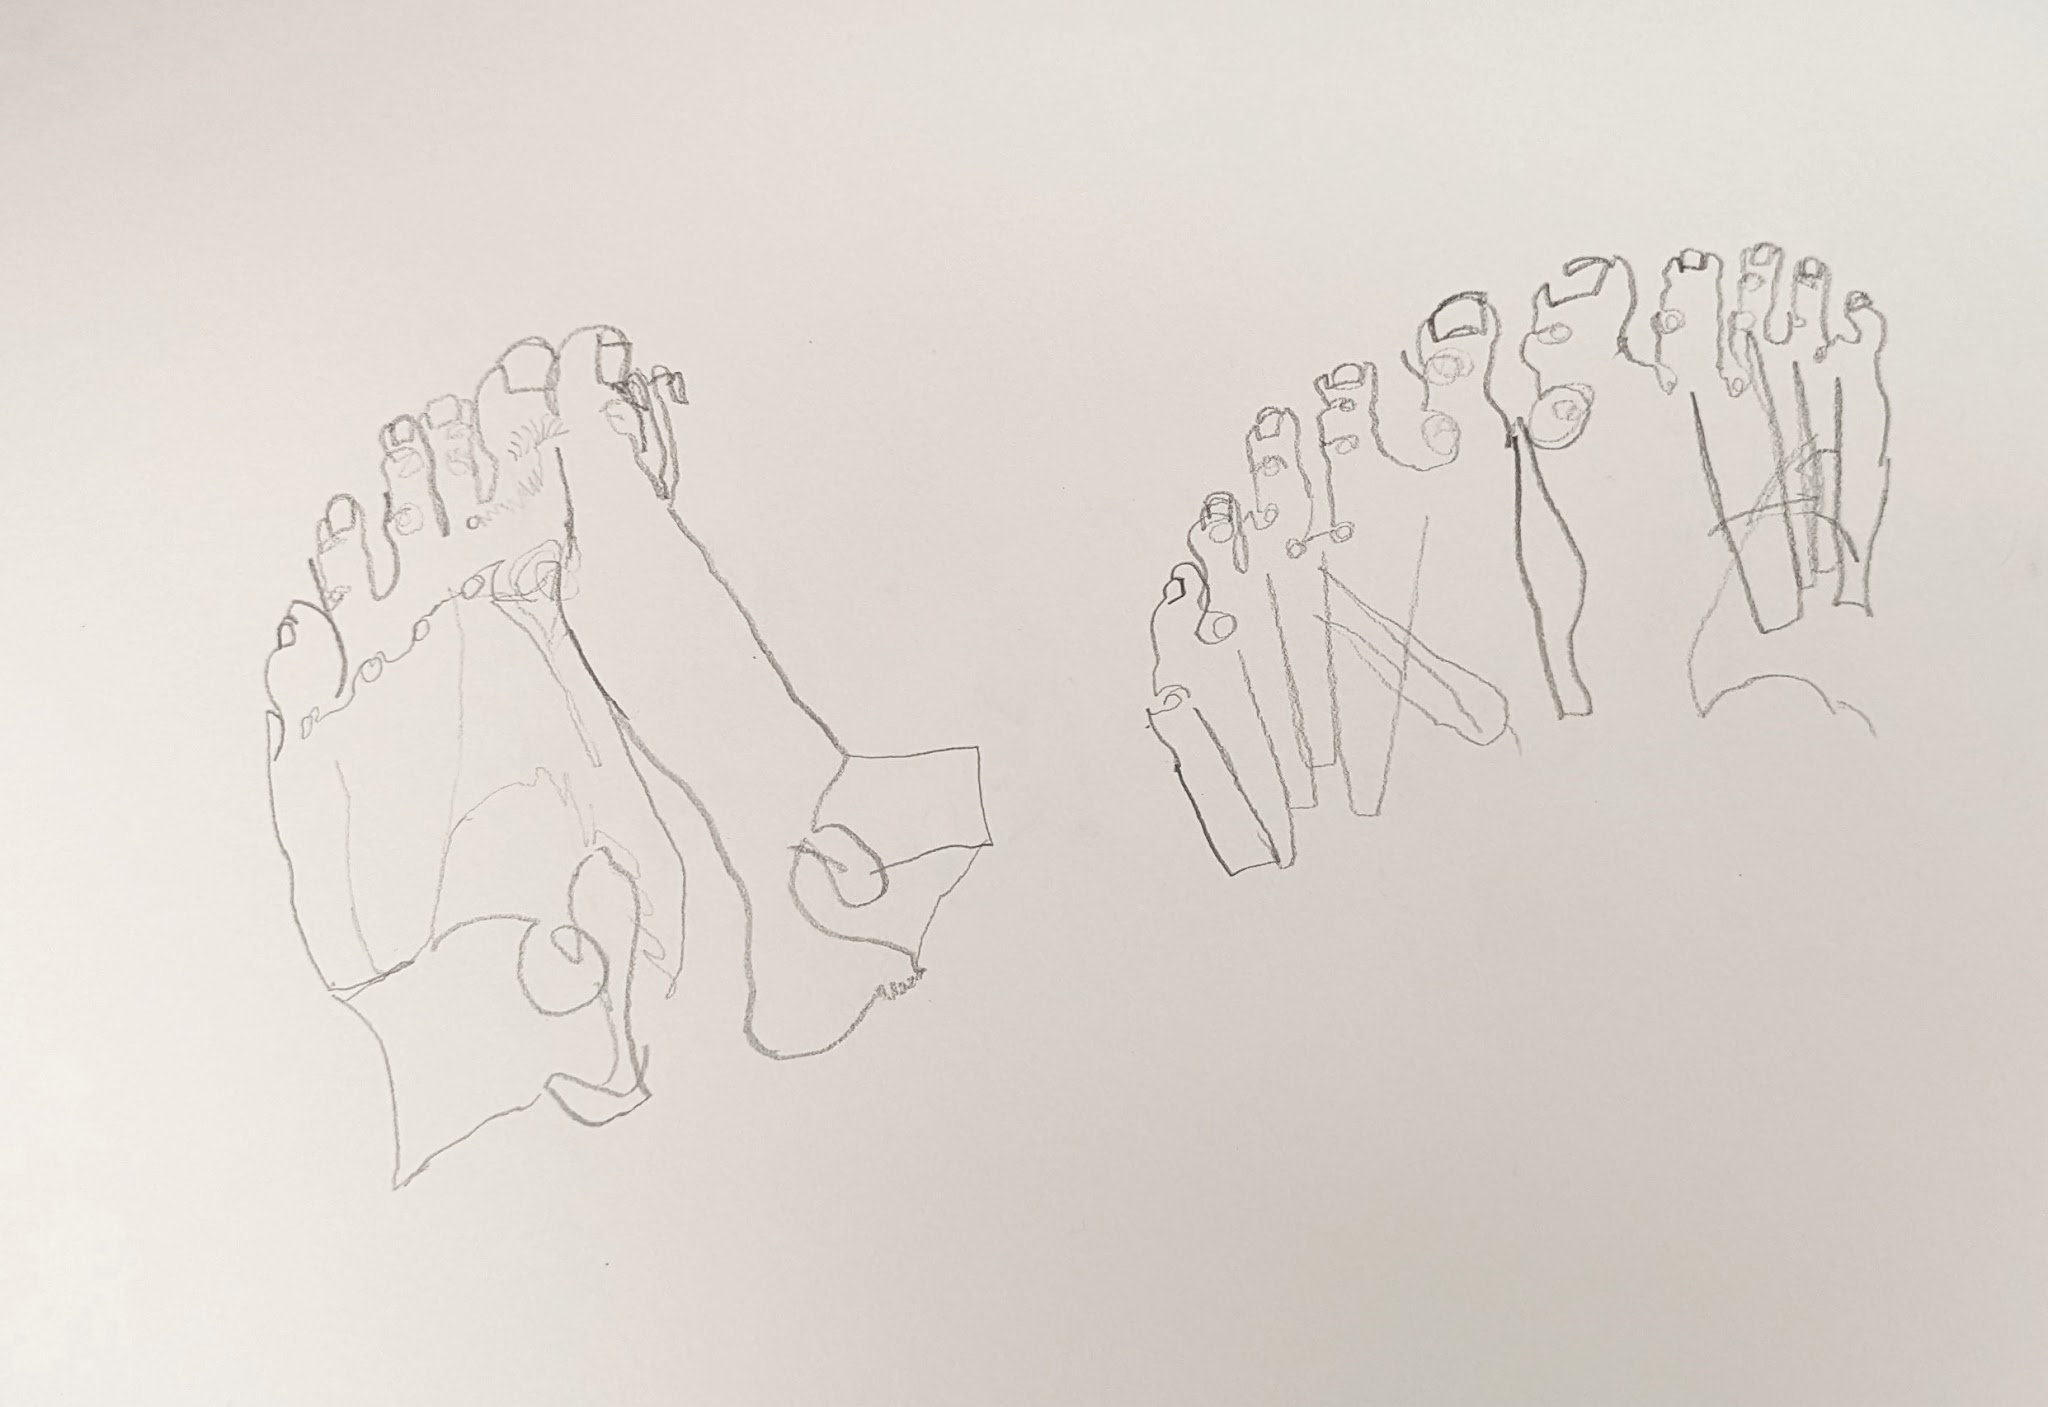
Blind contour drawings are created with a continuous line, with no line breaks. When drawing, the artist only looks at the reference, never at the paper or the drawing tool. For instance, if the artist is creating a blind contour line drawing of a person, the artist would solely look at the person and never check the drawing being formed to confirm if the pencil is in the intended place on the paper.
You may be wondering why an artist would choose to work this way. What advantages could there be for such an odd and likely inaccurate drawing result?
The answer is simple – to emphasize looking at the subject.
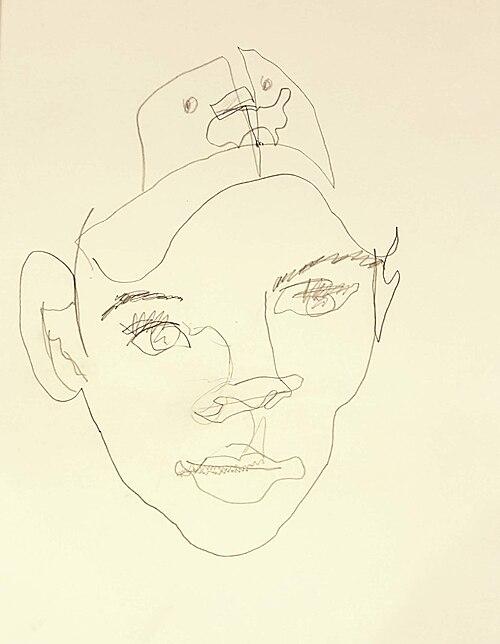
While the result typically doesn’t resemble the reference in its entirety, in fact, if it does, it reveals that the artist cheated and looked at their drawing paper. Blind contour line drawings. The technique teaches us the invaluable importance of looking at the subject. Blind contour line drawings. The technique teaches us to see and to draw only what we see. Many people, whether beginners or advanced artists, fall into the habit of not looking at their references enough. By practicing blind contour line drawings, artists can retrain their eyes to see their reference more honestly.
Modified Contour Line
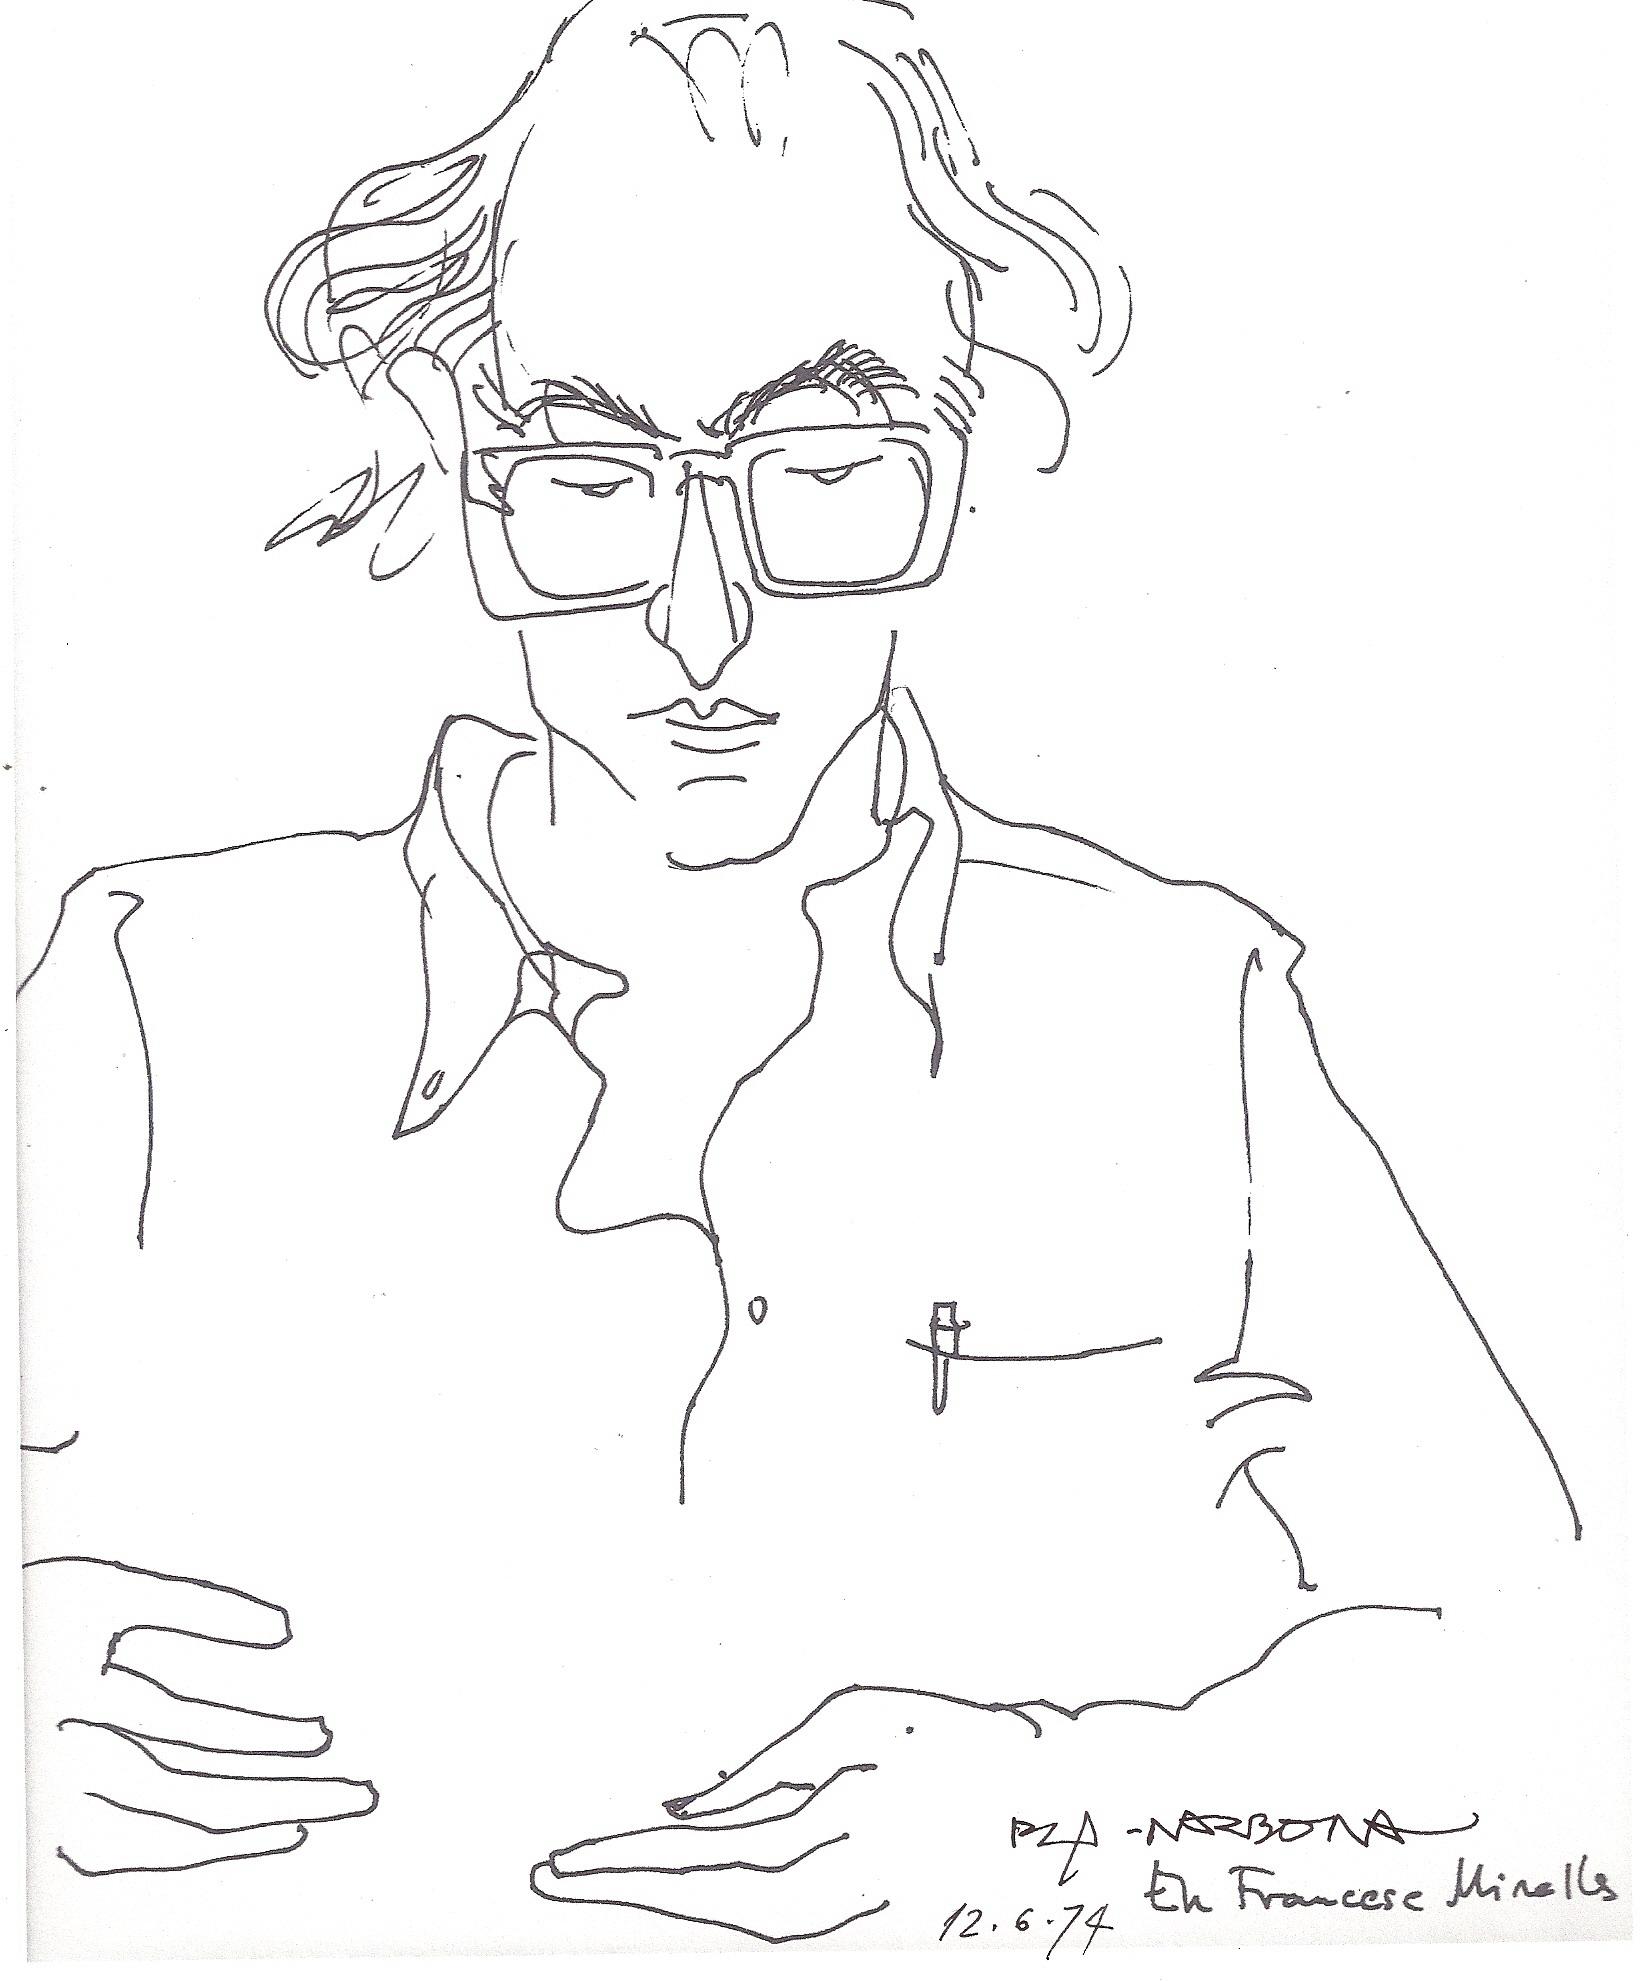
Modified contour line drawings are similar to blind contour drawings because they place heavy emphasis on looking at the reference. However, instead of never looking at your drawing, you can sneak peeks at it. Approximately 90% of the time, the artist looks at the reference, and the remaining 10%, they look at the drawing. The completed drawing often resembles the reference more accurately than a blind contour line drawing, but may still contain some placement issues because most of the time is spent looking away from the drawing paper.
Decorative Line
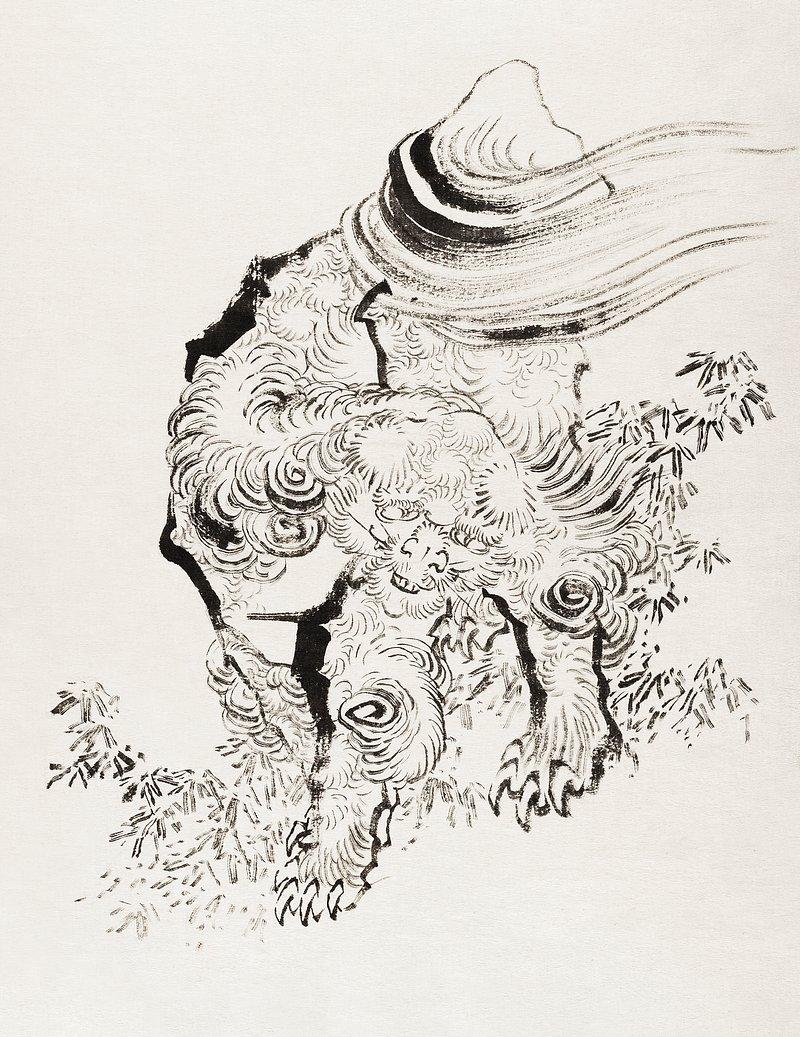
Decorative lines are used for the subjective interpretation of form, rather than direct observation. In the above example, the artist depicted the tiger’s fur with decorative, swirling lines to add aesthetic value to the image.
Descriptive Line

Descriptive lives are used in the objective description of form. Their pronounced specificity increases the viewer’s understanding of what is being described. A more detailed drawing would have more descriptive lines, and a simpler drawing would have fewer.
Dimensional Line
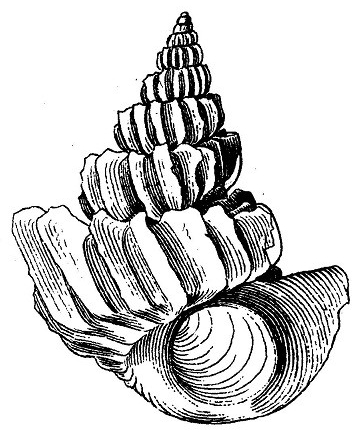
Dimensional lines vary in weight (thick/thin), value (light/dark), and/or focus (sharp/fuzzy). They convey a sense of three-dimensional volume and space on a two-dimensional surface.
Implied Lines
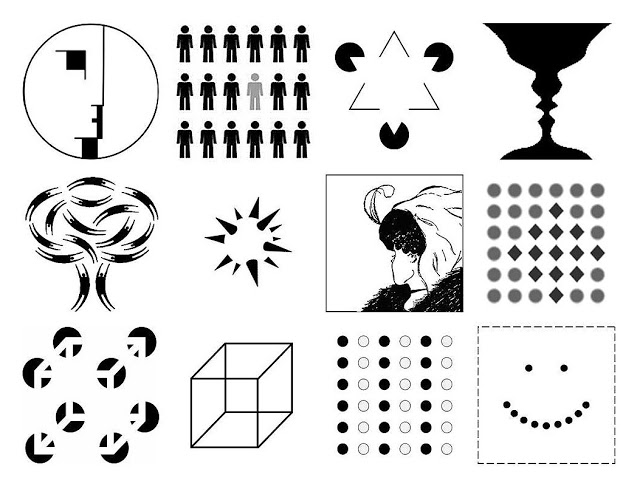
Implied lines suggest, rather than explicitly define, edges and contours. They can imply movement, direction, or the Gestalt Psychology principle of closure. The Gestalt Psychology principle of closure occurs when a viewer fills in missing visual information to create a shape from open lines.[2]
Lost and Found Lines
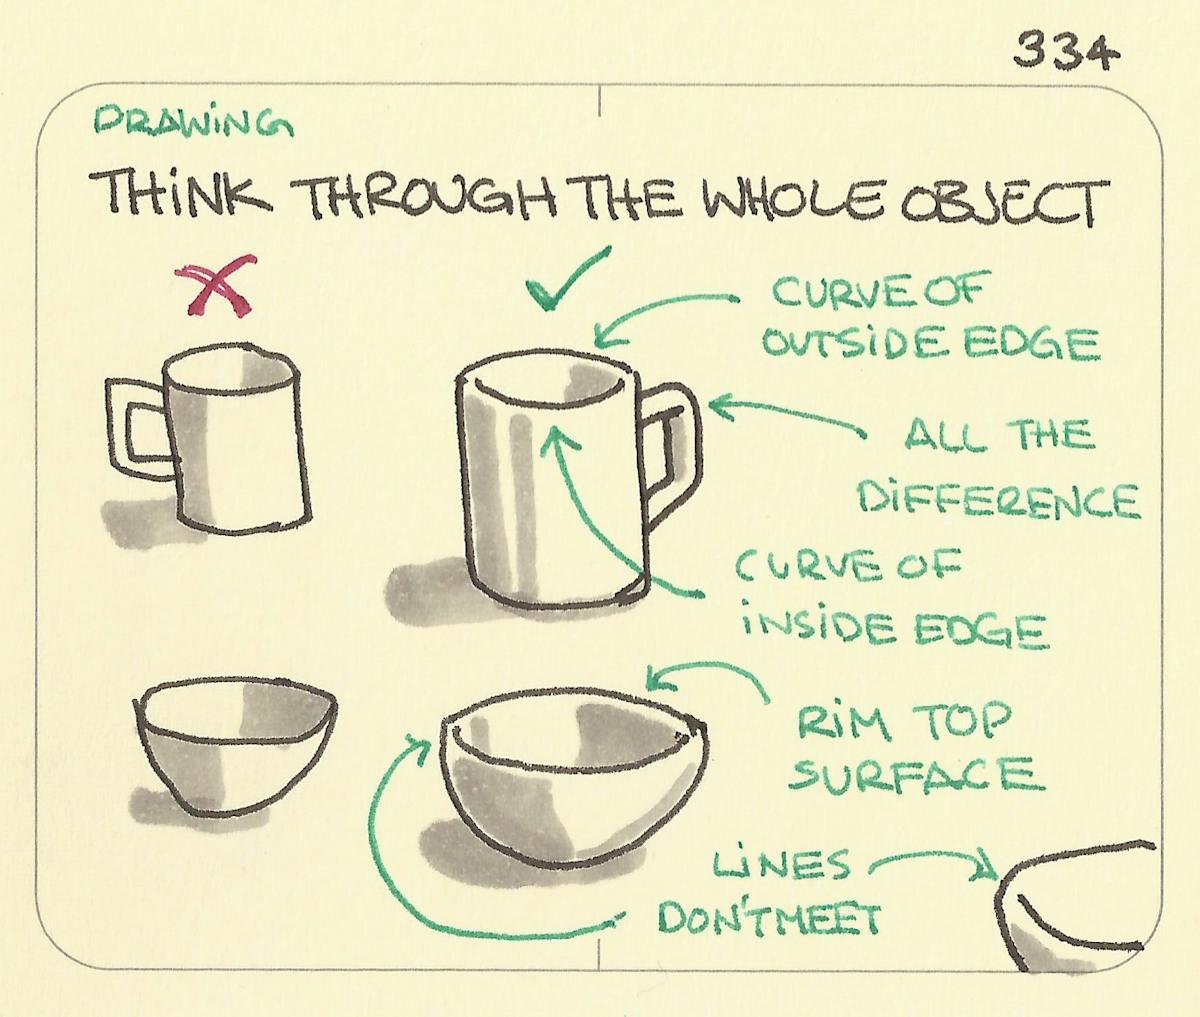
Artists use lost-and-found lines for a multitude of reasons. To create a lost-and-found line, use a pencil to start drawing a line, then lift off the pressure until the pencil no longer touches the paper. This will emphasize line weight because a line is seen and then disappears.
Lost and found lines add specificity and character to a drawing. They are intentional and descriptive rather than sketchy. One of the key uses for these kinds of lines is to add volumetric detail, particularly for the reflective elements on glossy or transparent objects. Instead of enclosing lines to flatten a form, use lost-and-found lines to imply rather than deliberately create a shape.
Mechanical Lines
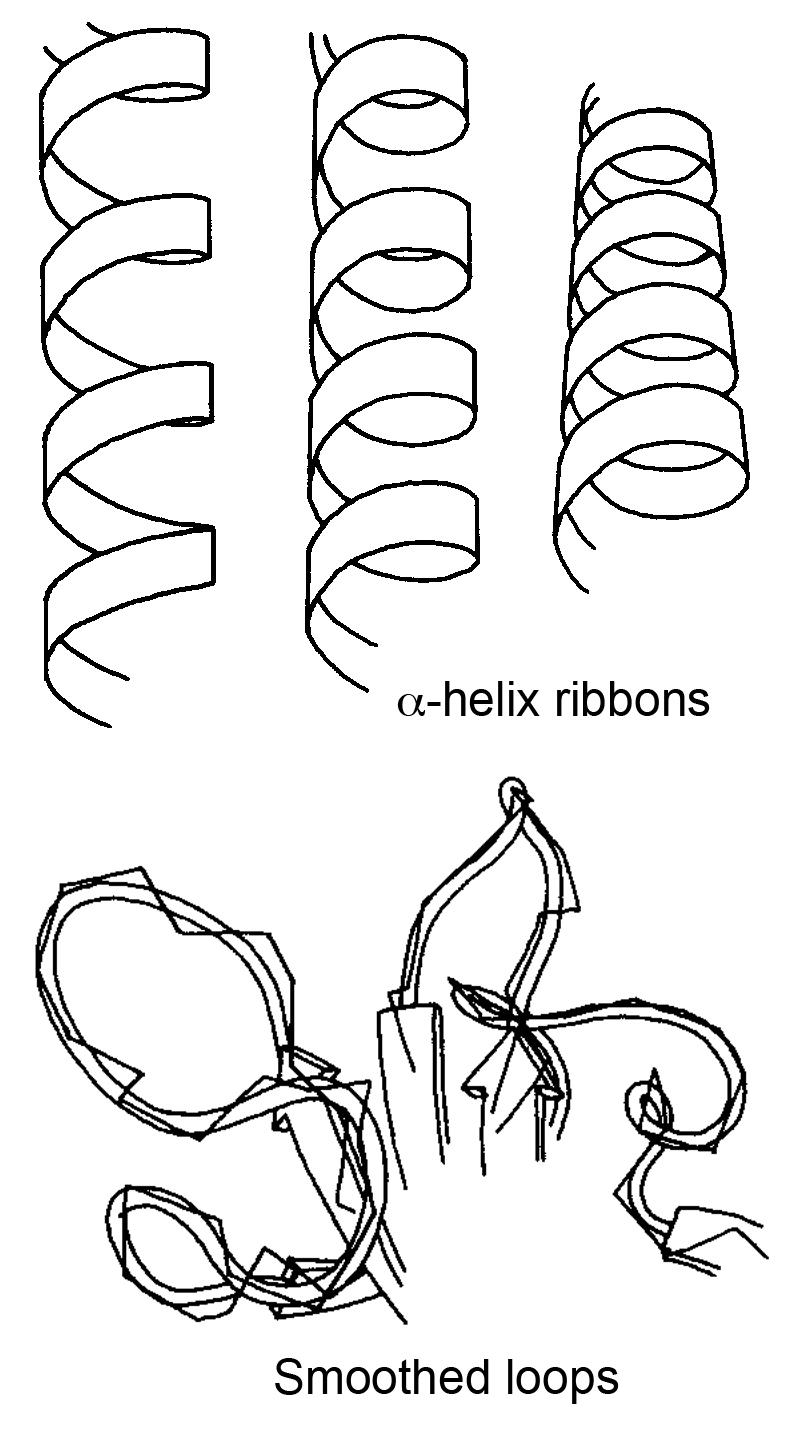
Mechanical lines are objective lines generally used in the technical description of form, characteristically uniform in width and character. These lines are deliberately precise in order to convey information, often in functional contexts such as in technical manuals.
Searching Lines
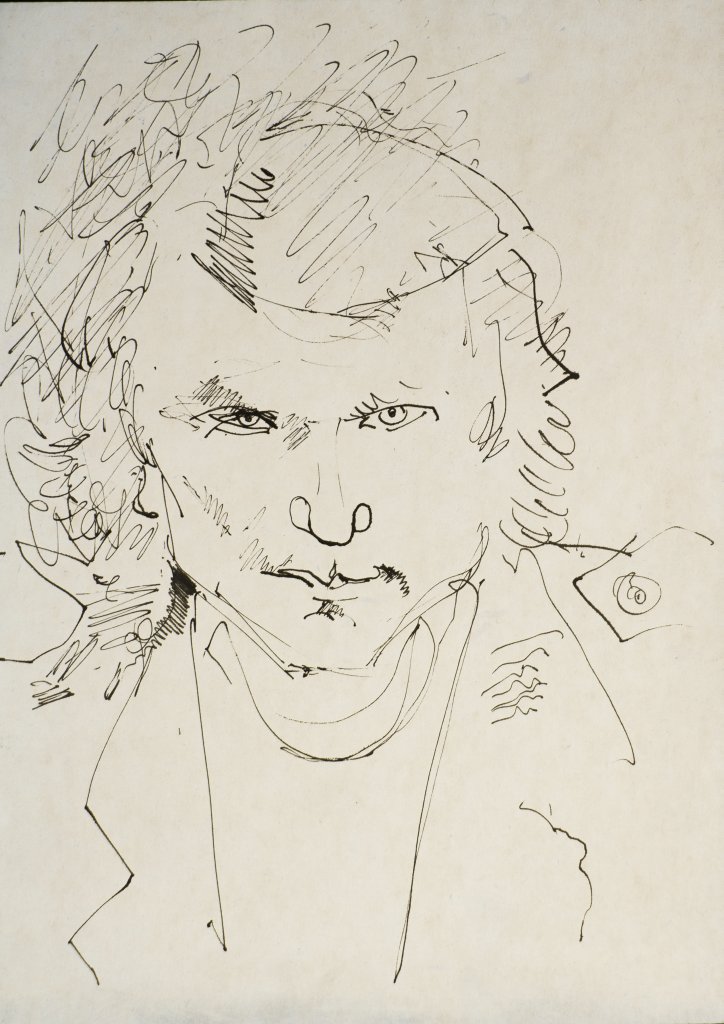
Searching lines are drawn freely and expressively in an attempt to capture the general characteristics, essential gesture, essence, and/or structure of a live or still form. Searching lines give a drawing a sketchy quality, as form is built up through the repeated overlapping of (often) lightly drawn lines.
Structural Lines
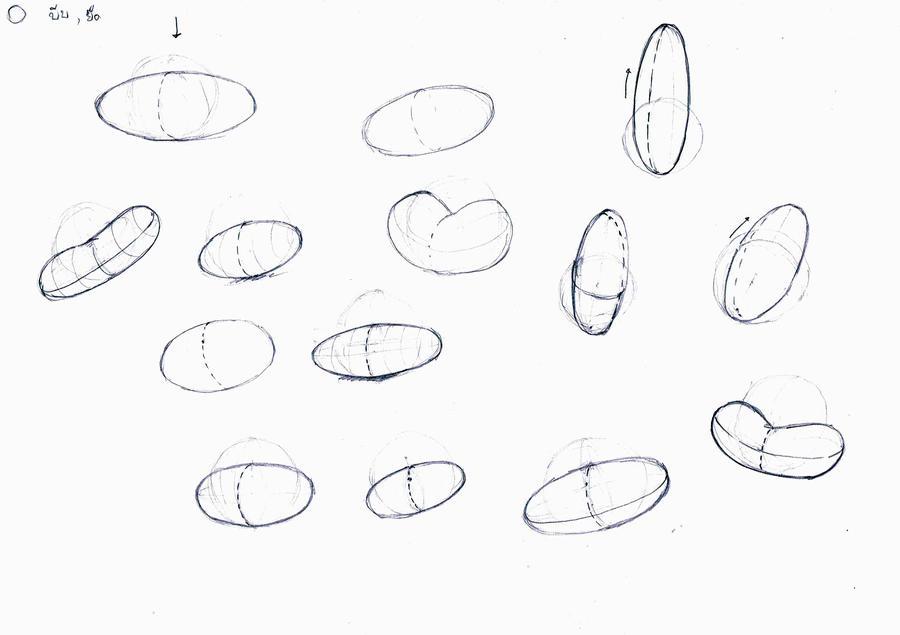
Structural lines are used during the initial stages of a drawing to map out the shape, size, and proportion relationships within and between a composition’s various forms. These lines reduce complex curves into smaller, more manageable segments, giving them a mechanical appearance. Structural lines are sometimes referred to as compositional lines.
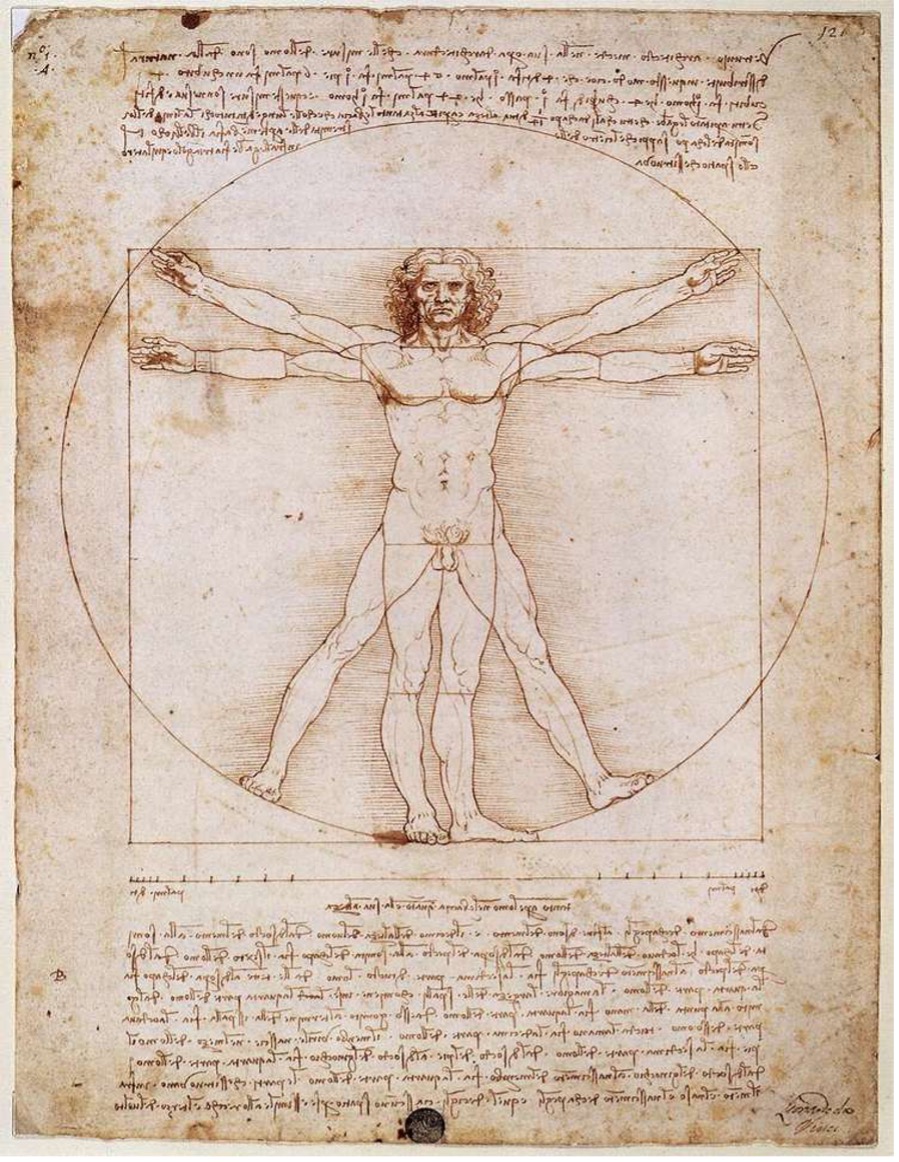
Left: The Vitruvian Man, Leonardo da Vinci, c. 1490, Source: picryl. License: Public Domain CC0 1.0
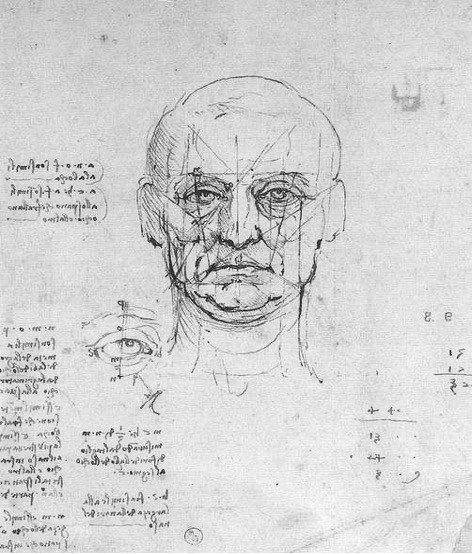
Right: Study on Human Proportions, Leonardo da Vinci, 1485-90, Source: picryl. License: Public Domain CC0 1.0
Both images cropped by Elaine Wilson.
A genius of human proportion is the Italian Renaissance master Leonardo da Vinci. In his two sketches above, you can see how he uses structural lines to plan out the features of the human face and body. The extremely famous artwork on the left, The Vitruvian Man, also coordinates the human body with geometric shapes. Da Vinci believed that the human body was special, specifically because of its harmony with mathematical concepts. Another reason da Vinci was able to depict his human bodies so precisely is because he personally studied cadavers (dead bodies) with scientific precision, even though it was illegal at the time.
Cross Contour Lines
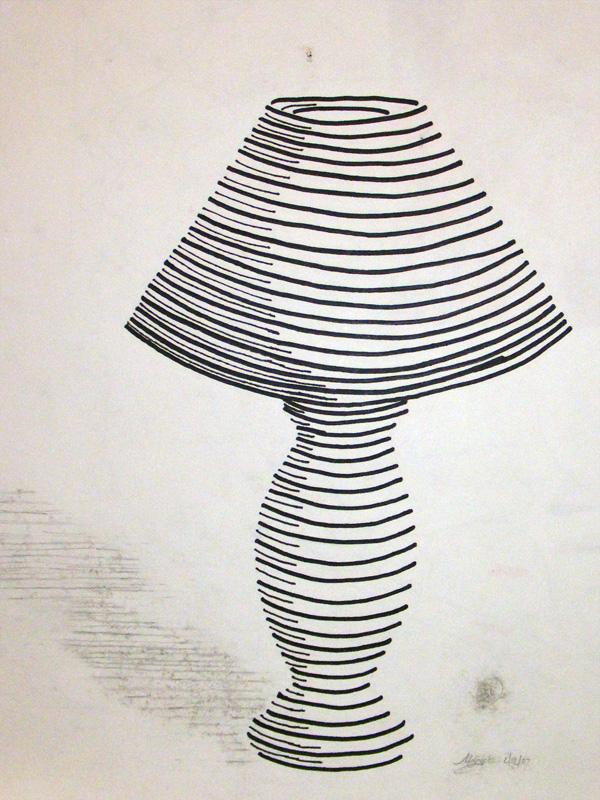
Cross-contour lines indicate form and shadow. Typically, artists add more lines or place lines closer together to imply darker values or form. Cross-contour lines travel across a form, rather than along the outline. Imagine what the trail of running your finger across the form of an object would leave. This would be a cross-contour line.
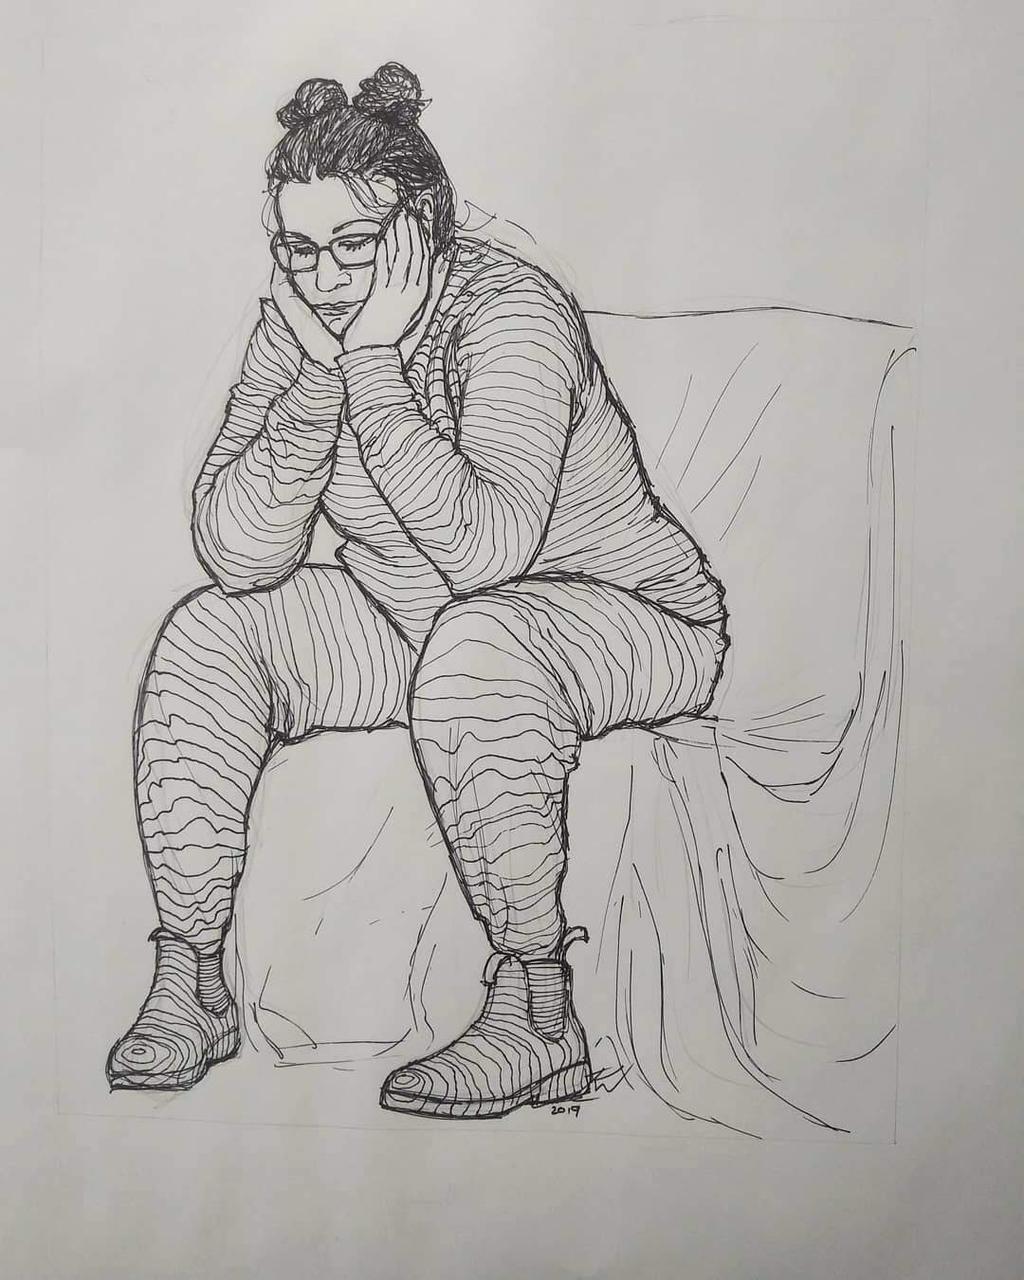
Cross-contour lines can be drawn horizontally, vertically, or both. However, they always describe the three-dimensionality of an object or surface.
Line Characteristics
Line Quality
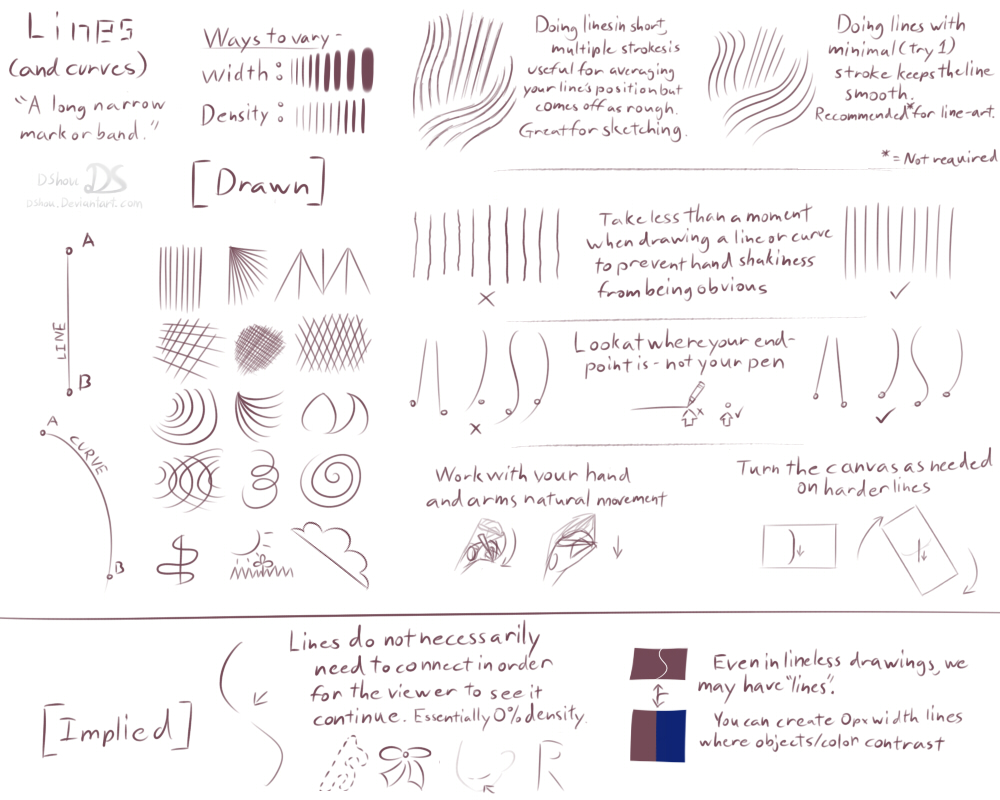
The quality of a line should match the intended depiction. For instance, a drawing of a reflective glass vase should have smooth, often delicate, and curved, thick-to-thin lines. Whereas the drawing of a rough-surfaced rock should contain short, often jagged, straight lines.
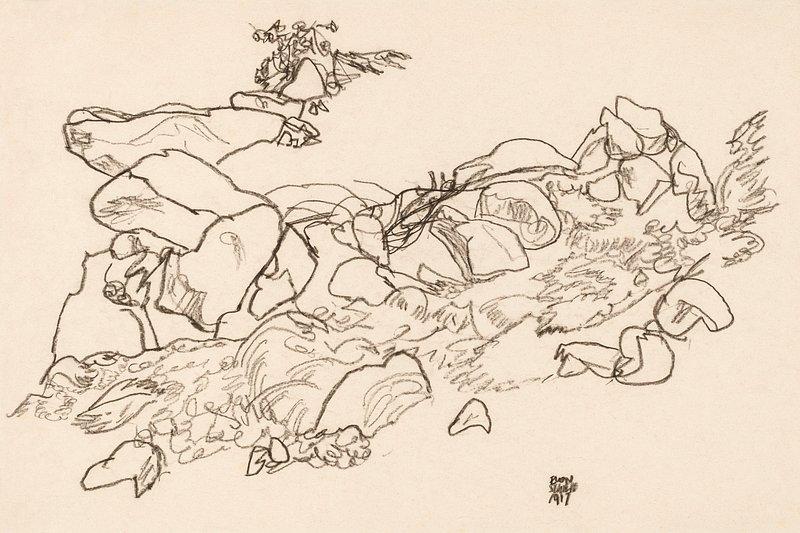
The line quality should mimic the observed surface and structure. The line quality can be long or short, wide or skinny, rough or smooth, heavy or light.
If an artist intends to create drawings of objects that replicate the observed forms, they will want to avoid shaky, searching, and zig-zag lines. In essence, all of these types of lines lend to excessive line use that conveys a lack of confidence in drawing the perceived forms.
Line Texture
Texture is an element of art that refers to the tactile quality of an object’s surface. Texture can be experienced through the sense of touch (actual texture) or sight (simulated/implied texture). Since this text deals with 2D drawing, we’ll discuss how to create simulated texture.
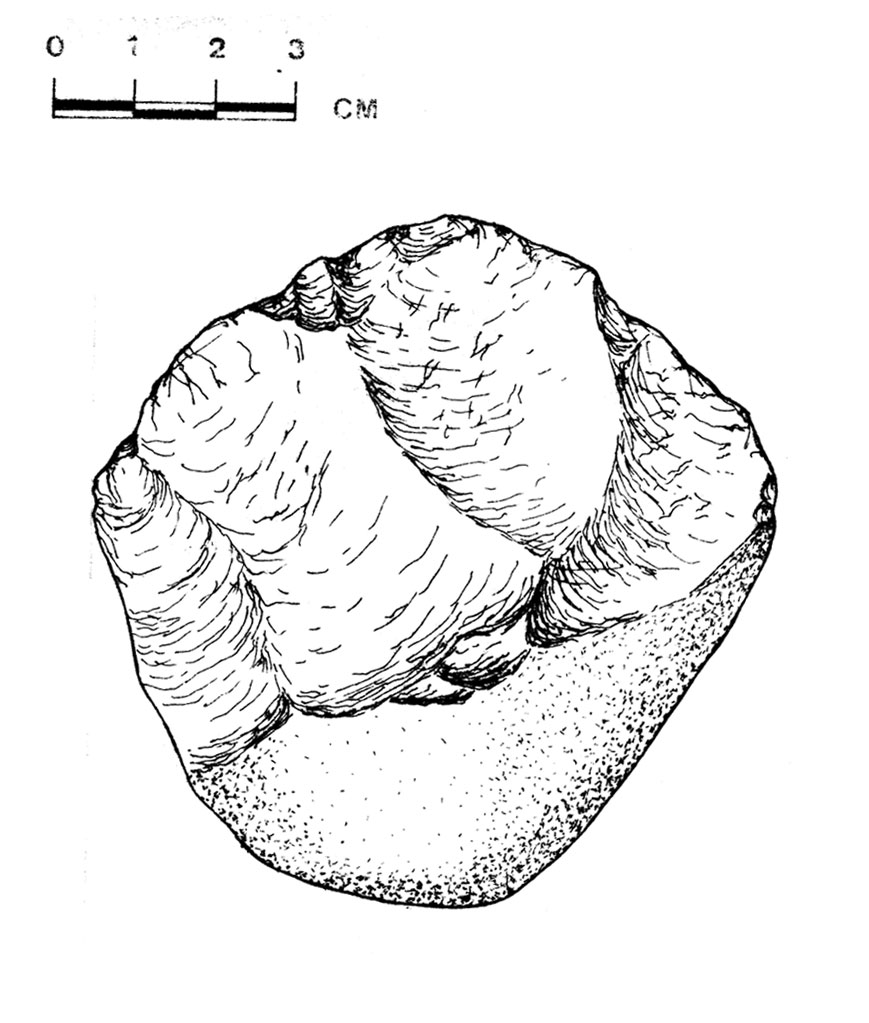
Simulated Texture
Simulated texture, also known as implied texture, is the representation of an object’s surface texture on a two-dimensional surface that mimics actual three-dimensional texture. Often, short lines or dots are used to imply the surface of an object.
Line Weight
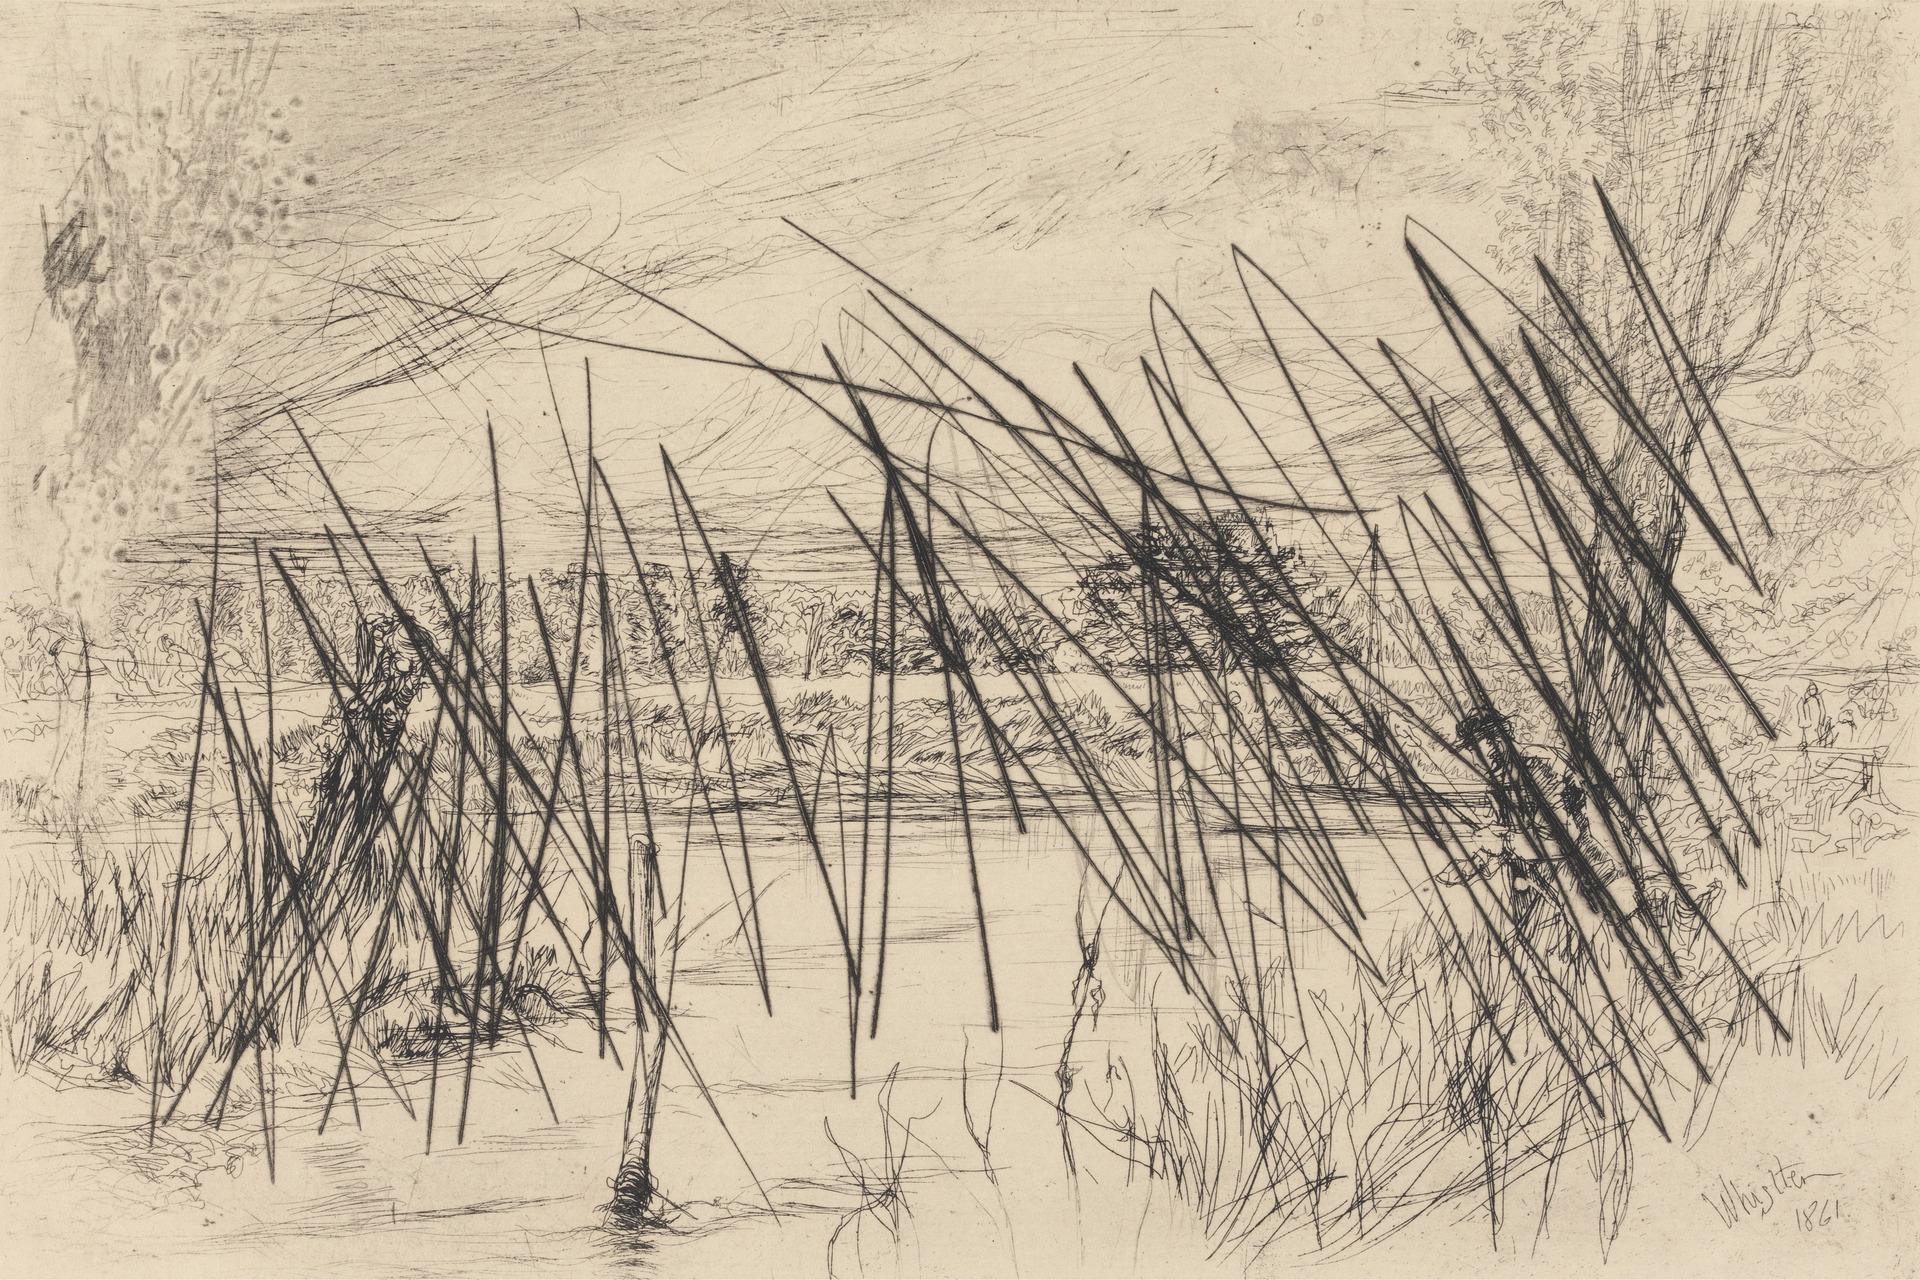
Line weight is the visual lightness, darkness, thickness, or heaviness of a line within a drawing. To create line weight, artists change the pressure and layers of a drawing tool to create different lines.

Cartoon Movement Effects on Free SVG, License: CC BY-NC-SA
If you apply less pressure, the drawn line will be lighter. If you apply more pressure, you will create a darker line. However, be wary of applying too much pressure. You want to avoid heavy pressure, since this will indent the paper and make erasing difficult. If you need an even darker line, consider building it by layering the same line multiple times to darken it or increase its width.
Line Weight Hierarchy
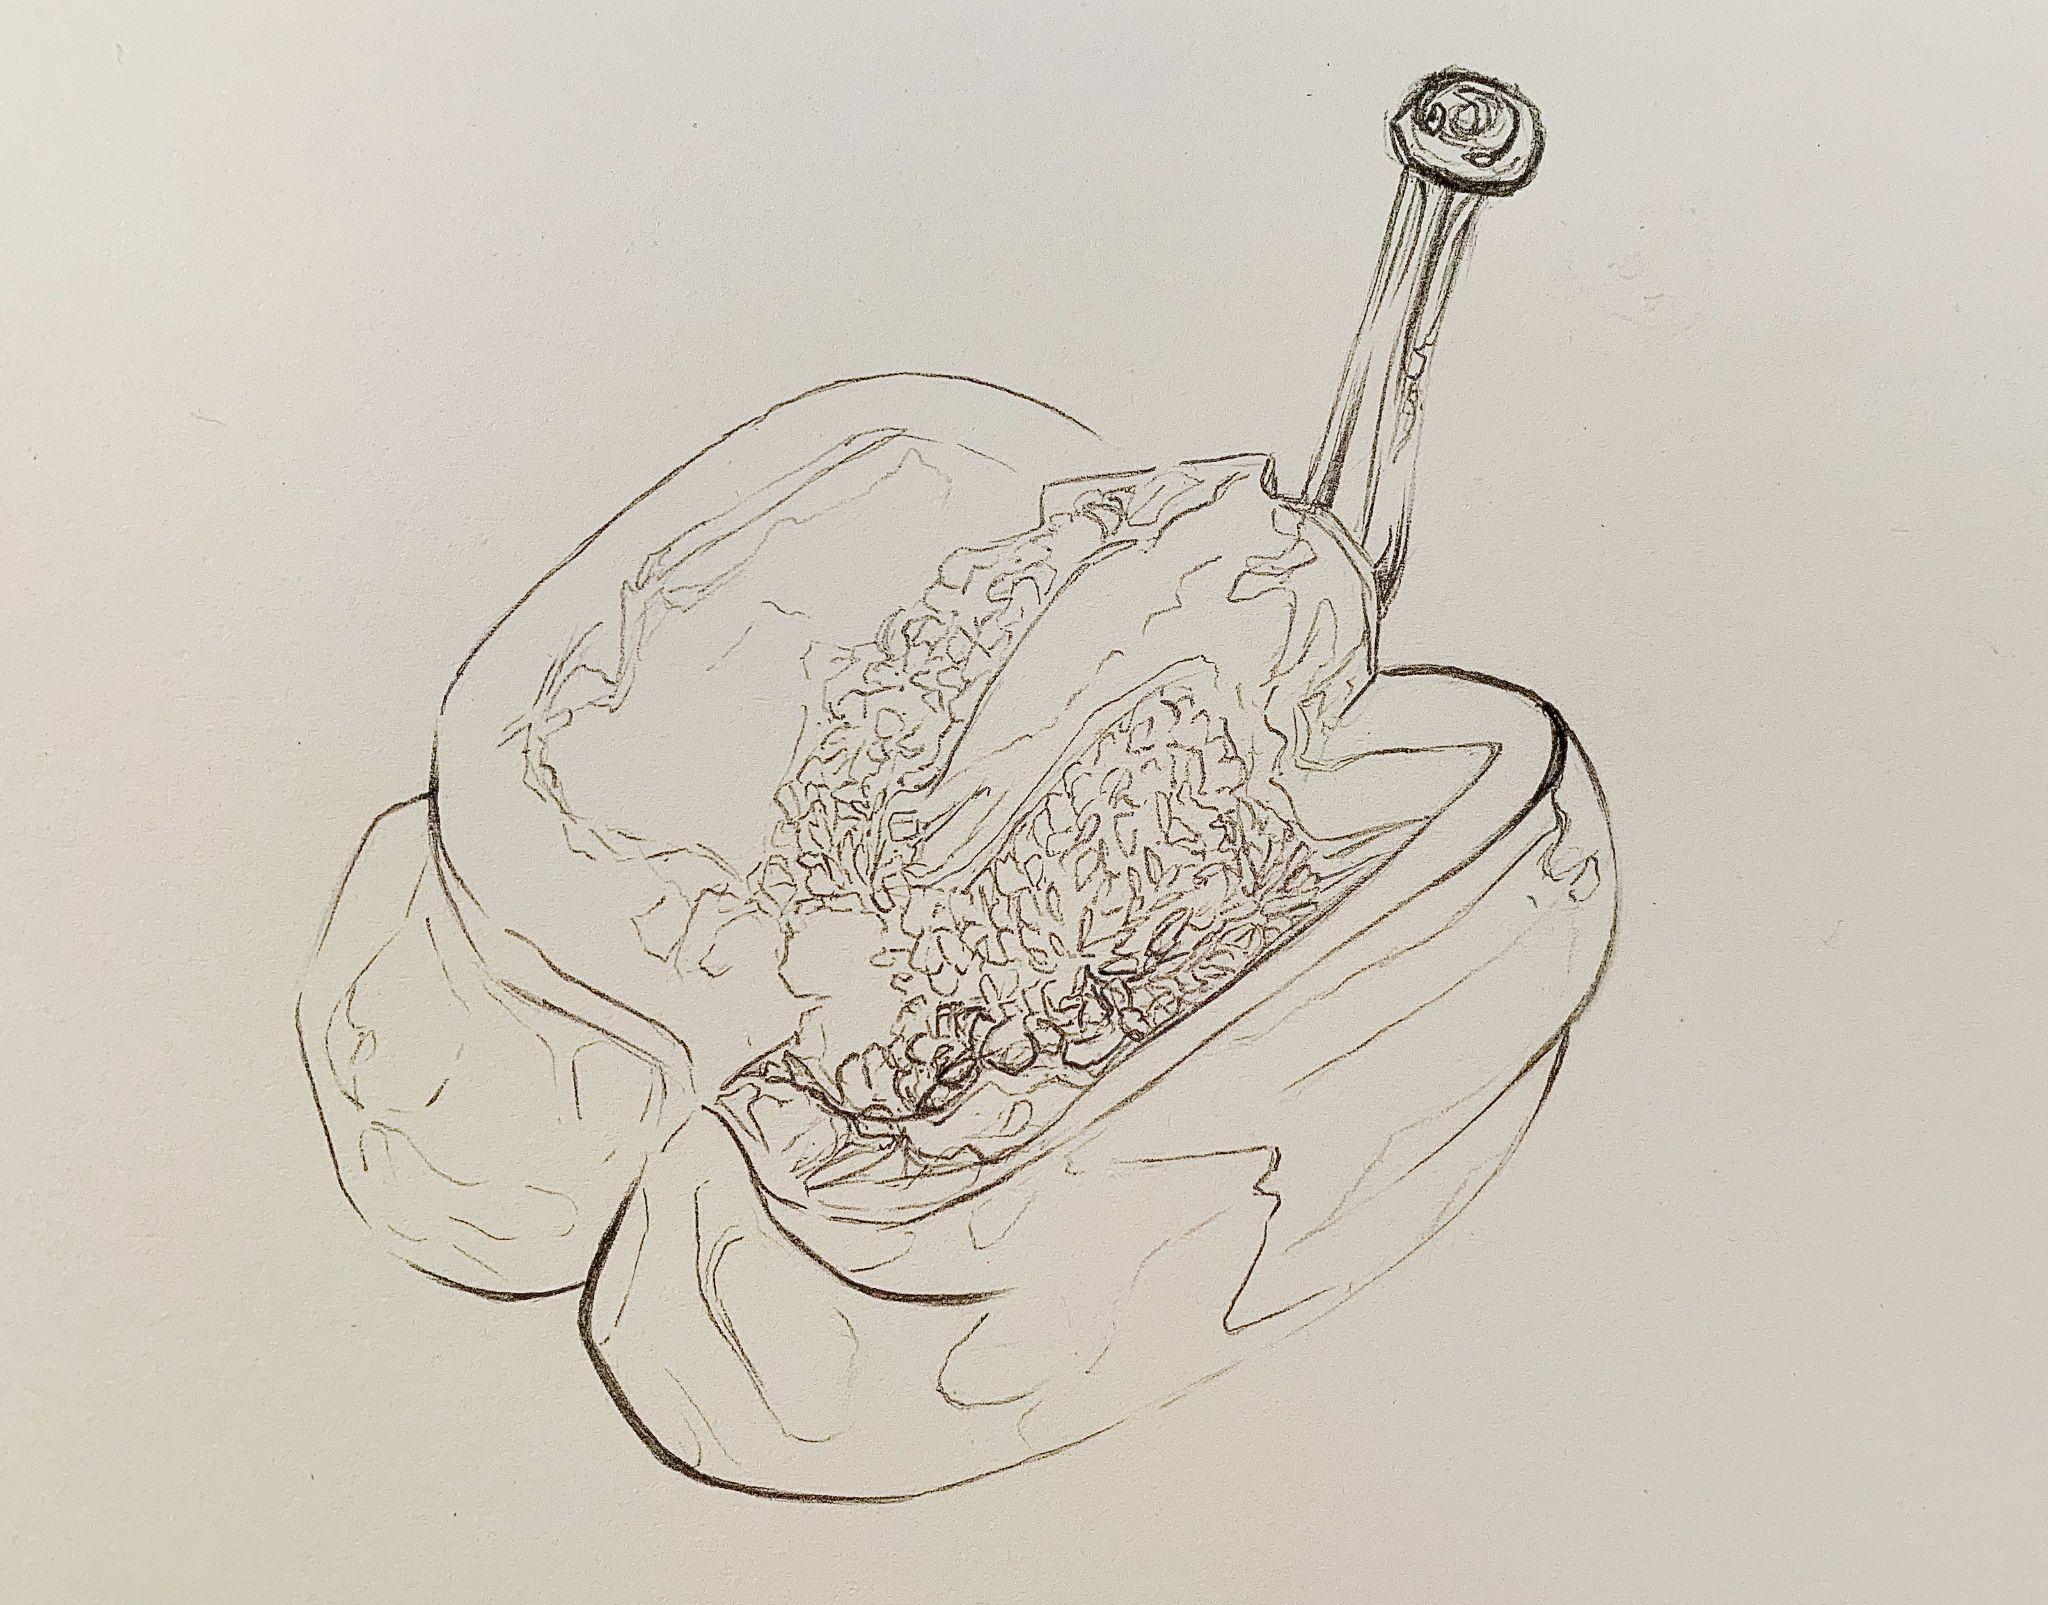

Black and White Pattern Photo on PX Here, License: CC BY-NC-SA
Variation in line weight along a single line emphasizes a drawing’s perspective. Typically, heavy lines are observed in the foreground, while lighter lines occur in the background.
Line & Feeling
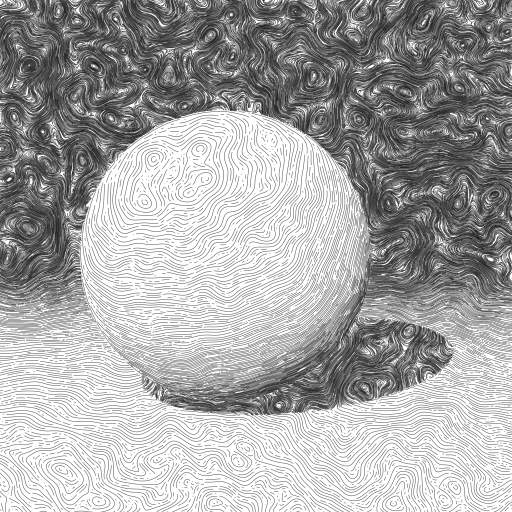
Raytraced Sphere #5 on Turtletoy, License: CC BY-NC-SA
Varying the thickness, density, value, texture, focus, direction, and/or continuity of the lines in a drawing enhances visual clarity, describes form with greater specificity, and conveys a sense of three-dimensional volume and space on a two-dimensional surface. The lines in a drawing can vary in weight (thick or thin), in value (dark or light), and in focus (distinct or blurred). Line weight becomes more important as a drawing evolves into a completed work of art.
Realistic Objects and Implied Spatial Depth
Although line weight variation is important for many kinds of drawing, its most noteworthy use in a foundation of drawing class is for creating realistically drawn objects from observation.
When drawing objects from observation, start by intently looking at a three-dimensional reference composed of a variety of objects, some closer to you and some further away. As you observe, notice where you see distinct, clean edges and where edges may appear soft or blurred. You may notice these differences correspond with proximity, how close or far away the objects are, the surface texture (is it matte or reflective), or a lack of contrast between the object and background colors. Make note of these observations. Then, record them with a drawing tool such as a pen or pencil on paper with a variety of line qualities and textures.
For instance, if you observed a black mug with a glossy surface on a white background close to you, you likely observed a distinct edge along the exterior structure of the mug and slightly lighter reflective lines on the glossy surface of the mug. In line weight, this would translate to wider, distinct, and confident contour lines to capture the exterior structure of the mug and light, thinner lines to emulate the reflective lines on the mug’s glossy surface. When drawing from observation with line, an artist is constantly looking back and forth between their reference and their drawing to determine and translate observations into a variety of line qualities and weights.
When you transition from observing to drawing, keep note of these distinctions. As you draw the objects, record your observations by varying line weight. For objects you saw with distinct, clean edges, use crisp solid lines. For objects with blurred or soft edges, use light, thin lines. The lines you create to draw an object should be a record of the observed object’s structure and edges.
Conclusion
As you practice and become more familiar with drawing, your confidence will improve as your artistic eye develops. The result will be a learned and intuitive understanding of when to vary line quality, texture, and weight throughout a drawing.
Licensing and Attributions
“Line.” Written by Briana Miyoko Stanley. License: CC BY
Line Activities
Blind Contour Line Activity
Description
Use the blind contour line drawing method to create at least two portrait drawings on separate sheets of paper. Choose two people to sit for you (friend, classmate, roommate, family member, etc.).
The blind contour line method requires you to only look at your subject, not at your drawing. If you look at the drawing tool or paper during the making process, you are cheating. Instead, you can only look at your reference. For this exercise, your reference is a person sitting across from you. Your goal will be to draw them without looking at your drawing in one continuous line. This creates the added challenge of creating the drawing with one line. The line can be straight, curved, etc., but the drawing tool cannot lift from the paper. Be patient, take your time, and prioritize observation of your reference. Relearning how to see with the intention of drawing the subject is the most important skill required for creating successful observation drawings.
Please note that the goal is not to create a drawing that looks like the subject, but rather to emphasize the importance of looking.
Project Parameters
Duration
10 minutes total (5 minutes per drawing)
Size
8.5×11” minimum
Subject
Portrait
Technique
Blind Contour Line Drawing
Required Materials
- 2 pieces of paper (8.5×11” minimum)
- Drawing tool (pencil, pen, marker, etc.)
Recommended Materials
- This technique and exercise can be created with any drawing tool and substrate
Student Learning Outcomes (SLOs)
- Apply blind contour line drawing techniques to emphasize the importance of intentionally viewing a reference.
- Do not focus on the drawing outcome. Instead, focus on how intently you can observe a reference.
- Continuous line drawing practice
Method
Reference
Two faces – classmates, friends, family members, etc.
- An alternative is to have one person sit as a reference, and to use a mirror to reference yourself as the second subject.
- Do not use a photo; instead, draw portraits from life
Drawing Process
- Set up a piece of paper and a drawing tool, such as a pencil, on a hard surface
- Then, sit directly across from your first subject
- Set a timer for three minutes
- Do not look at your paper. Instead, look at the person across from you.
- Look as if you are memorizing their face, as if you are tracing it. Consider the exterior and interior edges. How much space is between the person’s ears, eyes, nose, mouth, etc. Does your subject wear glasses, have bangs, or have short hair?
- Without looking at your drawing tool or the person in front of you, create a continuous line drawing of their face to the best of your ability.
- Attempt to fill the page with the portrait drawing
- Only look at the person across from you
- Do not lift your drawing tool from the paper
- Only use line, do not use value
- When the three minutes are up, lift your pencil and look at the drawing you created. Compare it to the subject, and if desired, share it with the subject as well.
- Then, repeat steps 1-6 with the second subject till you have two continuous line blind contour line portrait drawings.
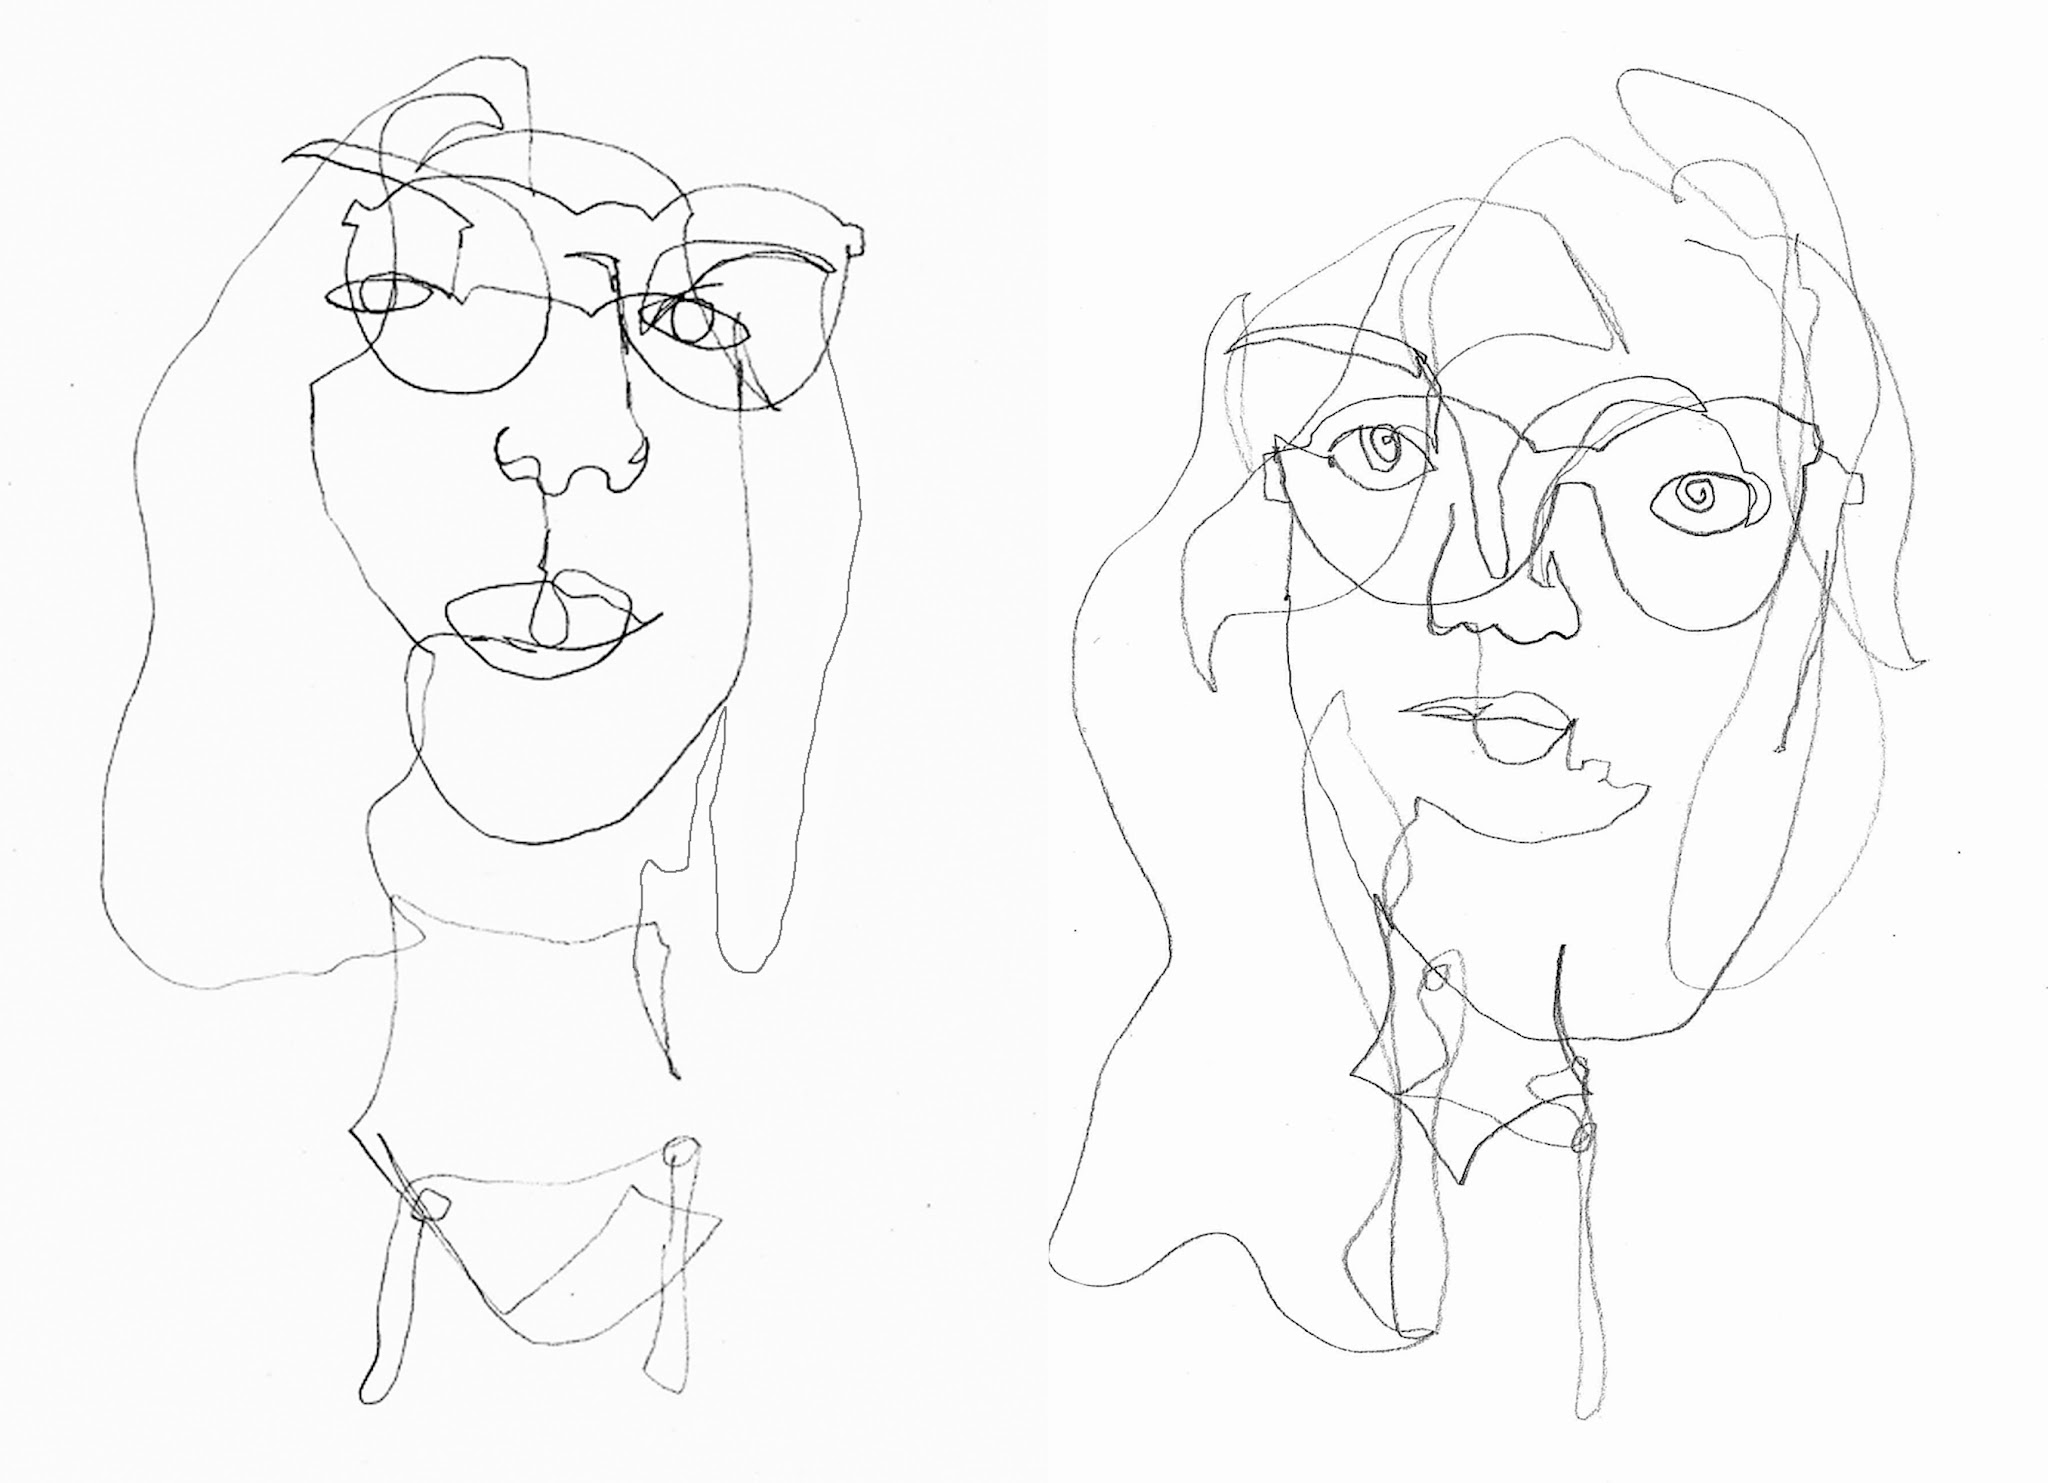
Result
The result of these continuous line blind contour drawings is a series of portraits. The drawings may not look like the referenced people. But they serve as a record of the observation process. Many beginning artists, and even experienced artists, do not observe their references enough, and the result of this exercise is to practice placing all of the importance on observation.
Modified Blind Contour Line Activity
Description
The Modified Blind Contour Line Activity is very similar to the Blind Contour Line Activity. However, instead of looking 100% of the time at the subject, you can sneak peaks at your drawing. Think of this as 90% of the time you observe the reference and 10% of the time you look at your drawing. You can also lift your pencil as you draw. As a result, you will not use a continuous line for the activity.
The subject of this drawing will also change. Instead of referencing a person’s face, you will reference your non-dominant hand. For example, if you are left-handed, you will observe your right hand, so your left hand is available to hold a pencil to draw it.
Please note that this exercise still places a great importance on observation, but since you can peak at your drawing from time to time the assumption is that your drawing will look more like, if not completely like your reference.
Project Parameters
Duration
10 minutes total
Size
8.5×11” paper size minimum
- The drawn image should be life-size or larger
Subject
Hand
Technique
Modified Contour Line Drawing
Required Materials
- 1 piece of paper (8.5×11” minimum)
- Drawing tool (pencil, pen, marker, etc.)
Recommended Materials
- This technique and exercise can be created with any drawing tool and substrate
Student Learning Outcomes
- Apply modified blind contour line drawing techniques to emphasize the importance of intentionally viewing a reference.
- Do not focus on the drawing outcome. Instead, focus on how intently you can observe a reference.
Method
Reference
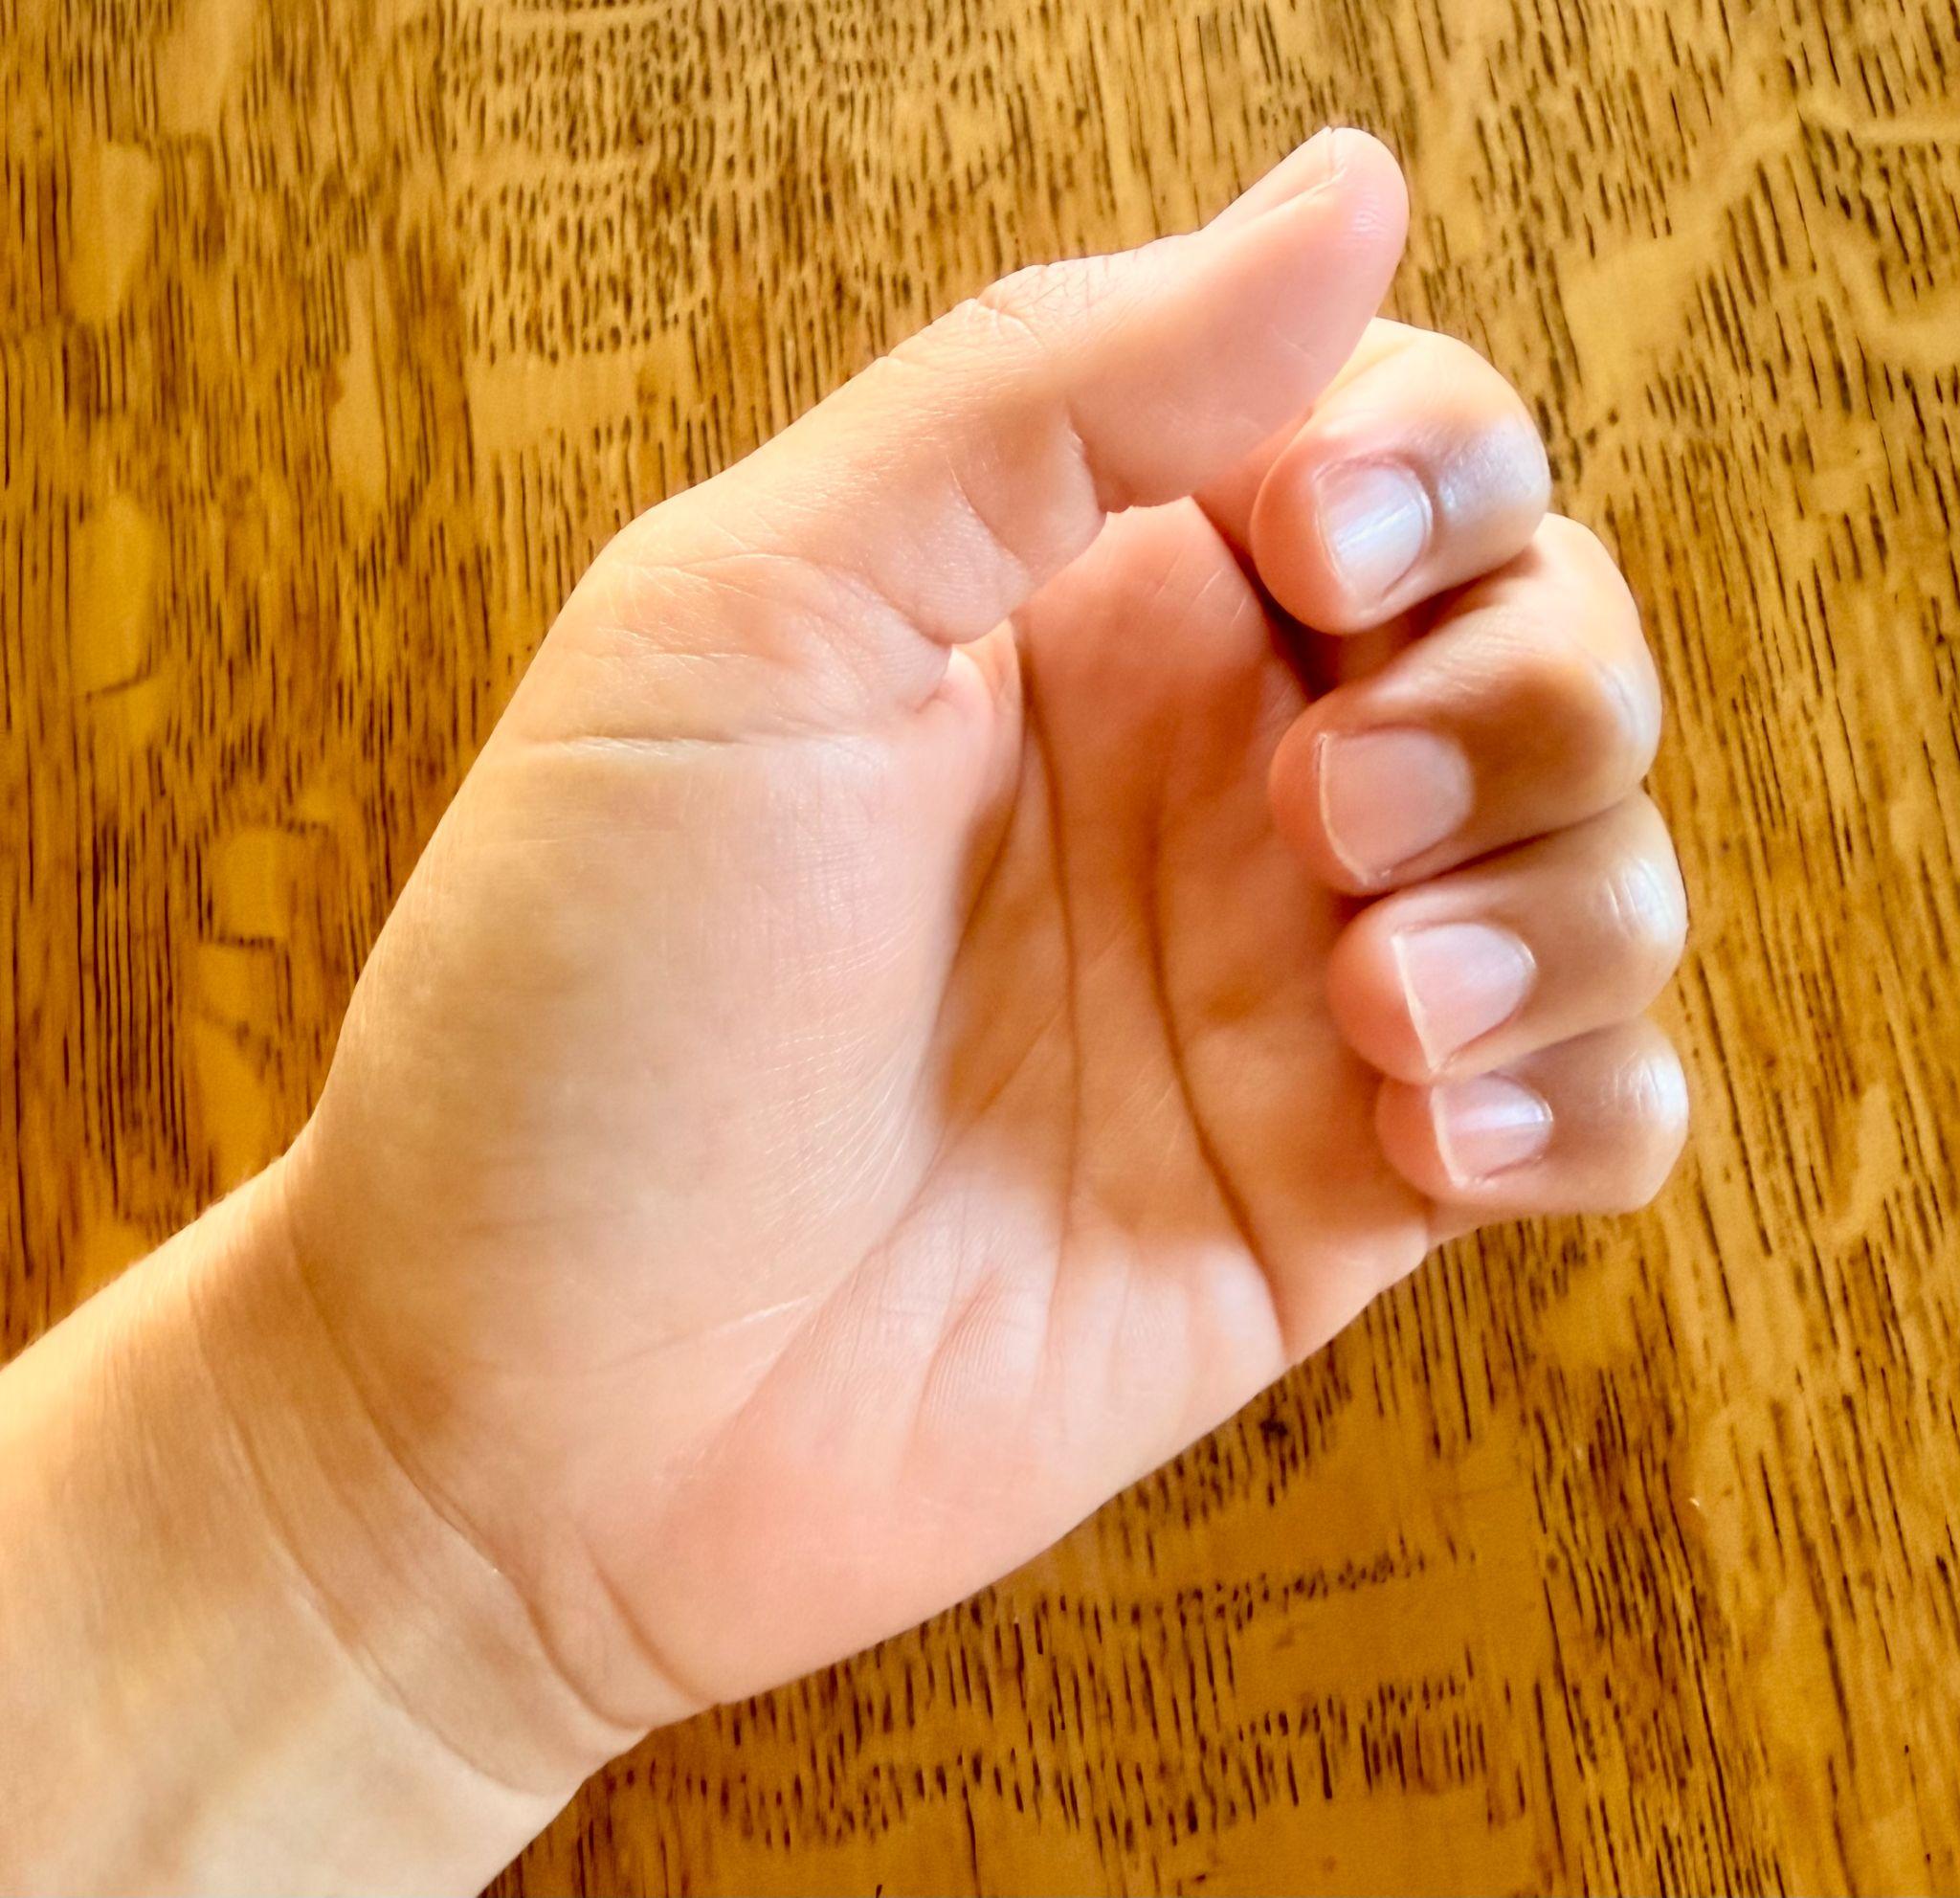
1 hand from direct observation – use your non-dominant hand
- Pose your hand in a position you can easily maintain for at least ten minutes. For example, a loose fist often works well.
- Do not use a photo
Drawing Process
- Set up a piece of paper and a drawing tool, such as a pencil, on a hard surface
- Then, position your non-dominant hand in an easy-to-see location in its 10-minute pose.
- Set a timer for ten minutes
- Look intently at your non-dominant hand
- Consider what parts of your hand occupy what space. Notice the location relationships between the different fingers, the thumb, palm, wrist, etc. What is higher, lower, more to the left, more to the right, etc.?
- Take these observed locations into consideration as you start to draw.
- Look at your non-dominant hand for approximately 90% of the time.
- Sneak peeks at your drawing to help guide the placement of lines
- Work from the outside in. Then, draw from the general to the specifically observed forms.
- Avoid drawing like a printer, working systematically from one little area to another. This approach often leads to proportional mistakes and inevitably means having to restart the drawing.
- As you develop the drawing, record everything you see from the structural edges to your fingernails, creases in your palms, and even wrinkles. All these details help capture the true essence of your hand. This visual information is what helps the drawing grow into a realistic two-dimensional portrayal of the three-dimensional reference.
- When the ten minutes are up, compare the drawing you created to your non-dominant hand. Note the similarities and differences between the two. Adjust as needed or simply acknowledge these notes to keep in mind for the next time you draw from observation.
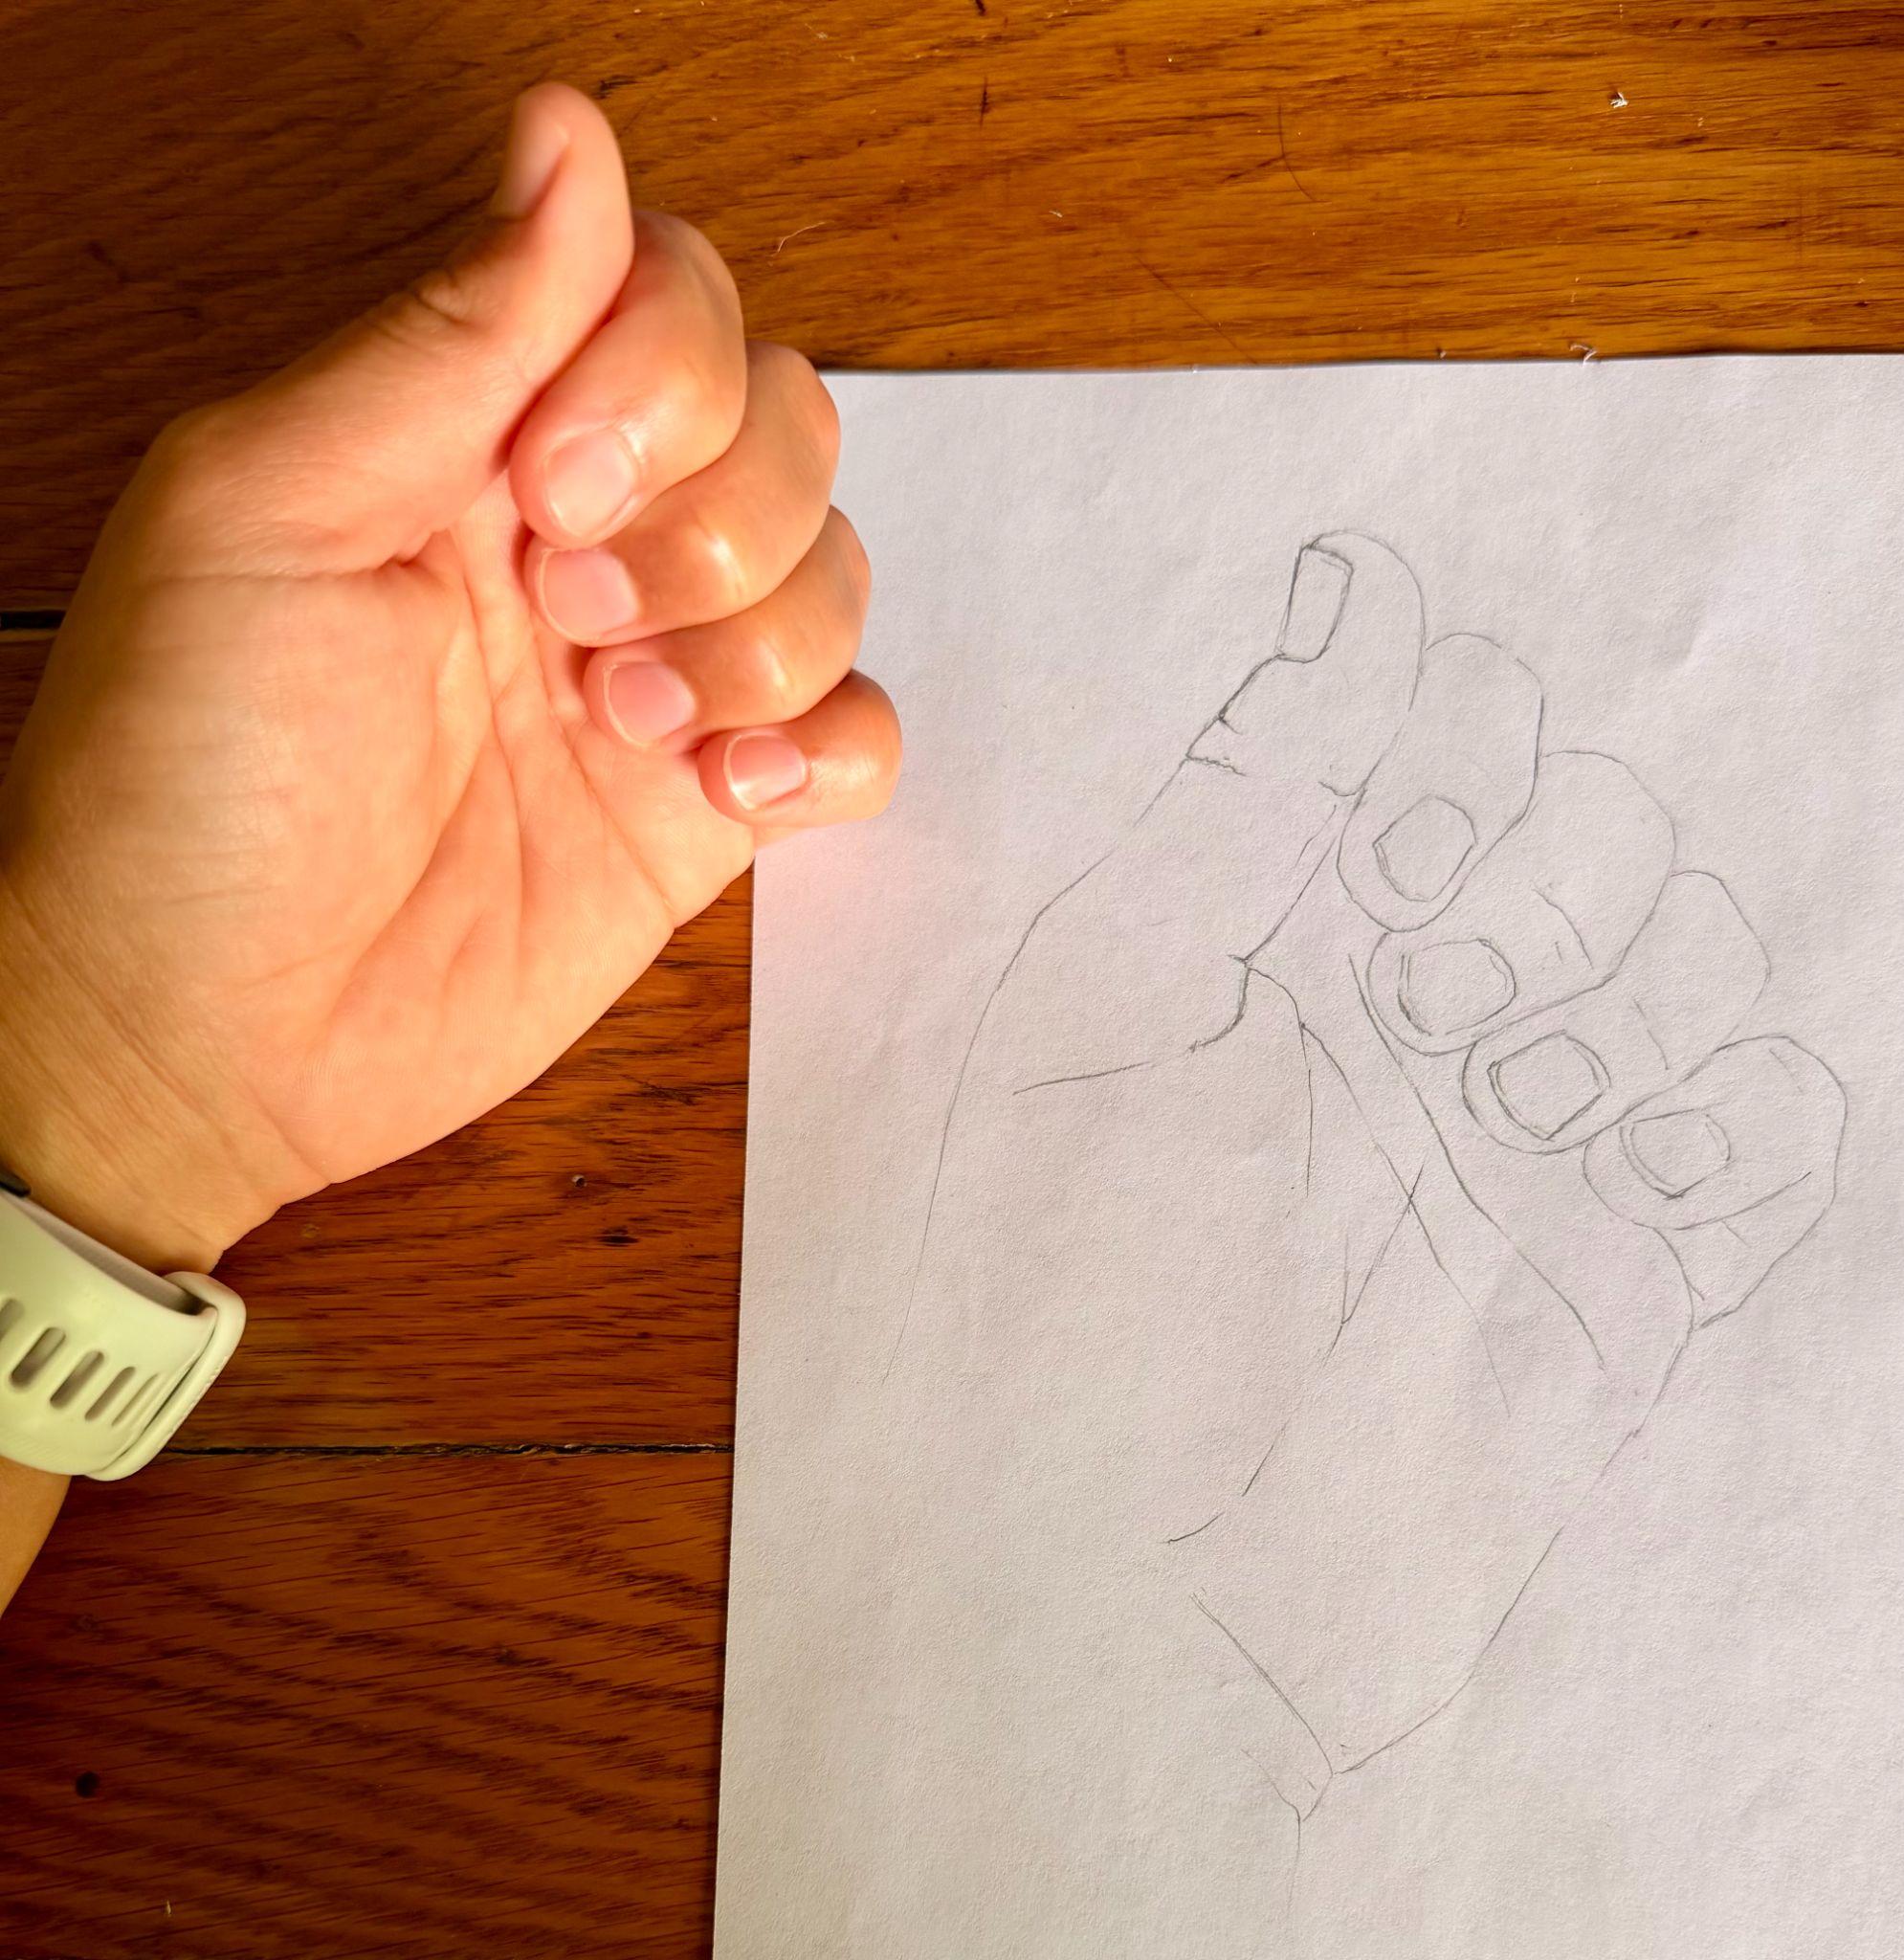
Result
The result of the modified contour line activity is one life-size or larger drawing of your non-dominant hand. If you truly followed the 90% looking at the reference, 10% looking at the drawing ratio, your drawing may not resemble your hand as well as you’d like. However, even if this is the case, you still successfully completed the exercise, since the goal is to practice the importance of observation. And the more you practice, the more accurate and realistic your drawings will become.
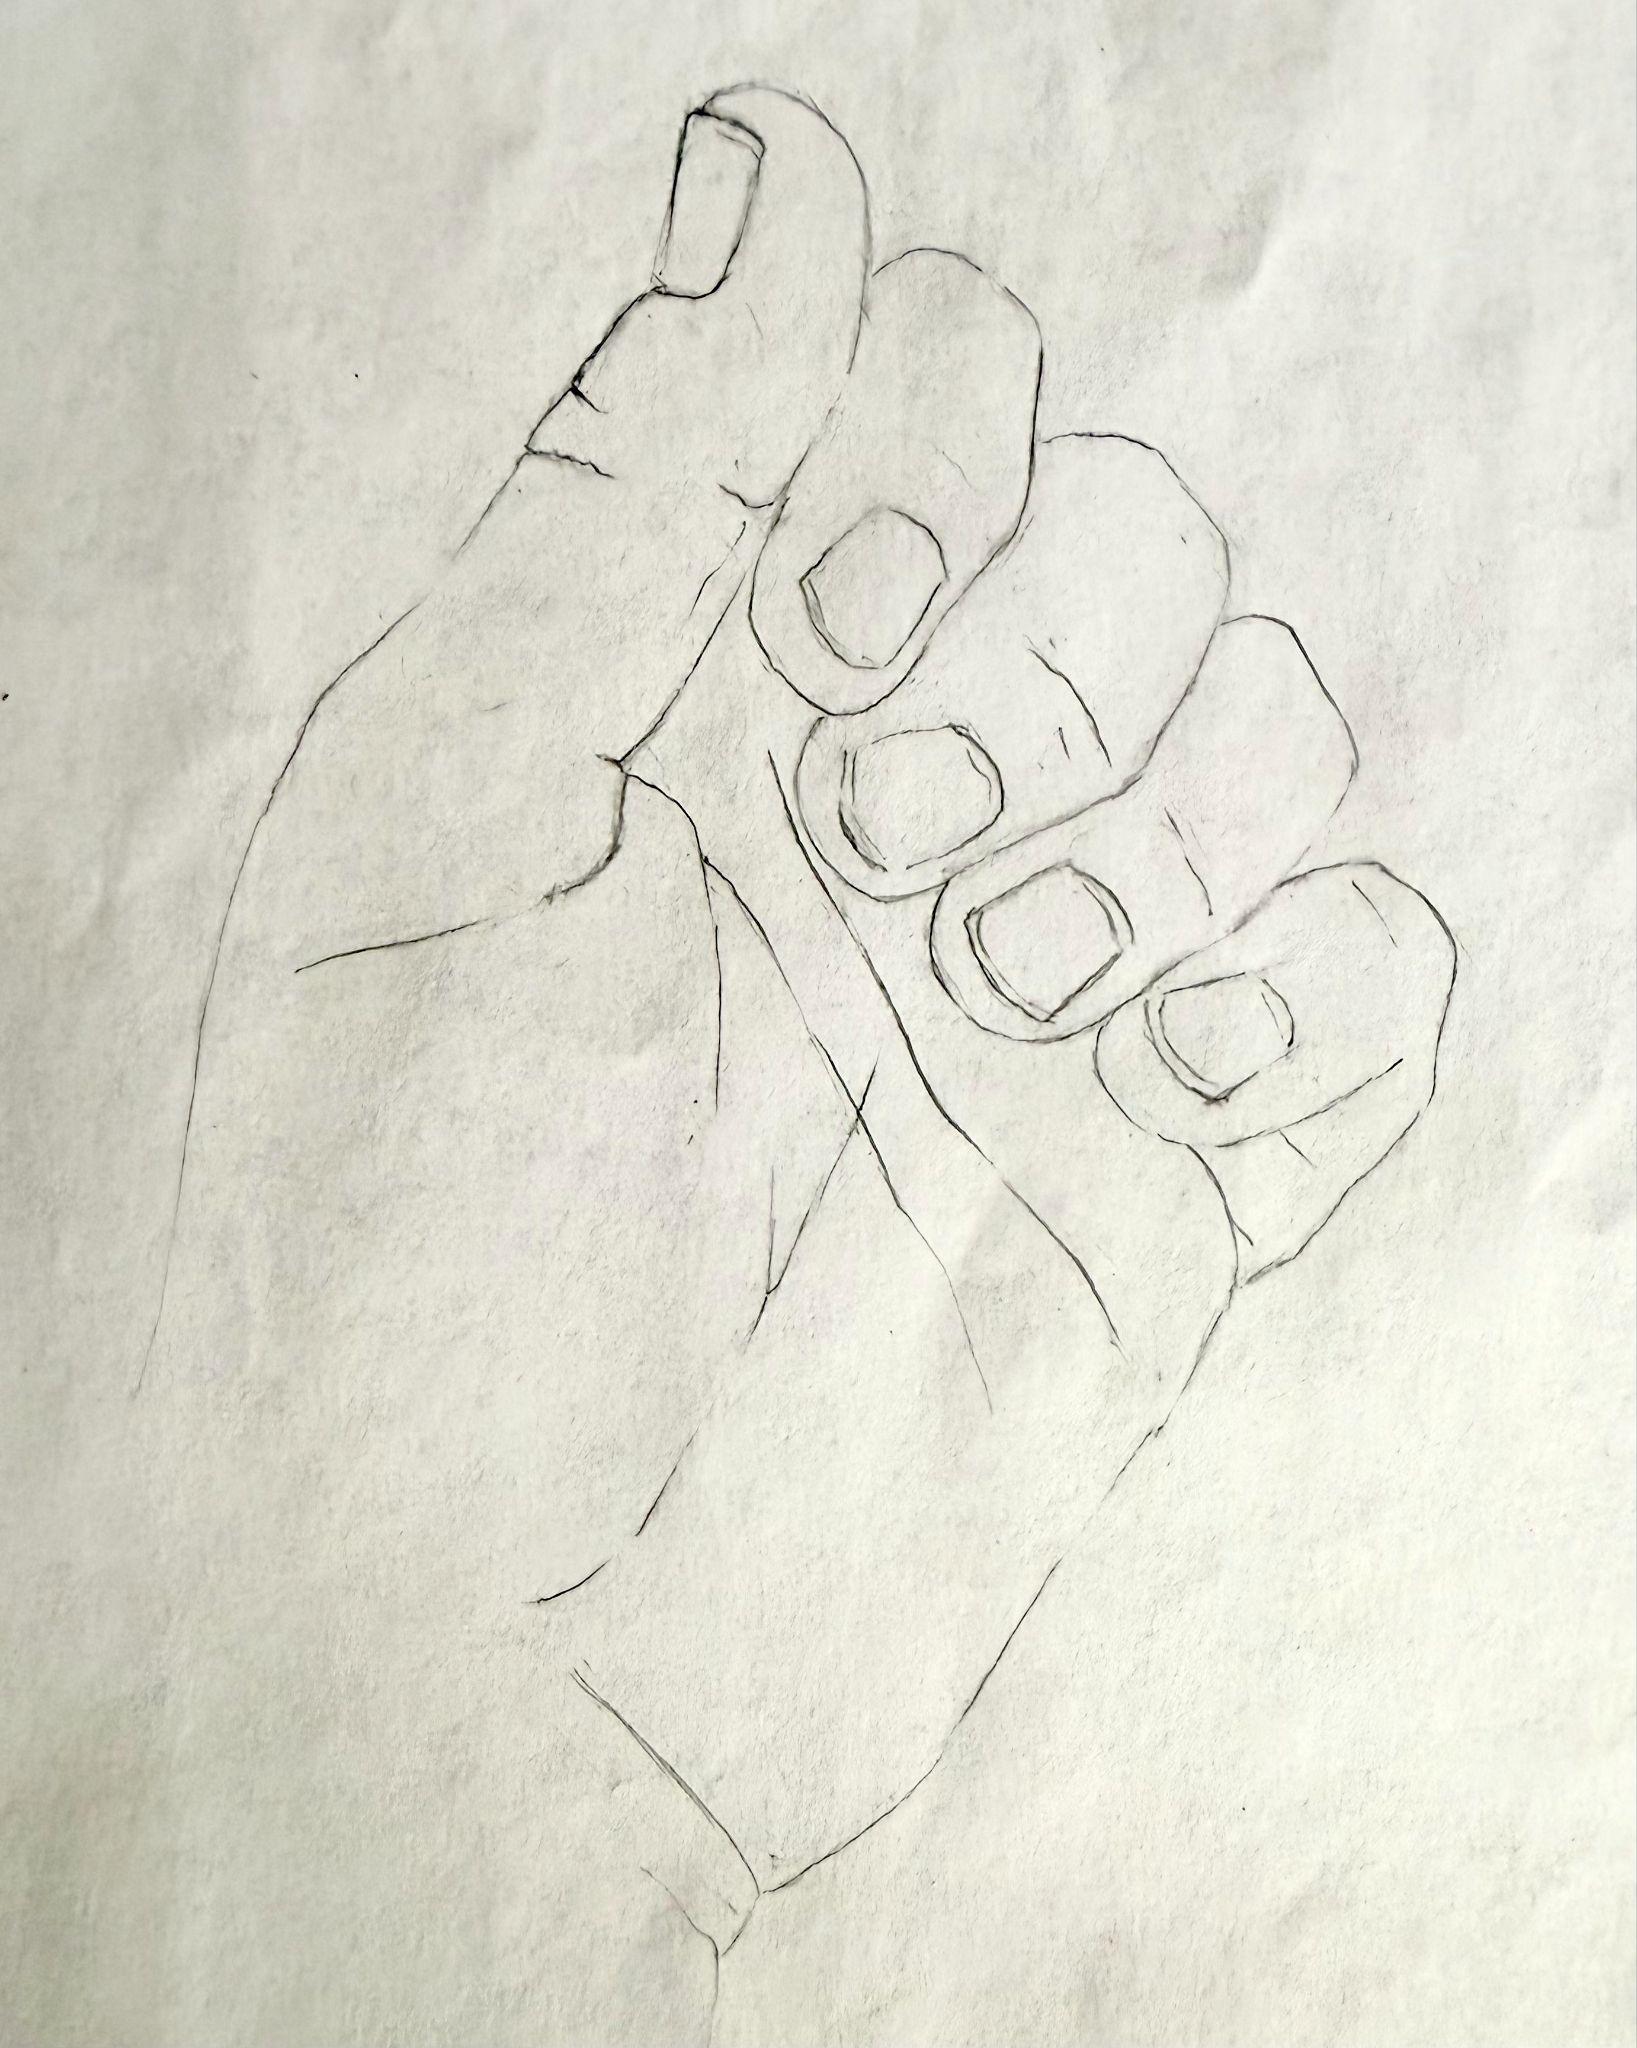
Licensing and Attributions
“Line Activities.” Written by Briana Miyoko Stanley. License: CC BY
- This is a popular rephrasing of Paul Klee’s musings on the qualities of line in his Pedagogical Sketchbook. Paul Klee, Pedagogical Sketchbook, trans. Sibyl Moholy-Nagy (London: Faber and Faber, 1953). ↵
- American Psychological Association, s.v. "Gestalt Principles of Organization," in APA Dictionary of Psychology, accessed July 2, 2026, https://dictionary.apa.org/gestalt-principles-of-organization ↵