
Gesture
Beginning the drawing process with feeling
Introduction
What is a Gesture Drawing?
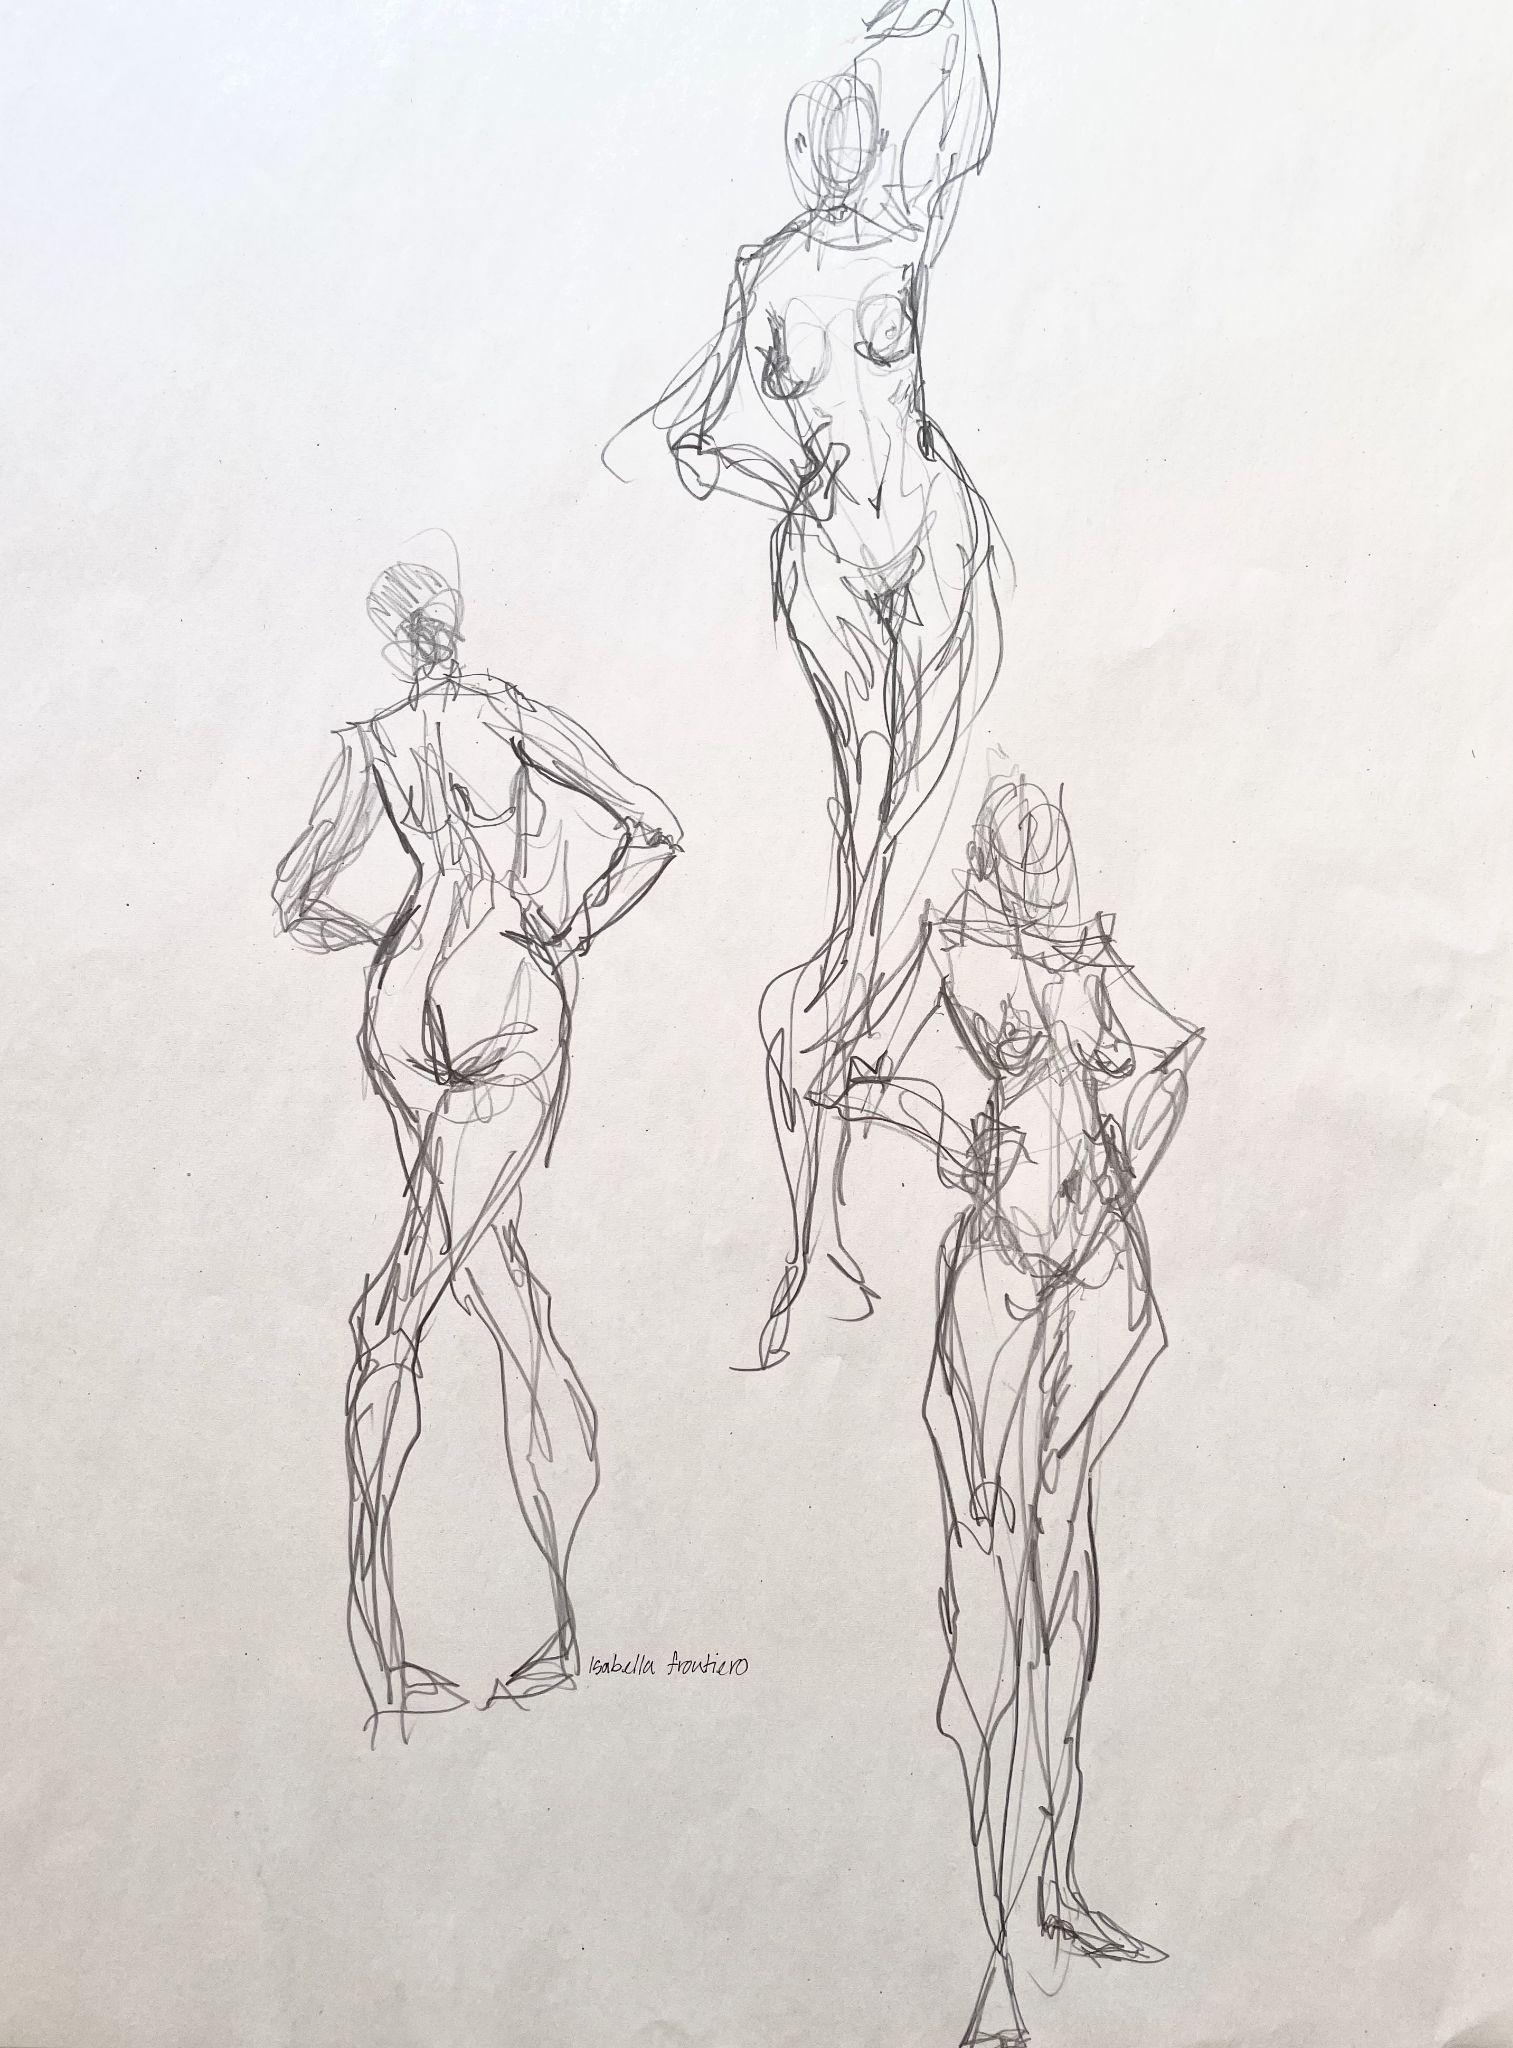
It might be easier to begin by explaining what a gesture is not. A gesture drawing is not a contour drawing or an outline. A contour drawing is done slowly, methodically, and with intention to describe the subject matter accurately and efficiently in a simple linear drawing, focusing on the edges of the subject. However, a gesture is done rapidly and energetically, usually in an almost continuous line, with the pencil rarely lifting off the paper. It can be described as looking more like a scribble, but it is in no way a mindless act of mark-making. It is a way to describe the whole form or subject matter and get it down on paper in a loose and fast way that does not prioritize being realistic or particularly accurate. Gestures can look almost messy and nonsensical or extremely expressive and dynamic.
Uses of Gesture Drawing
Most of the time, gesture is used when drawing the human figure and in life-drawing. Gestures are also used as a warm-up exercise and a way to loosen up at the beginning of a drawing session, to capture movement, or for quick studies. However, the gesture can and should be used in most drawing applications to begin the drawing process. Use it to work out composition or subject-matter placement and make considerations about scale and proportions within the picture plane. It is a quick way to estimate the size of one object relative to another. A gesture is also a way of using line to describe the feel or sense of the subject matter rather than a precise likeness. Lastly, gesture is a great way to develop and practice line quality and line variation. Thick, thin, light, and delicate or heavy and bold, angular and aggressive, or looping and lyrical, and endless combinations of all of these.
Master Artist: Jean-Michel Basquiat and Gesture
Art historians define gesture in two ways: 1) the captured movement of a figure’s body and 2) the visible marks made by the artist. In the second definition, gesture is associated with the practice of preparatory sketching and often categorized as “unfinished” in traditional Western art. Beginning in the 17th century, artists began to challenge the negative connotations associated with gesture. Gestures could instead communicate emotion, presence, and vitality. Over the next several hundred years, gesture moved to the forefront of art-making. Gesture changed from preparatory sketches into formal artwork. The 20th-century artist Jean-Michel Basquiat embraced gesture in his finished works of art. Works like Horn Players actively use gestures as a visual effect. Working as a graffiti artist in the late 1970s, Basquiat operated under a pseudonym, SAMO, while spray-painting city walls in New York City. In the early 1980s, his work captured the attention of the New York Fine Art scene, and Basquiat brought the aesthetics of street art into the museum space. In Horn Players, Basquiat combined influences from Jazz legends Charlie Parker and Dizzy Gillespie with references from art history, including the triptych format. Throughout the overall composition, Basquiat used a variety of gestural markings. From thick white strokes of paint obscuring forms to narrow blue lines crossing out words, the marks of gesture allow the viewer to see the movement of Basquiat’s hand. Basquiat’s gestural markings reveal his presence across the canvas, and we, as the viewer, can sense his presence and vitality in the act of creating.
“Master Artist: Jean-Michel Basquiat and Gesture.” Written by Chelsea Wright. License: CC BY
Types of Gesture
Line Gesture
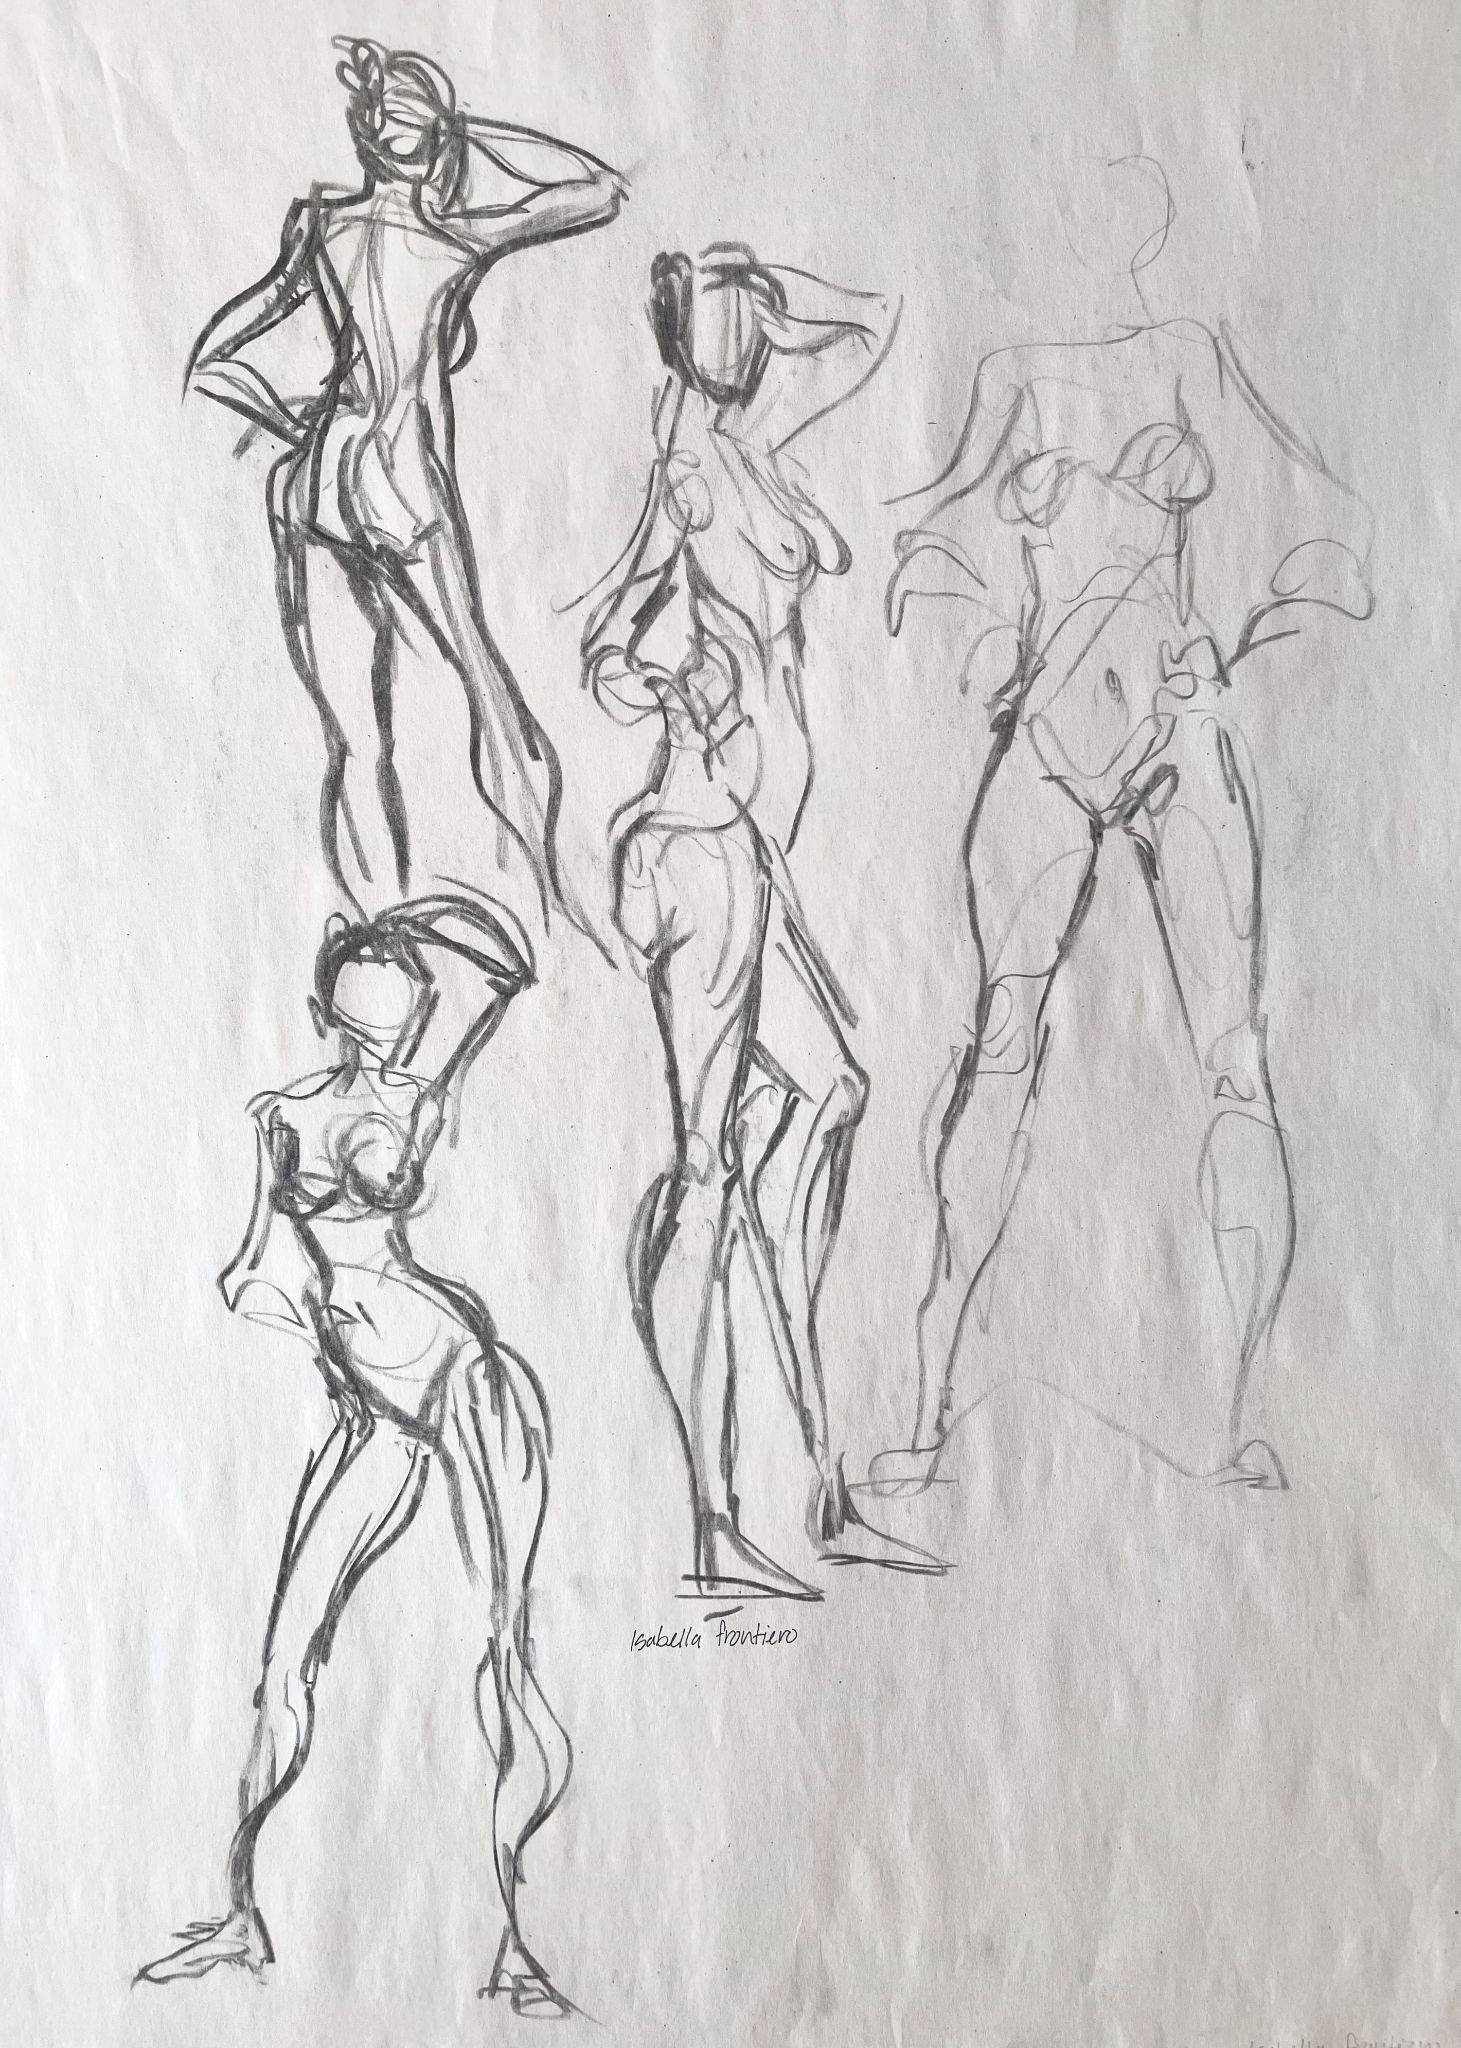
Most gesture drawings are composed of lines. Line gestures refer to the use of rapid, fluid, and varied mark-making to loosely describe a form. It can be a short 15- to 30-second gesture made up of just a few lines describing the bare essentials of an object (size, basic shape, and orientation), or it can be slightly longer, comprising a range of mark-making, describing form, and limited details.
Mass Gesture
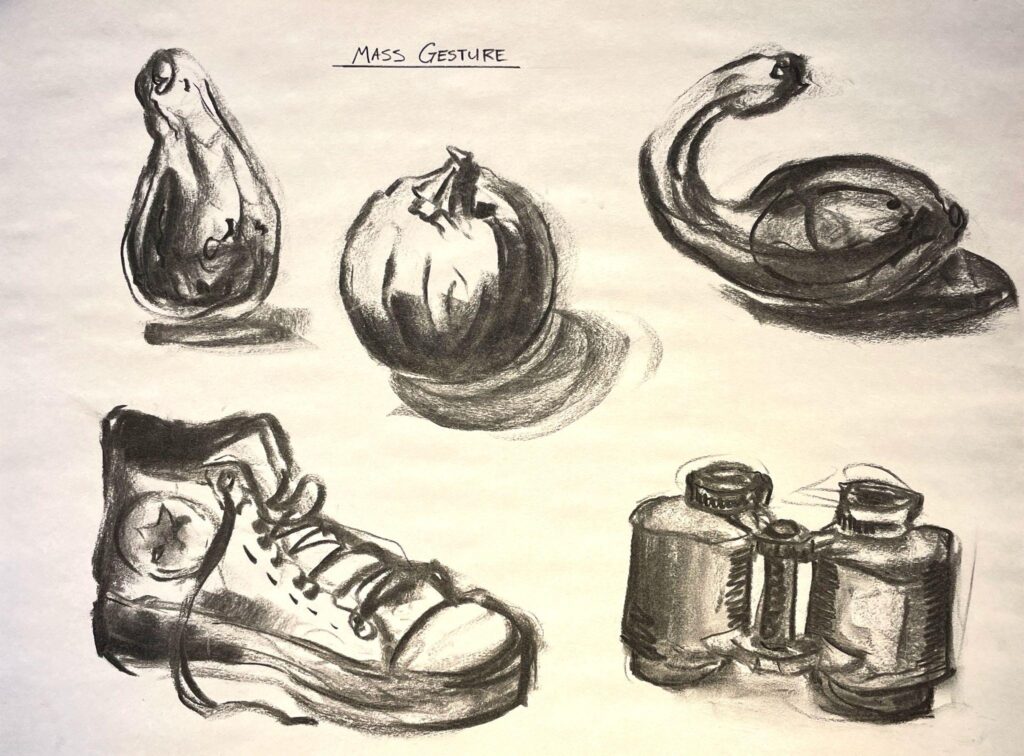
Mass gesture focuses on form and value shapes. Using a small piece of vine charcoal or a graphite stick, the artist uses the side of the drawing tool, instead of the tip, to block in broad strokes of tonal value to describe mass and dimension, rather than line and contour.
Scribble Gesture
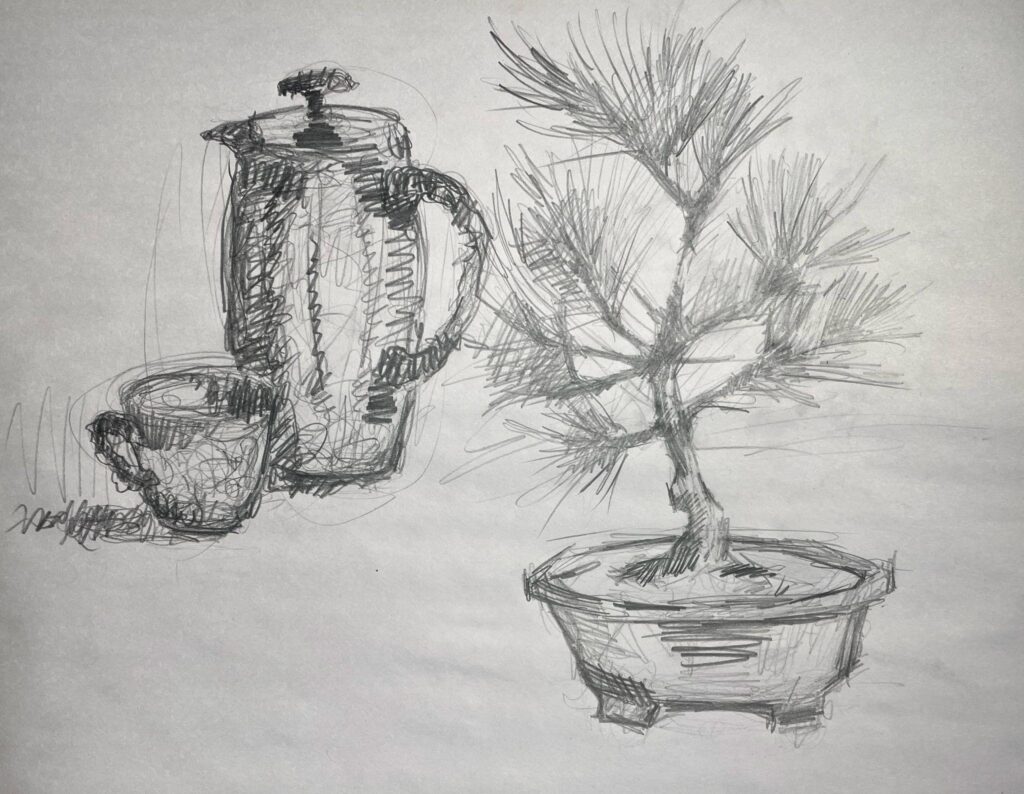
A scribble gesture creates a dense web of varied, looping, and scribbled mark-making, often in a continuous line, to explore the subject matter in more detail, with a focus on volume and dimension. A scribble gesture can involve a longer or more sustained use of the technique.
Sustained Gesture
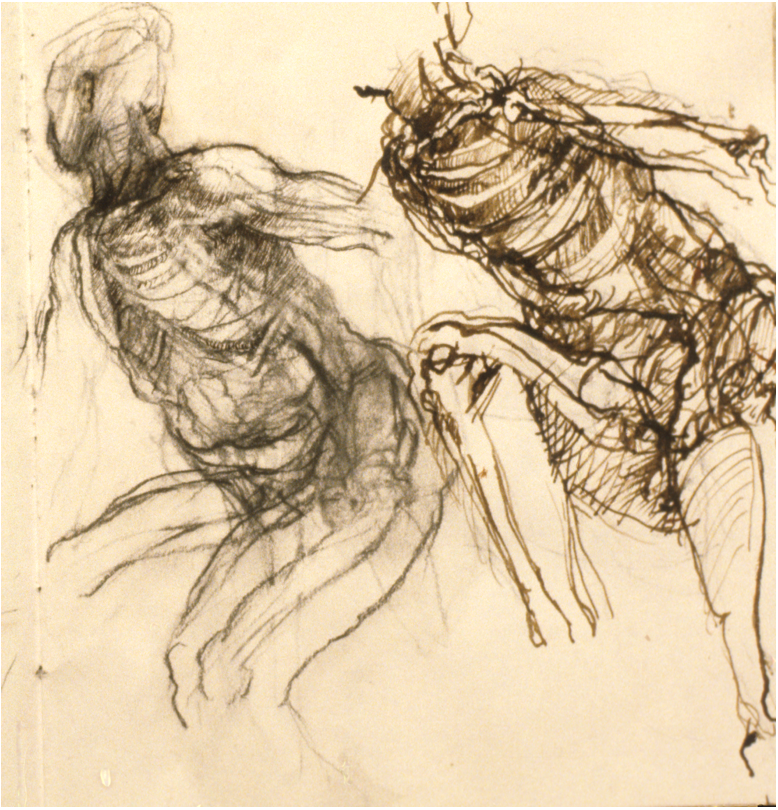
A sustained gesture is similar to a longer scribble gesture, but the difference is an artist can spend 5 to 10 minutes or longer on the drawing in a much more involved, detailed, and observed exploration of the subject matter. Beginning with a rapid line gesture, continuing with details, adjustments, and corrections, and then possibly finishing with a contour line, to better understand a more complex object or figure.
How to Gesture Draw?
First, and most important, is how we hold our pencil when we are gesture drawing. This is not like handwriting. Try not to hold your pencil with a tightly clenched grip. Practice various ways of holding the pencil. Loosen your grip, hold the pencil further away from the point, and grip the pencil differently than you normally hold it. A lighter, looser grip on the pencil will assist in achieving a more varied line and give the added benefit of being able to draw longer and with less hand fatigue.
Second, avoid drawing around the form like you would with contour drawing. Don’t follow the edges or an outline; instead, draw through the object or form. It can help to start your gesture in the center of the form and work outward. Left and right, up and down, around, continuously moving your pencil. It is as if your pencil is roaming the paper surface, discovering the subject matter as you go.
The third consideration for gesture drawing is timing. Work quickly and intuitively, inviting a loss of control with your mark-making. A gesture is more about the feel of the form than the actual likeness. Vary the weight of the pencil to produce light and dark, thick and thin lines. Think about the rhythm of your line. Draw the whole form as quickly as possible, and do not focus on details or get stuck only working on a portion of the object. Keep your pencil moving. At first, gesture drawing can feel awkward and clunky, but the more you do it, the more effortless, enjoyable, and even meditative it becomes. Your drawing results may not look like anything objective, but it does not matter. It is about the action of this process. It can be helpful to time your gesture drawings. Using a timer or a stopwatch, begin with very short 15-second gestures. Get the whole object or figure down as quickly as possible. Gradually increase the time with each drawing. Two minutes is a typical length for a gesture drawing, sometimes five or ten minutes, depending on the complexity of the subject matter.
Lastly, avoid the bad habit of always repeating the same mark or stroke over and over again. Sometimes a drawing looks like an endlessly repeated series of loopy lines in the shape of something. This is not a gesture. Gesturing may look like a messy scribble or a child’s drawing, but it is not a mindless act and should be approached with intention and focused observation. With a lot of practice and many, many gesture drawings, you will develop something like your own personal and diverse vocabulary of mark-making to create successful and enjoyable gestures to further your drawing abilities.
Conclusion
Gesture drawing may feel awkward at first. Treat it as a warm-up exercise, similar to how you might perform gentile stretches before physical activities. With time and practice, your improvements in hand-eye coordination, line quality, and mark-making will translate to more confident, dynamic, and successful drawings.
Licensing and Attributions
“Gesture Drawing.” Written by Stephen P. Curry. License: CC BY
Gesture Drawing Activities
1: Introduction to Gestured Line
Description
This first gesture project is intended to familiarize you with the use of gesture as an expressive and functional step in the drawing process. It is also an excellent warm-up exercise and great for building confidence and expression with line and mark-making. It begins with very short 15-second gestures and gradually increases the time while experimenting with the different types of gestures, as well as practicing and developing drawing tool skills and grip variations.
Activity Parameters
Duration
1 – 2 hours.
Size
18” x 24” Newsprint
Subject
A selection of ten or more different objects. (For example, shoes, hats, hands & feet, a potted plant, or a flower arrangement. Almost anything can be gestured.)
Technique
Direct observation – draw the still-life objects as seen. Line, mass, and scribble gesture.
Required Materials
- Drawing board
- Newsprint or Drawing Paper (18 x 24”) – 3 or more sheets.
- Graphite pencil (2H or HB)
- Vine charcoal
Recommended Materials
- Charcoal pencils (HB and 2B)
- Compressed charcoal
- Workable spray fixative
Student Learning Outcomes (SLOs)
- Exercise hand-eye coordination and break habitual ways of holding drawing tools and implements. This encourages more fluid movement and opens up new possibilities in your drawing technique by shifting you out of your comfort zone.
- Develop a complex vocabulary of mark-making and line variations.
- Avoid always starting drawings with a contour or outline. Instead, allow the gesture and movement to guide the form, giving your drawings more life, rhythm, and spontaneity.
- Create unpredictable marks and “happy accidents” that lead to new visual discoveries. Embracing mistakes or unplanned outcomes adds unexpected energy, personal character, and excitement to your drawing.
- Use gestures to start or even complete artwork. This is a very efficient and dynamic way of beginning the drawing process.
Method
Reference
Choose at least ten references. For example, your hand in various poses, plants, pets, the human form, simple or complex objects. Almost any object can be used to practice gesture drawing.
Drawing Process
Part A
- Attach at least one sheet of 18 x 24” newsprint to a drawing board. Then, use a 2H or HB pencil to begin drawing short, quick 15-second gestures of the reference.
- Use a timer or stopwatch.
- Try to get the whole form down on paper as quickly as possible.
- Use the same 18 x 24” newsprint, but this time gradually increase the time allowed for each gesture to take: 30 seconds, 1 minute, 1.5 minutes, and ultimately 2 minutes to complete. In total, create five to ten gesture drawings on the newsprint.
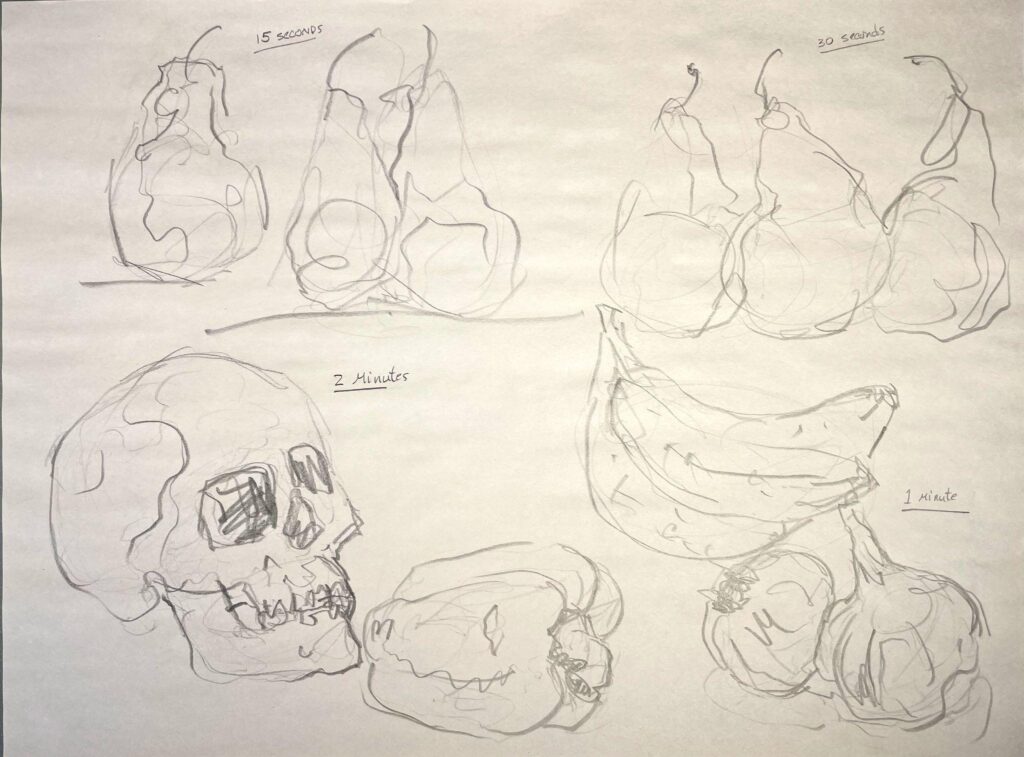
- Fit as many gestures on the newsprint sheet as possible. It is okay if they touch or overlap. If needed, use the backside of the newsprint.
- Vary your line as much as possible: light to dark, thick to thin, light pressure to heavy pressure.
- Practice hand-eye coordination: quickly look/draw/look/draw. Synchronize your hand movement with eye movement.
- Avoid repetitive strokes. Do not repeat the same movement or pencil stroke over and over. Mix up and experiment with your mark-making.
- Draw with rhythm. Similar to music, think about a beat. Vary the speed and pace of the mark-making with fast and slow movements instead of one constant and repetitive movement.
- Draw through and inside the forms, not around them. This should not look like a contour drawing.
- Draw with energy, expression, and inventiveness.
Part B
- Attach another sheet of 18 x 24” newsprint to the drawing board. Then, switch the pencil to your non-dominant hand.
- Try four or five 1-minute gestures with your non-dominant hand.
- Notice the awkwardness and difference in line and mark-making.
- Switch back to your dominant hand to create at least two more 1-minute gesture drawings. Try to maintain the feel and line quality achieved with the non-dominant hand. If needed, use the backside of the newsprint.
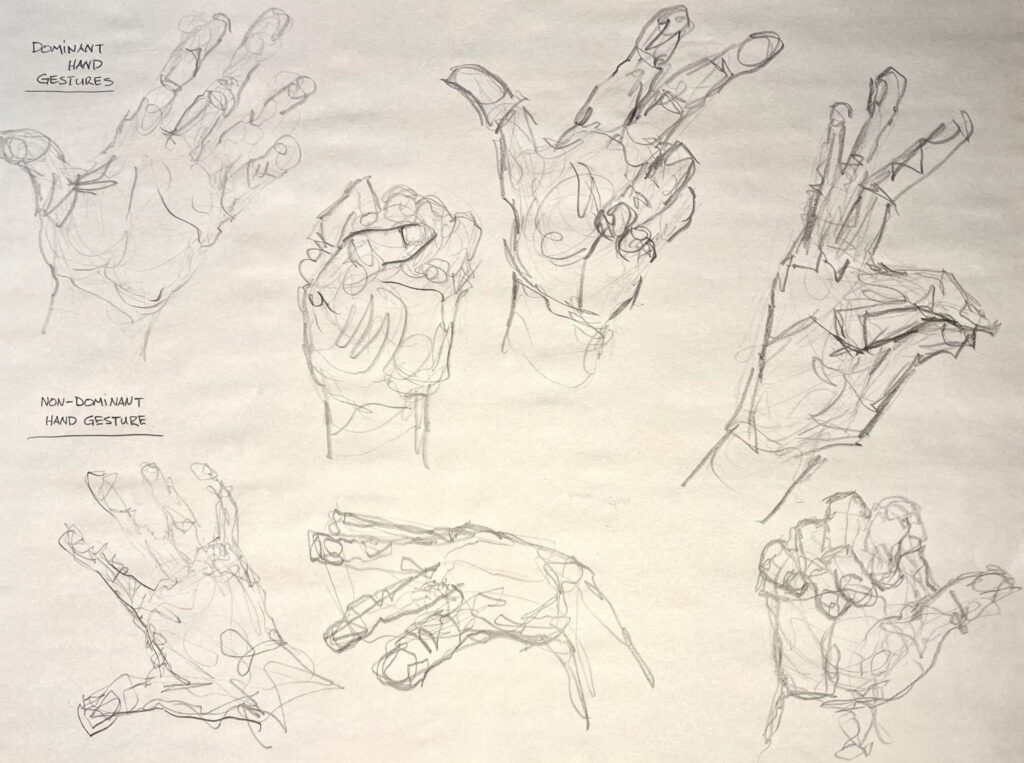
- In total, complete at least 12 gestures on one or more sheets of newsprint.
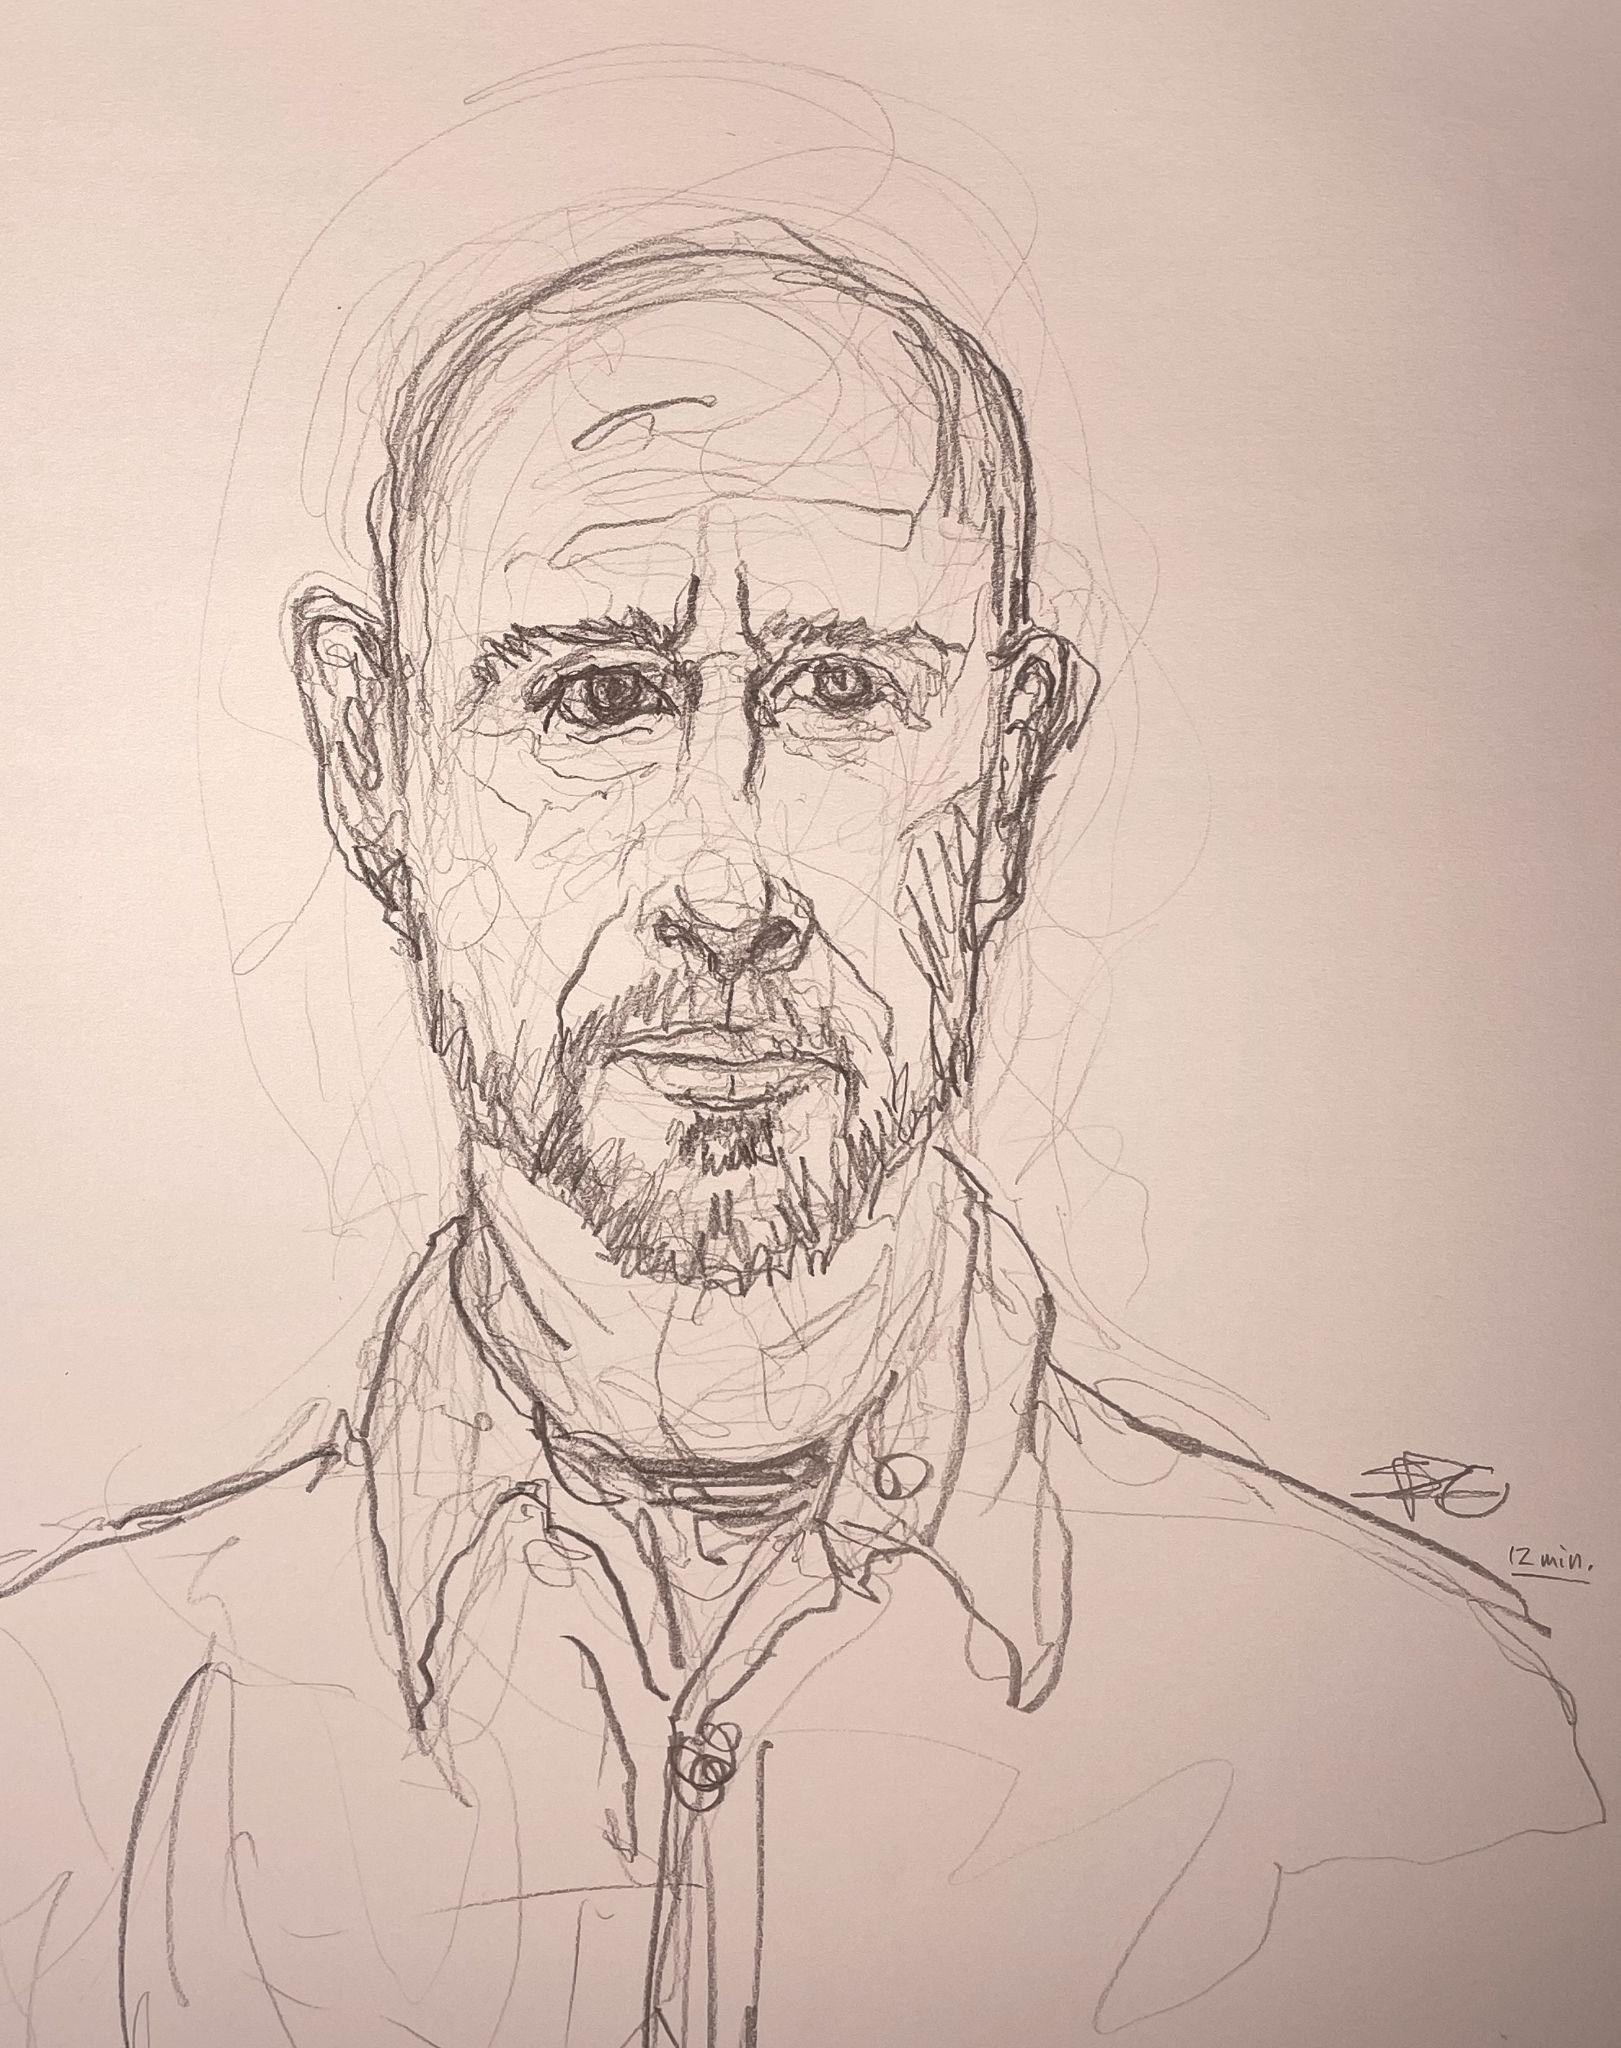
- On a clean sheet of newsprint, draw a large sustained or long gesture portrait on its own. Use a mirror or a live model (classmate, friend, or family member). This gesture should take 5 to 15 minutes and fill most of the newsprint sheet. The result will be a dense, almost web-like mass of lines and marks.
- Keep the pencil moving and in continuous contact with the paper.
- Do not fixate on individual features or details.
- Focus on large general shapes and the feel of the portrait rather than exact likeness.
- Keep the pencil moving and in continuous contact with the paper.
- Do not fixate on individual features or details.
- Focus on large general shapes and the feel of the portrait rather than exact likeness.
Results
The results of these gesture drawings will be a series of quick, loose scribble-like sketches to use as warm up exercises, to improve hand eye coordination and mark-making skills development.
2: An Alternative Approach to Mark Making & Gesture
Description
The Alternative Approach to Mark Making & Gesture exercise is a fun and unconventional approach to drawing. It is intended to encourage the loss of control and break free from habitual drawing practices and preconceived ideas about how a drawing is supposed to look. For this exercise, students will attach a series of graphite pencils to a long stick or dowel and draw a complex form using their whole arm, not just the wrist and fingers.
Activity Parameters
Duration
1- 2 hrs.
Size
18 x 24”
Subject
A complex object of your choice, such as a house plant, flower arrangement, or a still life grouping of 3 or 4 objects. (For example, skeletal system, animal skull, pine cone, potted succulent or other plant, or a human figure of a fellow student or friend.)
Technique
Direct Observation – draw the still-life objects as seen. Continuous line and sustained gesture.
Required Materials
- Drawing board
- Newsprint or Drawing paper (18” x 24”) – 2 or more sheets
- Graphite pencil (2H or HB)
- Vine charcoal
- 24” Stick – wood dowel, straight edge, sturdy stick, or scrap of wood
- Painter’s tape
Recommended Materials
- Charcoal pencils (HB and 2B)
- Drawing paper (18 x 24”) – 2 or more sheets
- Compressed charcoal
- Workable spray fixative
Student Learning Outcomes (SLOs)
- Exercise hand-eye coordination and break habitual ways of holding drawing tools and implements. This encourages more fluid movement and opens up new possibilities in your drawing technique by shifting you out of your comfort zone.
- Explore the use of pressure sensitivity, speed variations, and the use of unconventional tools to achieve rich and expressive marks.
- Avoid always starting drawings with a contour or outline. Instead, allow the gesture and movement to guide the form, giving your drawings more life, rhythm, and spontaneity.
- Create unpredictable marks and “happy accidents” that lead to new visual discoveries. Embracing mistakes or unplanned outcomes adds unexpected energy, personal character, and excitement to your drawing.
- Use gestures to start or even complete artwork. This is a very efficient and dynamic way of beginning the drawing process. It provides a strong foundational structure, helps establish the overall composition early on, and often results in more successful and harmonious finished pieces that feels cohesive and intentional.
Method
Reference
Set up the subject on a light colored surface against a wall or backdrop.
Drawing Process
- Attach your newsprint or drawing paper on a drawing board. Then place it either on an easel, propped up on a chair, taped or pinned to a wall, or even on the ground.
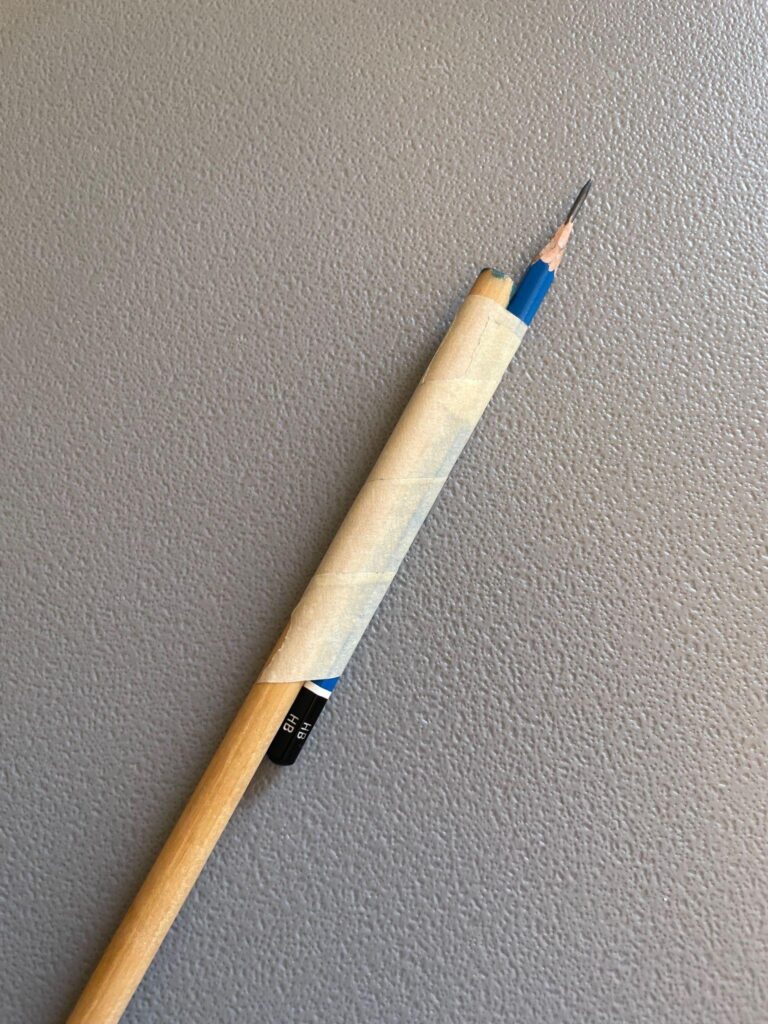
- Tape an HB pencil to a dowel or straight edge, as in the image below.
- Secure it firmly so it does not wiggle easily.
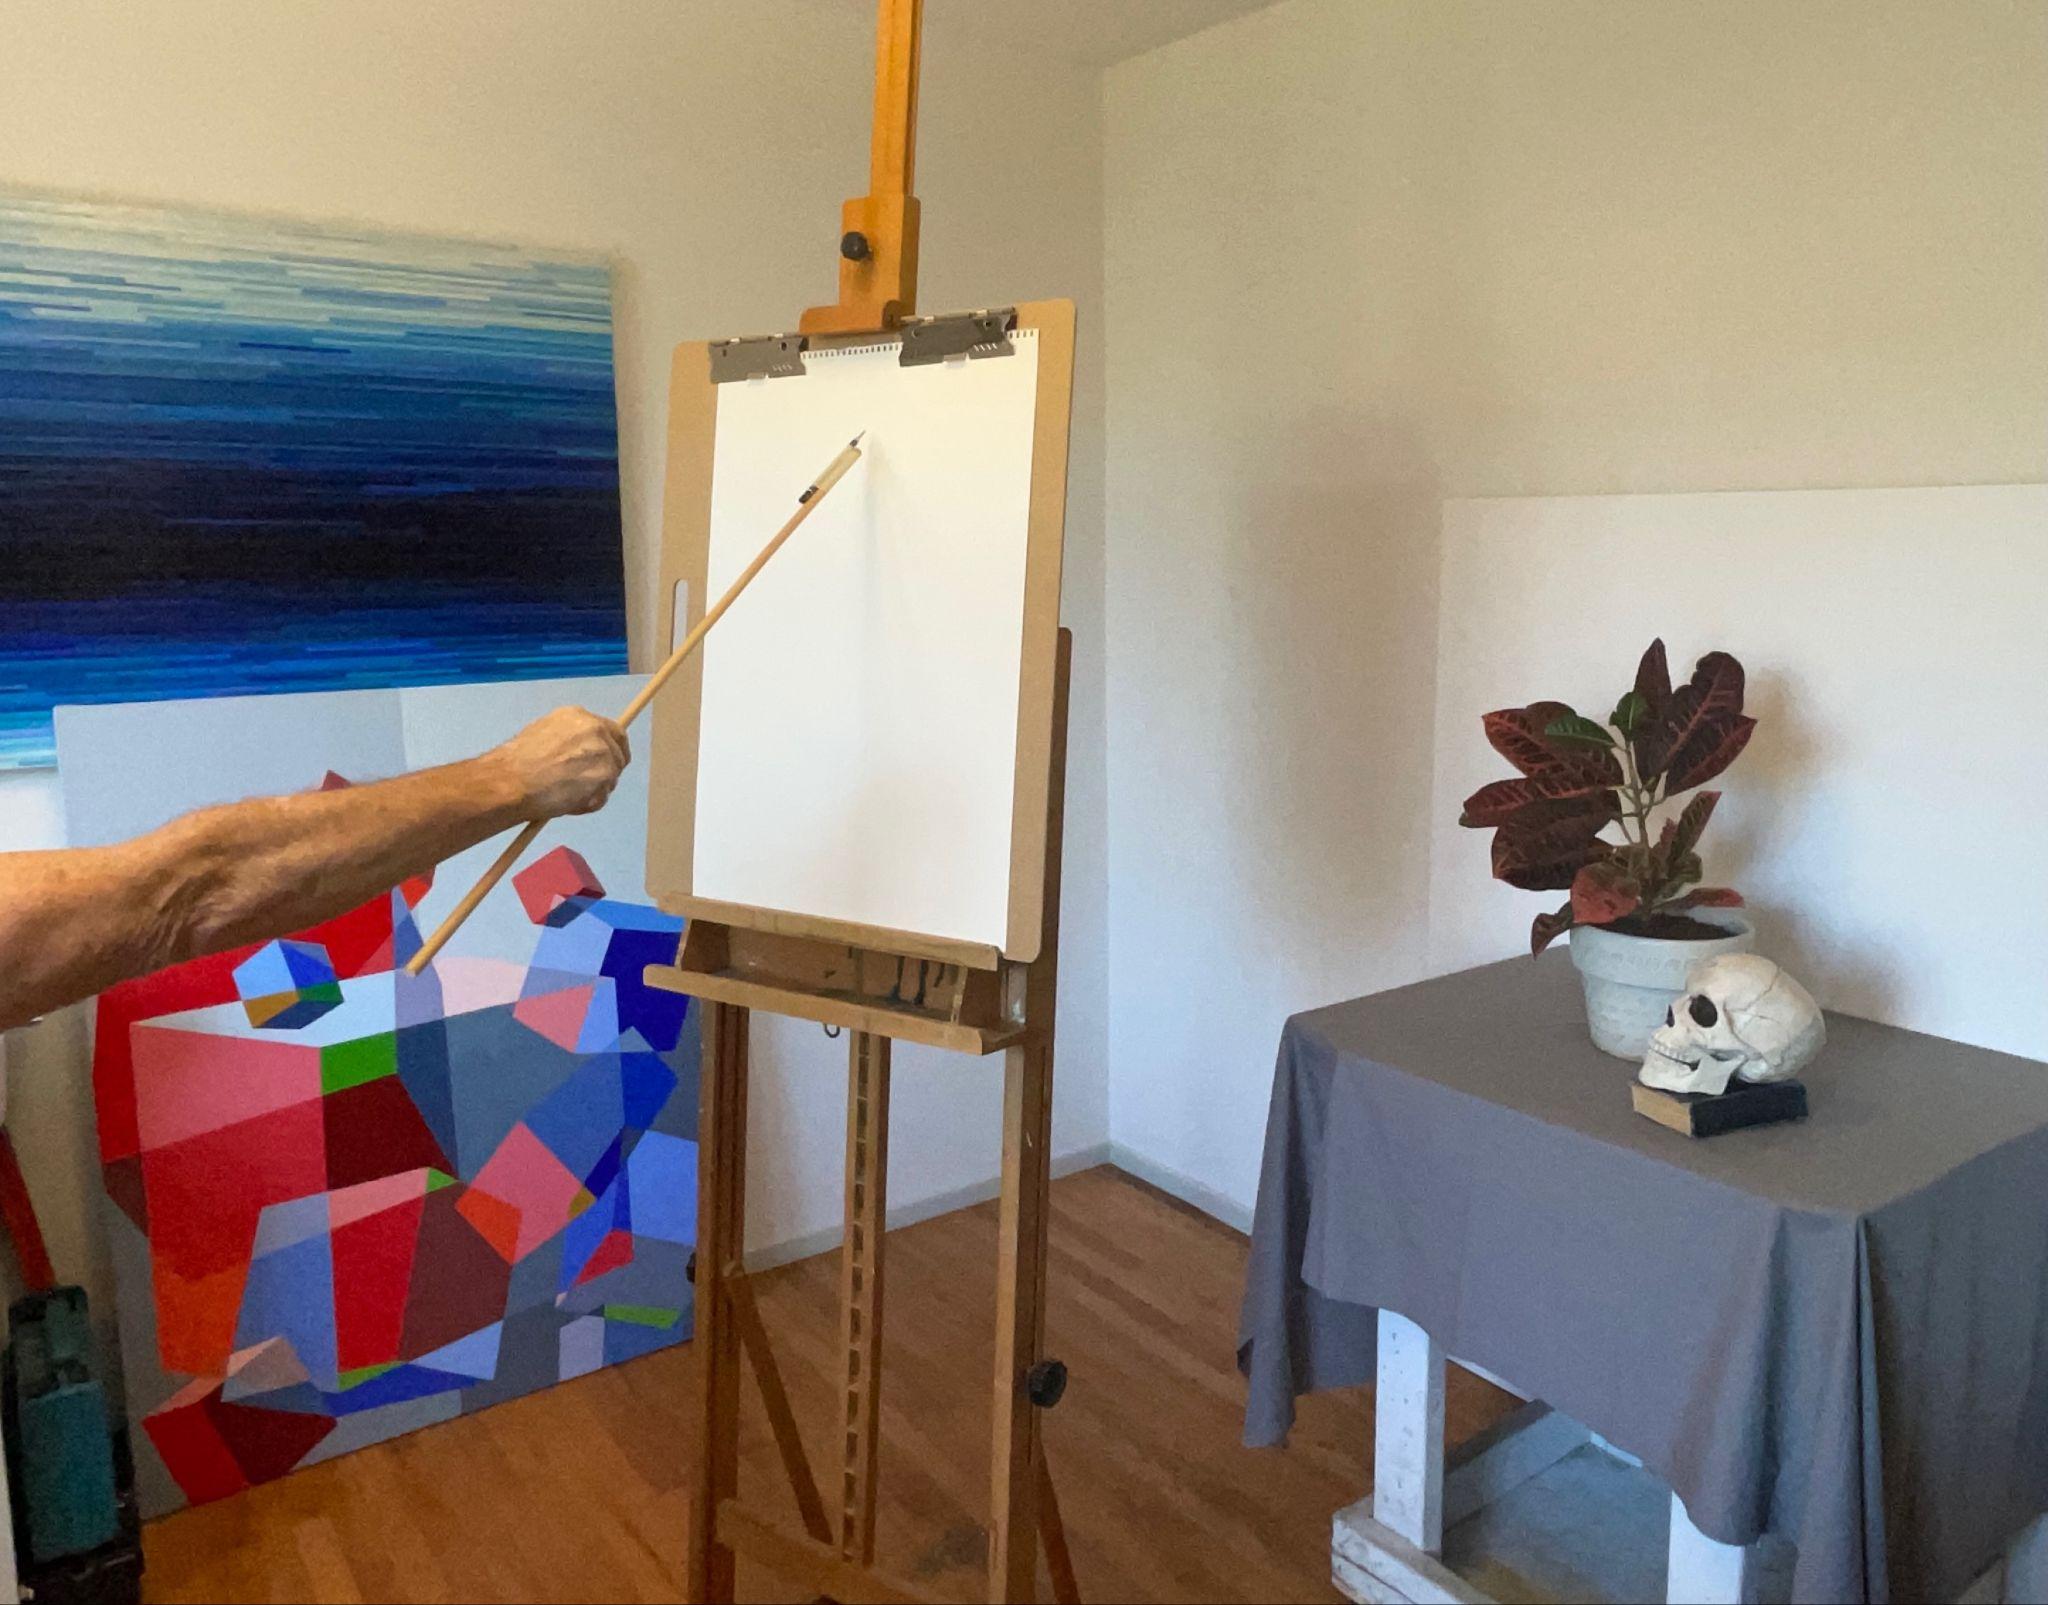
- Stand at a comfortable distance from your drawing paper so you can hold the end of the stick with your arm outstretched far enough away from the paper so that you can just touch the surface with the pencil, as demonstrated in the image below.
- Observe the object and, without attempting to force control of the pencil, draw the objects as best you can.
- Allow for expressive and descriptive marks.
- This first drawing with the HB pencil should result in a very light line. The results may be very chaotic, expressive, and quite abstract.
- Spend 2 to 5 minutes on this first drawing layer.
- Replace the taped HB pencil with a 2B pencil.
- Hold the stick approximately 12 inches from the pencil or at the halfway point.
- Repeat the drawing process again on top of the first drawing, holding the stick at arm’s length.
- Continue the gestural approach to the drawing, adding more information, adjustments, and details.
- Approximately 5 minutes.
- Next, set the drawing stick and 2B pencil aside, pick up a 4B pencil and repeat the process a third time directly on top of the first two drawings.
- Hold the pencil at the end as far away from the point as possible. With each holding adjustment, you will gradually gain more control.
- Use the previous drawing layers as a sort of road map for the next layer, but do not just retrace previous lines and marks.
- Work from observation to record control and darker line results.
- Make corrections and adjustments to the gesture with each layer. At this point, you can also begin to refine the forms, add some details, and begin to include some contour.
- Finally, repeat the process a fourth time with a 6B pencil.
- Hold the pencil with a natural grip, but at arm’s length.
- Draw the same subject on top of the previous three drawings, adding more details, making final adjustments, while also adding darker lines and contour.
- This final layer can be approached more slowly and with more control.
- Allow approximately 10 to 15 minutes.
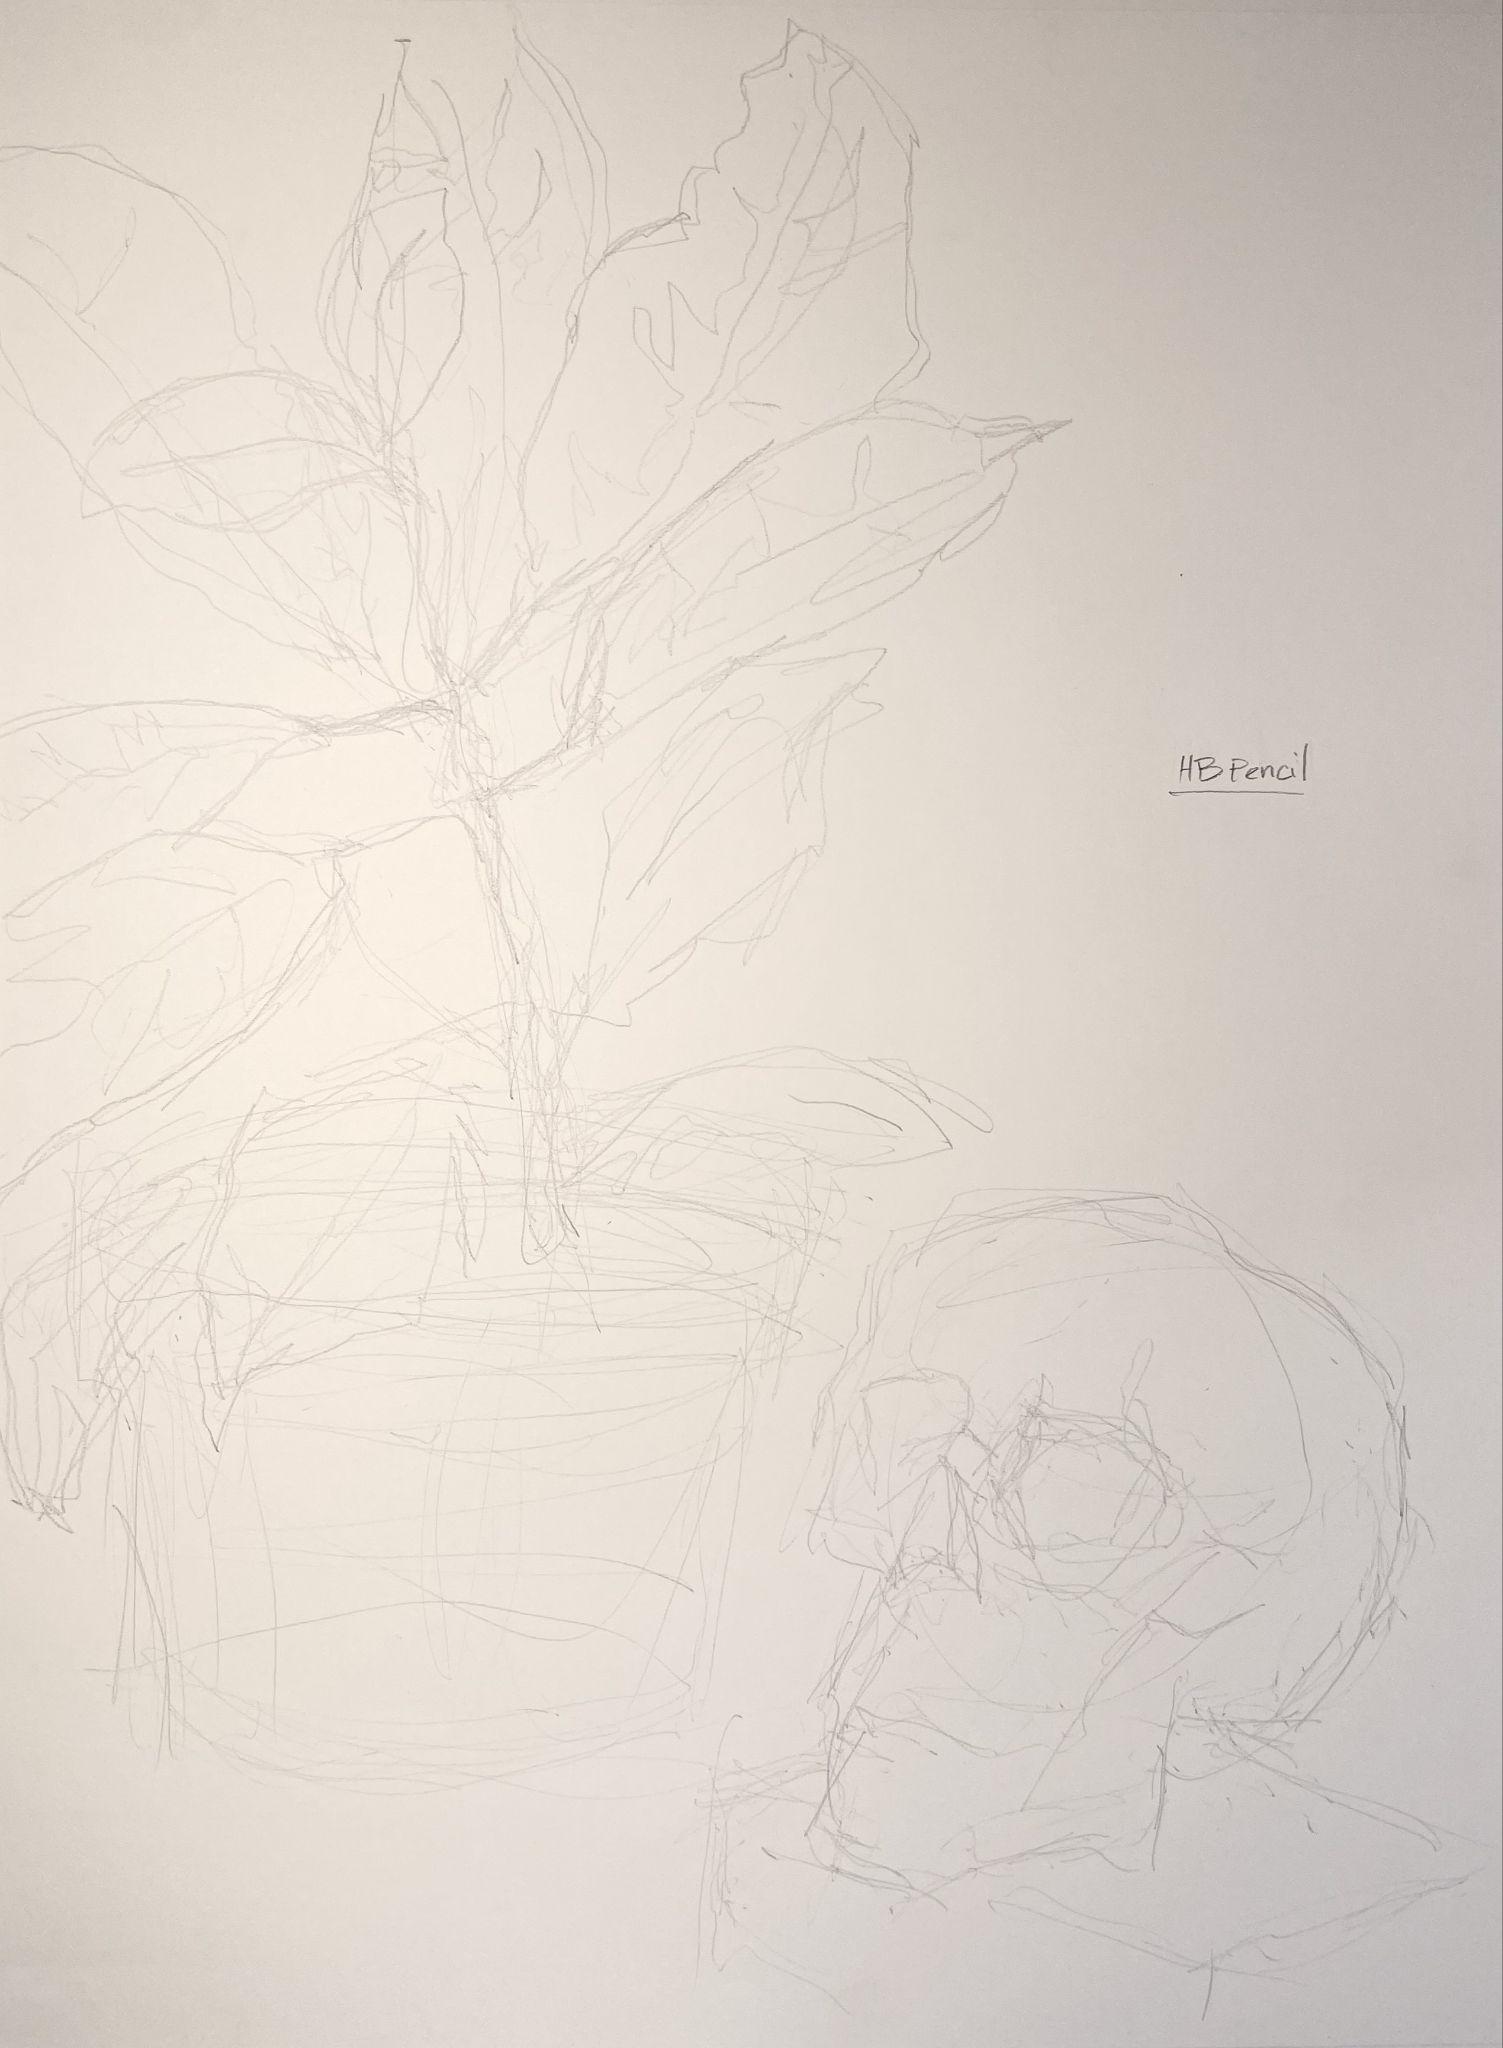
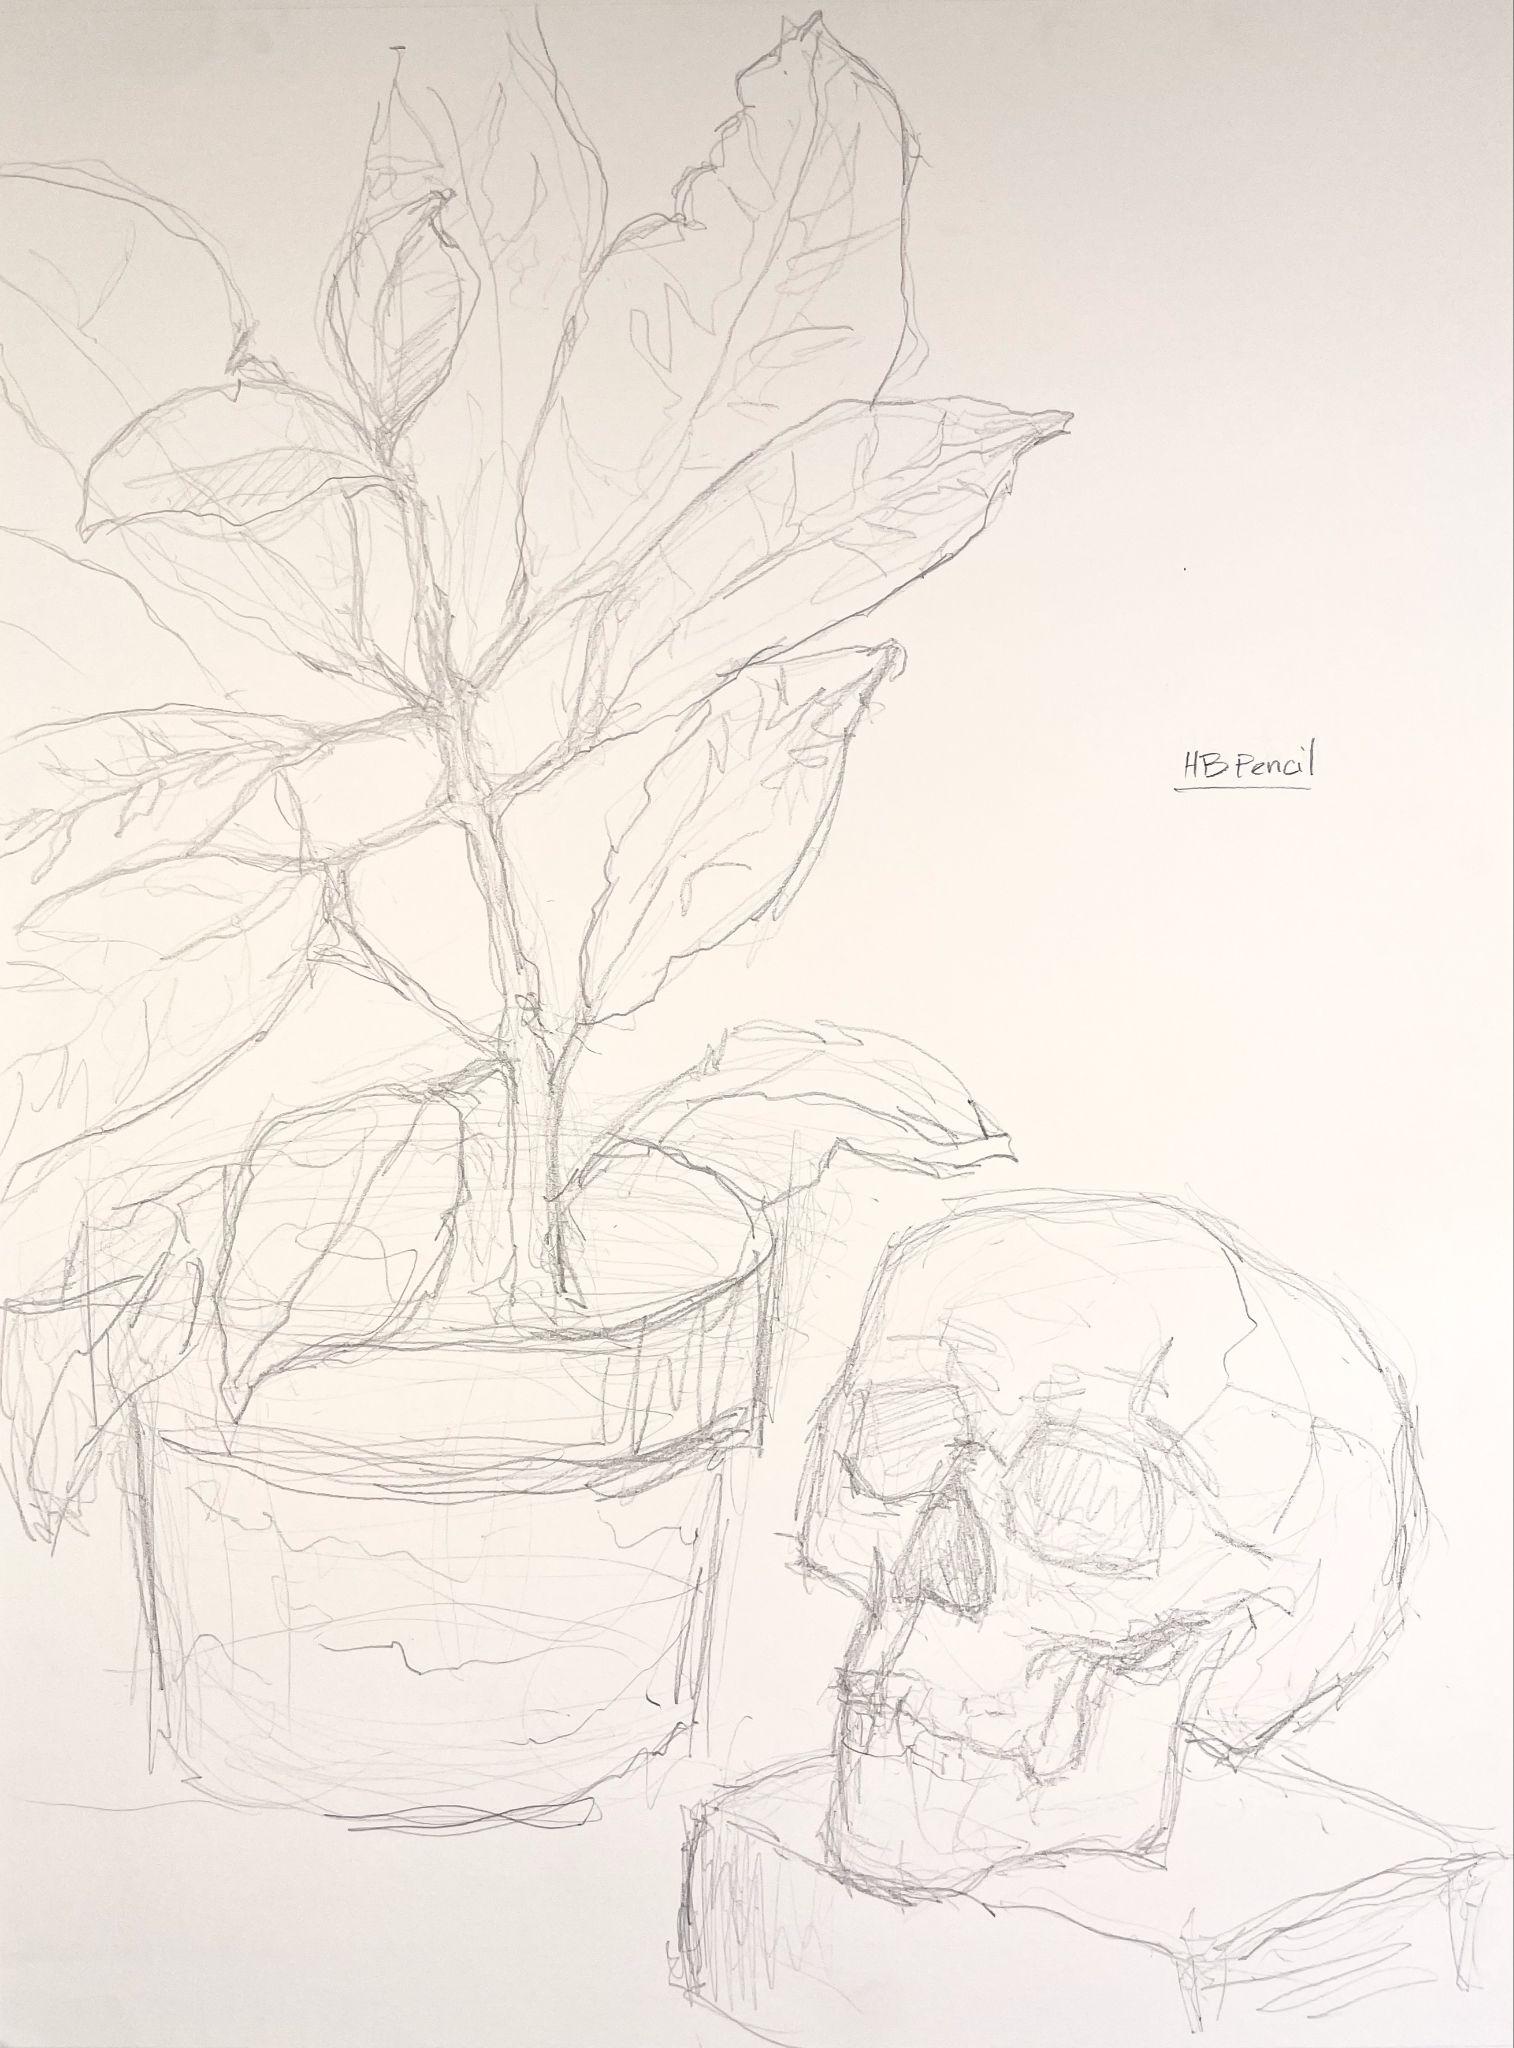
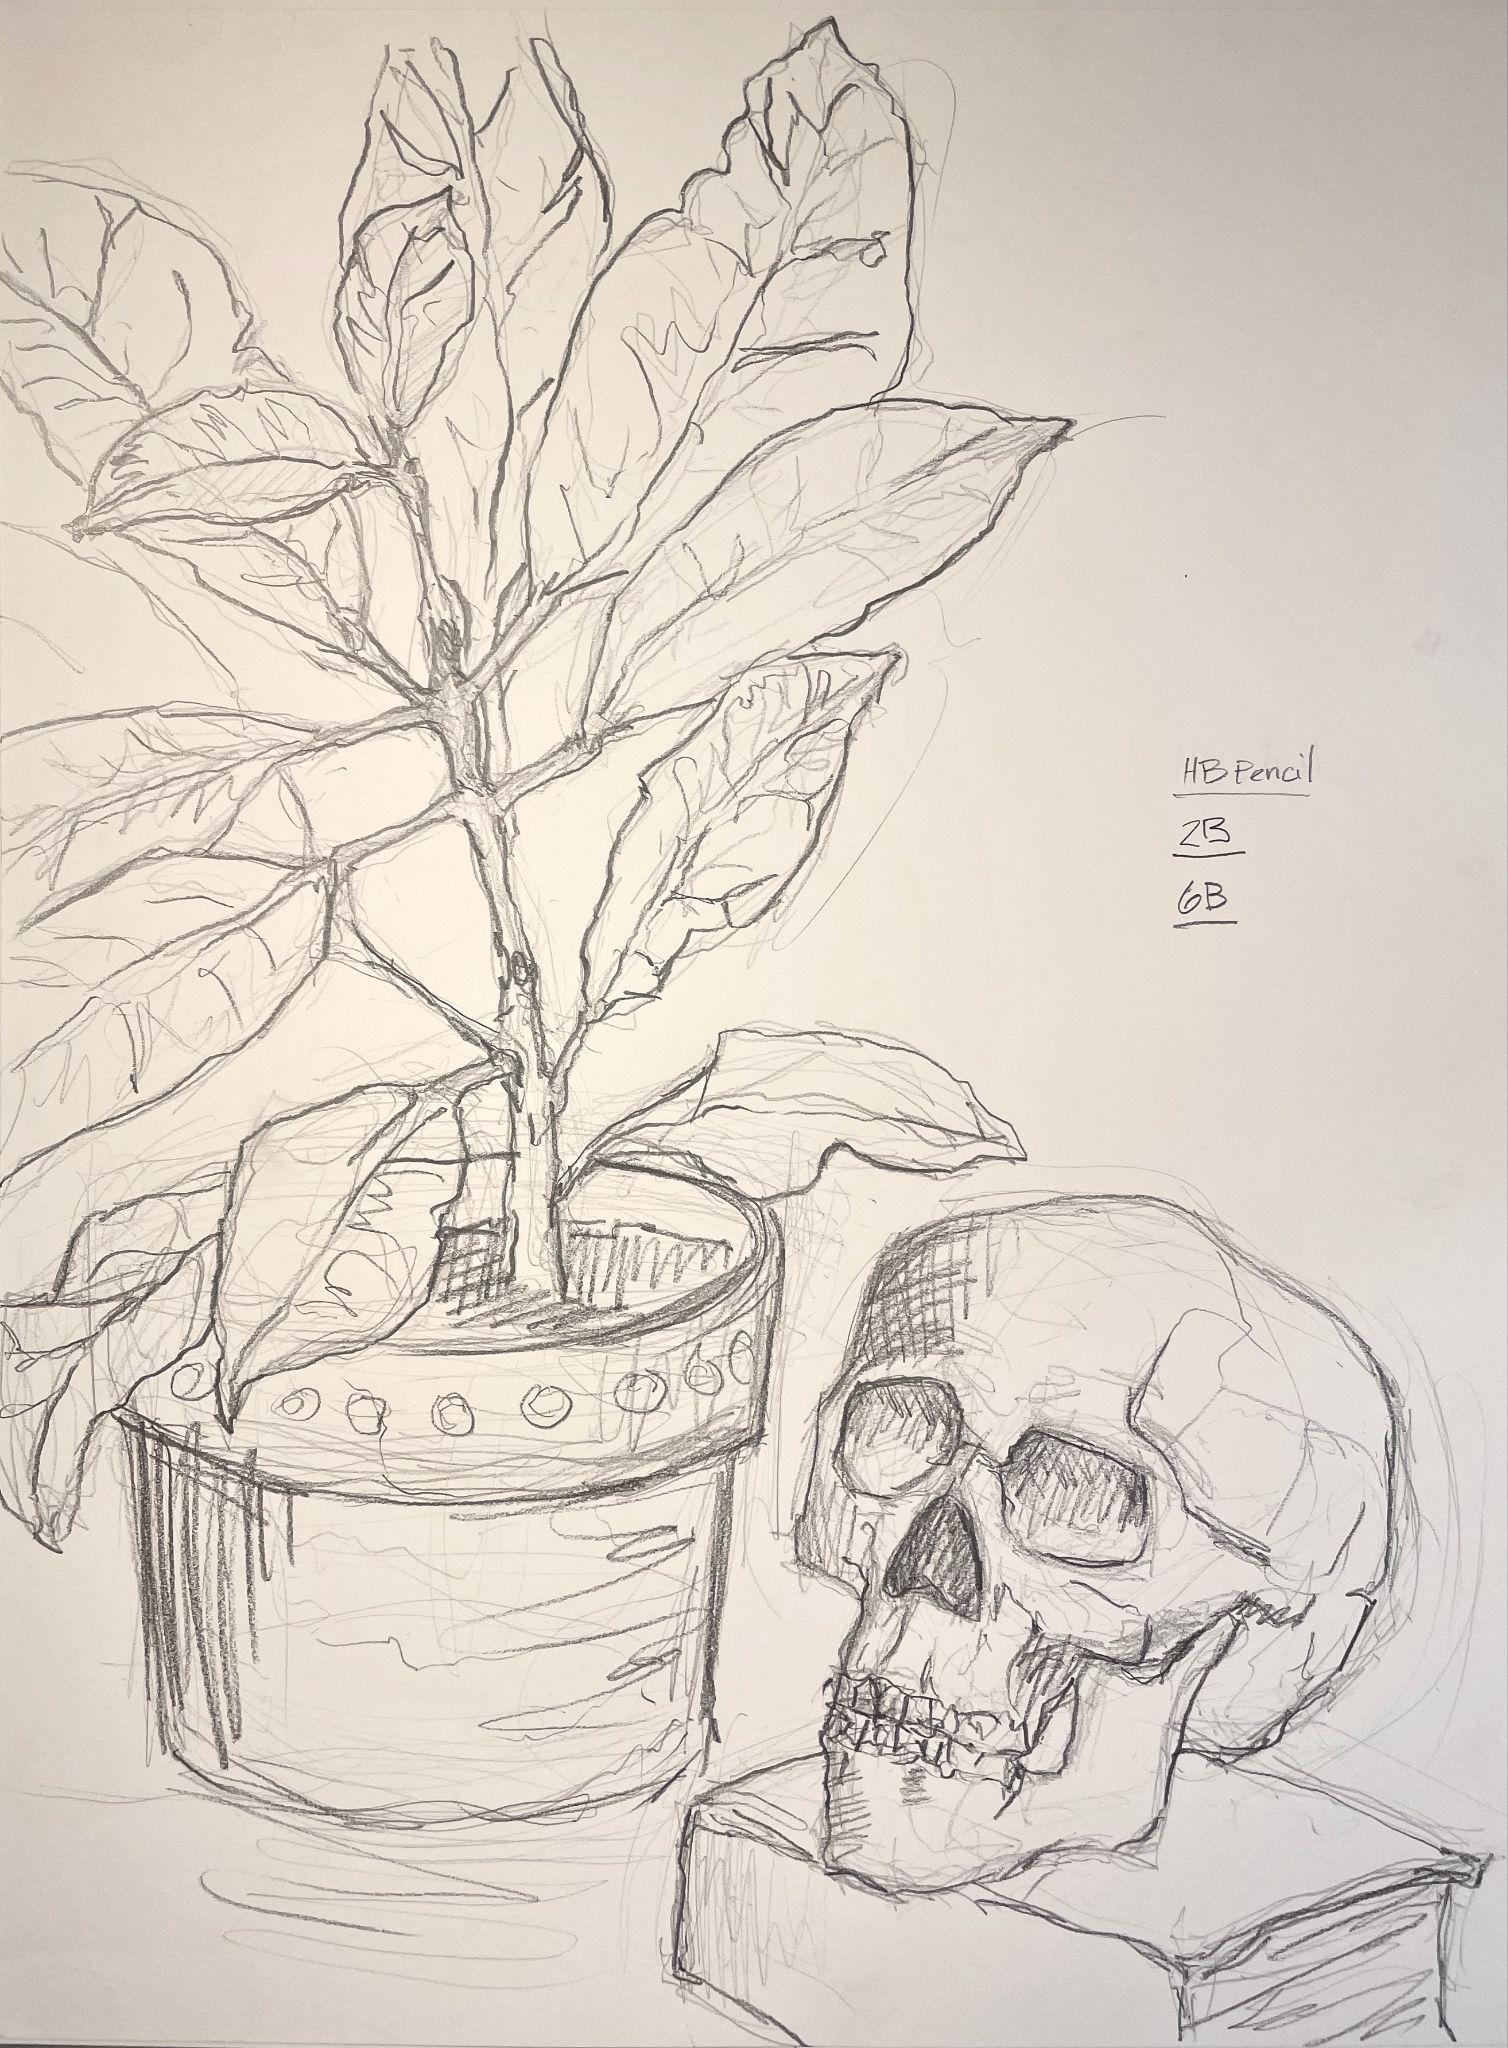
Examples demonstrating Steps # 5 – 8. Drawings by Stephen P. Curry. License: CC BY NC 4.0
Results
This unconventional approach to the usually quick, short gesture drawing tradition is a longer, more involved drawing made up of a series of layered gestures to produce a detailed drawing. It combines the fun and spontaneous nature of gesture with the concentrated focus of observation.
Licensing and Attributions
“Gesture Drawing Activities.” Written by Stephen P. Curry. License: CC BY